User Interface Introduction
Percipio Viewer is available in both Windows and Linux versions. The following section uses Percipio Viewer (Windows version) as an example to introduce its interface and features.

Percipio Viewer Interface
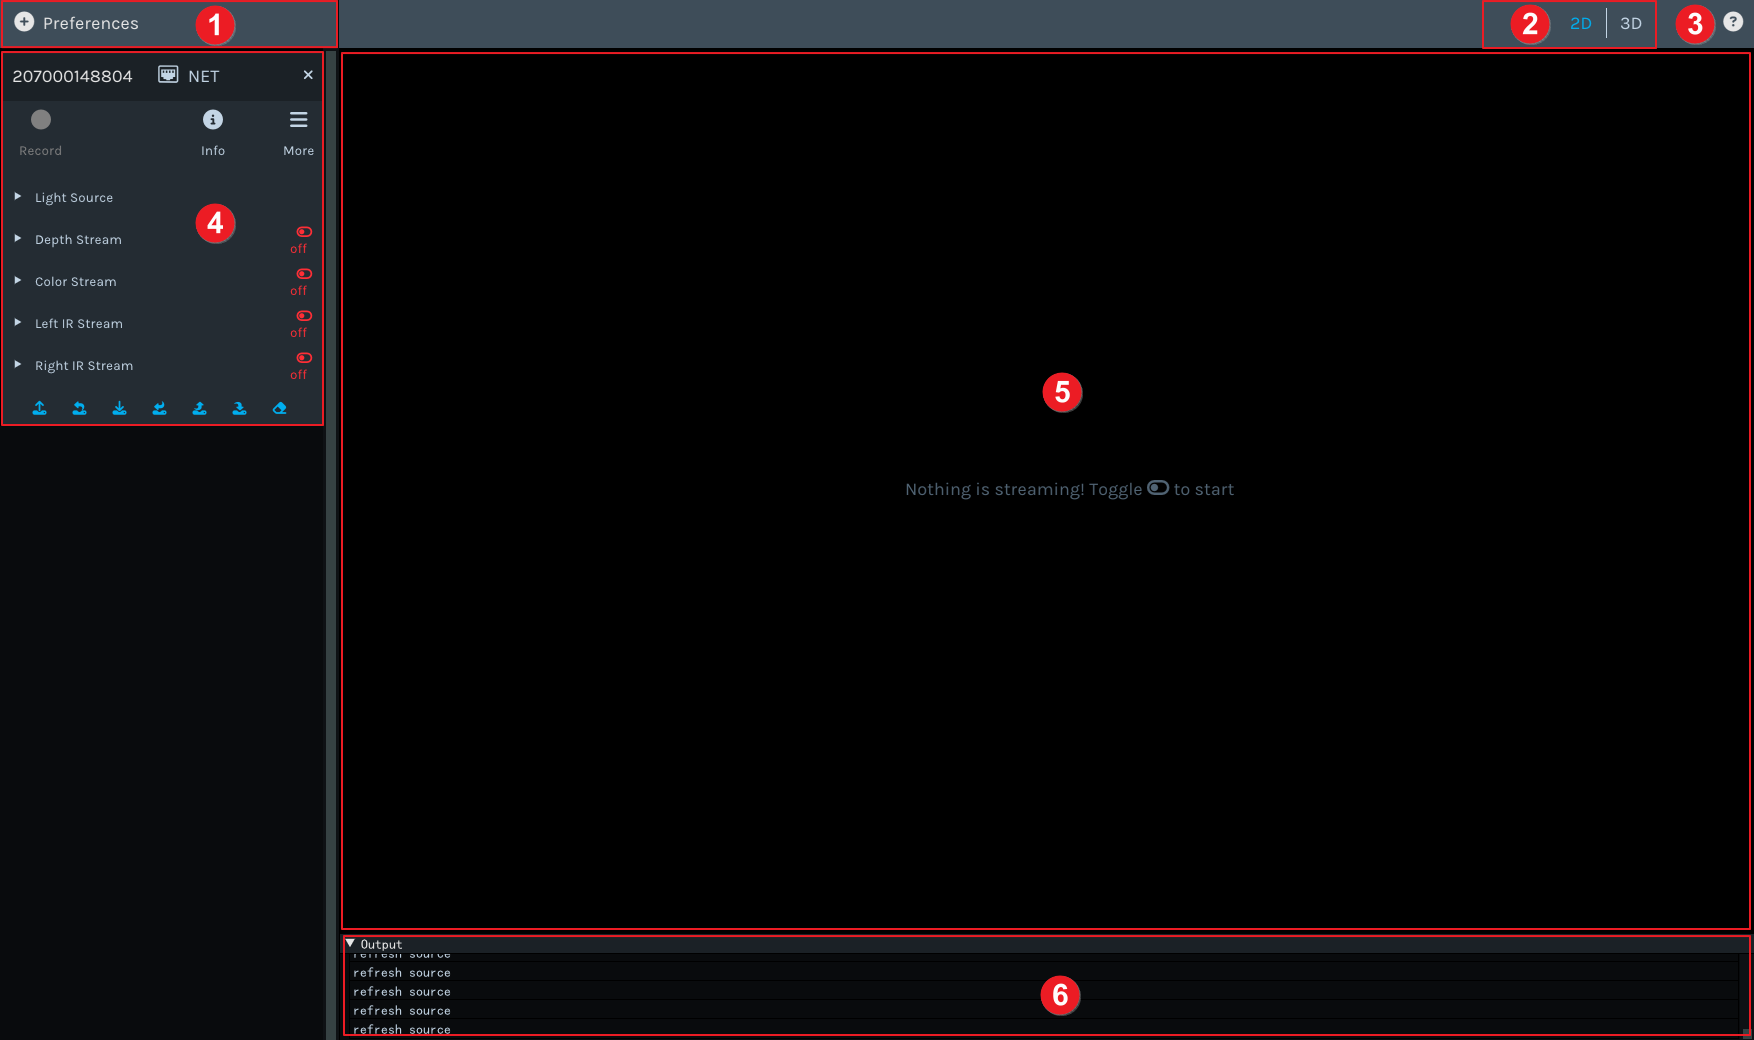
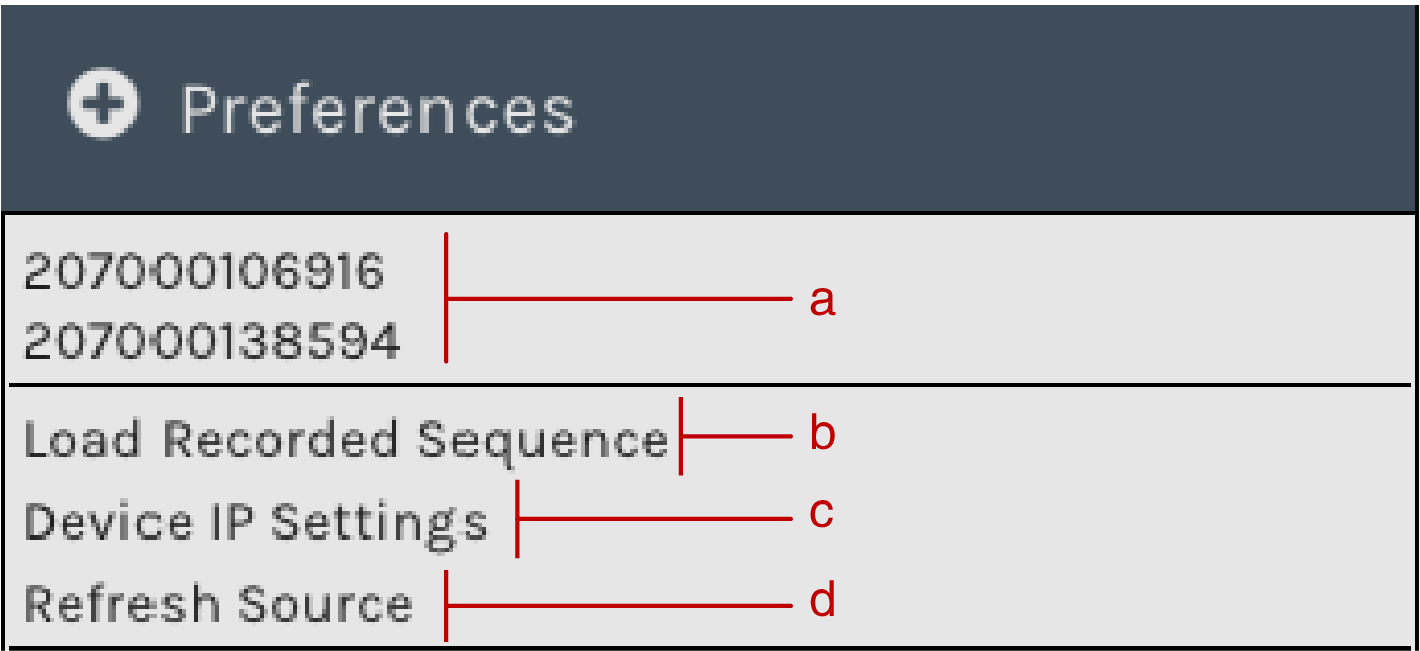
Preferences Button:Click Preferences to bring up the drop-down menu.

Device list, where you can select and open a camera. For steps, please refer to Select a Camera.
Load local recordings.
Set network camera IP. For steps, please refer to Set Camera IP.
Refresh device list.
View Switch: Switch between 2D, 3D, Registration, and Color 3D views.
 button: Clicking this button will navigate to the Percipio Viewer User Guide page.
Control Panel: View information, set work modes, turn data streams on/off, set component parameters, save/load parameter settings, and save videos/images.
 indicates that the data stream is activated.
 indicates that the data stream is deactivated.
Image Display: Display depth maps, color images, grayscale images, and point clouds.
Log Display: Display log information.