How to Unbox
When you receive the package, refer to the Item List inside to check if all items and accessories are present and undamaged. In case of any missing or damaged items, contact Percipio’s technical support promptly.
Note
The following list is for reference only. Please refer to the actual Item List in the package.
Name |
Image |
|---|---|
3D Camera |
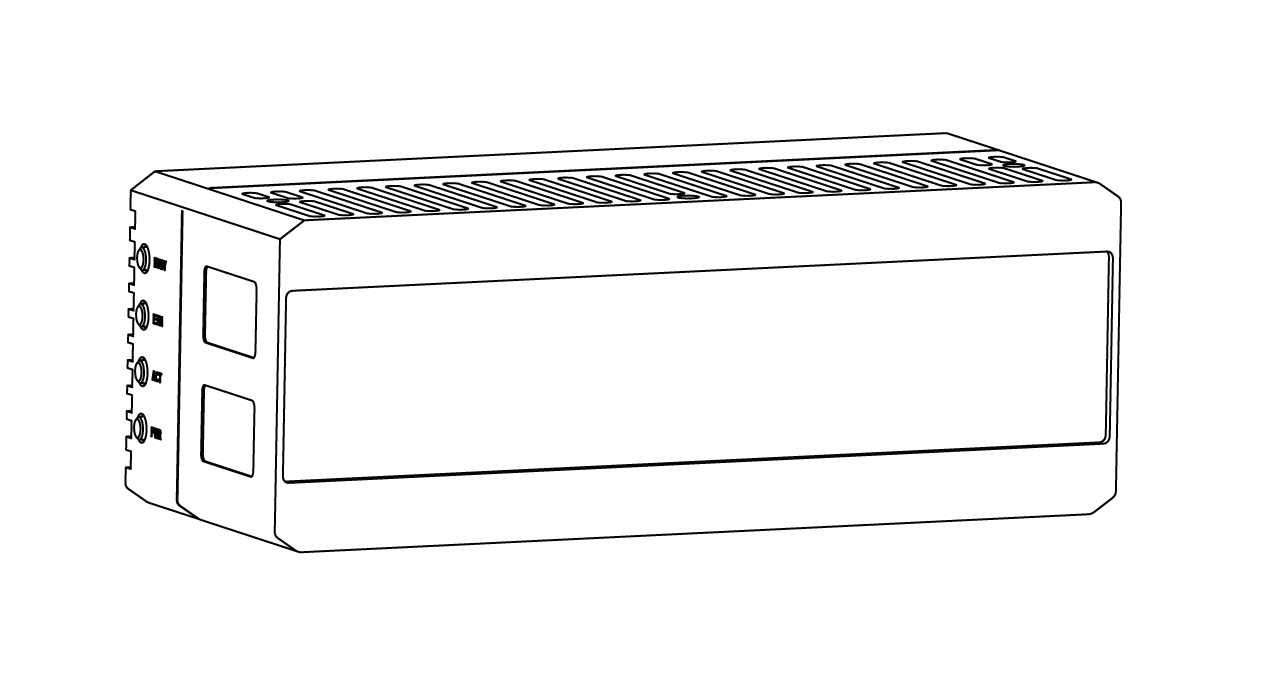
|
User Manual |

|
Gigabit Ethernet Cable |

|
DC Power Supply and Trigger Cable |

|
Connect Cables
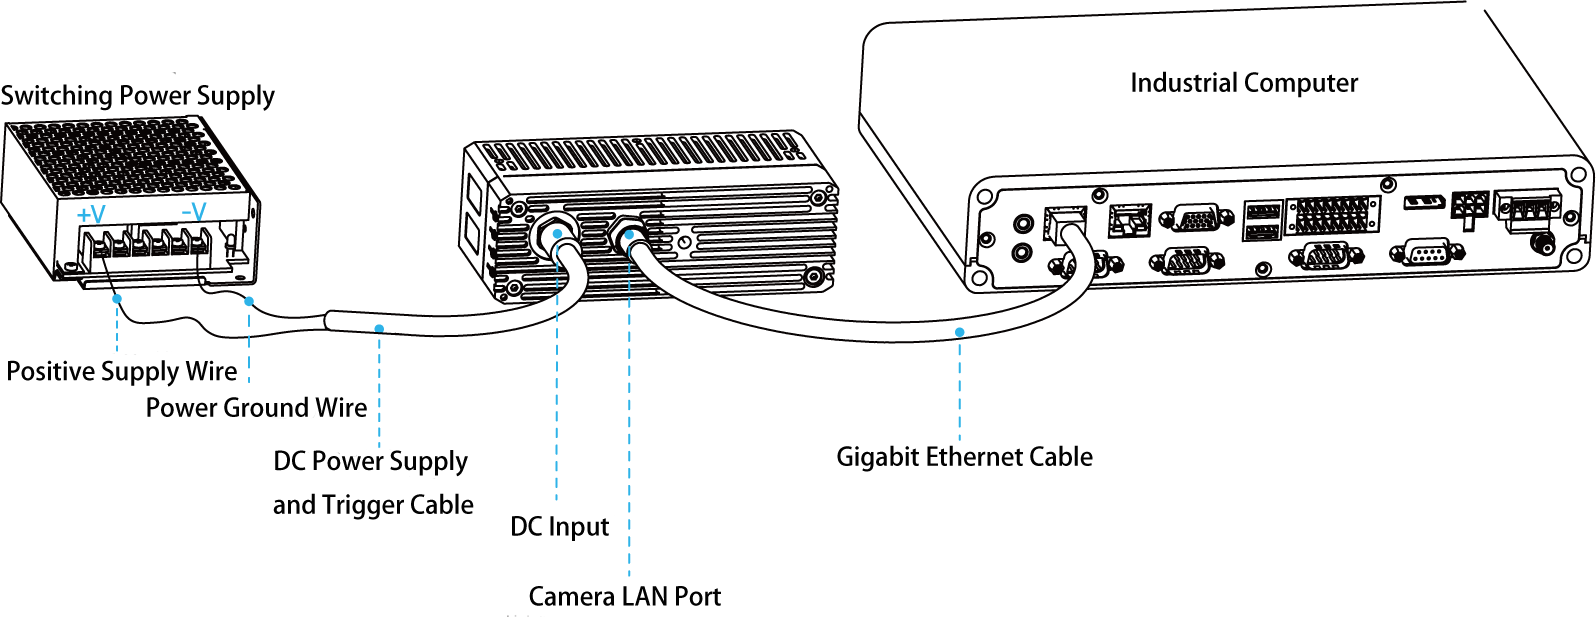
As shown in the figure below, connect the camera to the power supply and the industrial PC.
Connect to Power Supply
The figure above utilizes a DC power supply to provide power to the camera. Connect the Power Positive Wire and Power Ground Wire from the open end of the Power & Trigger cable to an external DC power supply, and connect the other end to the camera’s DC power connector. For descriptions of the wire sequence in the DC power cable, refer to the Product Specifications of the corresponding camera model .
For more power supply methods, refer to Hardware Connections .
Connect to Network
The above figure shows a direct connection between the camera and the industrial host computer. Connect the RJ45 end of the Gigabit Ethernet cable to the network port of the industrial host computer, and connect the other end to the camera’s LAN network interface.
For more network connection methods, refer to Hardware Connections .
Set IP Address
The camera can only be opened by the host host computer when both the camera and the host computer are set to the same network segment.
Configure Host Computer Network
It is recommended to configure the host computer’s network port to use a dynamic IP address.
Open the “Control Panel” on the host computer, select “Network and Internet” > “Network and Sharing Center” > “Change Adapter Settings”.
Right click on the current network connection, select “Properties” in the pop-up window.
Double click “Internet Protocol Version 4 (TCP/IPv4)” in the “Properties” window, and in the “Internet Protocol Version 4 (TCP/IPv4) Properties” dialog box that appears, select “Obtain an IP address automatically” and “Obtain DNS server address automatically”.

Configure Host Computer Network
Click on “Confirm” to save the settings.
Before configuring the computer network, please first confirm the camera’s network connection method. For specific connection details, refer to Network Connection Methods. Then follow the steps below to configure the computer network:
If the camera uses Network Connection Method 1 or Network Connection Method 2:
Open the computer’s network settings. Navigate sequentially to “Settings” > “Network” > “Change Settings” >
 to access the detailed configuration of the current connection.
In the IPv4 tab, select “Link-Local Only”. If there are any previously configured manual IP settings, remove all manually entered IP addresses, subnet masks, gateways, and DNS servers.

Local Network Configuration
Click “Apply” to save the settings.
The computer will successfully negotiate and obtain an IP address in the 169.254.xx.xx range.
If the camera uses Network Connection Method 3
Open the computer’s network settings. Navigate sequentially to “Settings” > “Network” > “Change Settings” >
to access the detailed configuration of the current connection.In the IPv4 tab, select “Automatic (DHCP)”. If there are any previously configured manual IP settings, remove all manually entered IP addresses, subnet masks, gateways, and DNS servers.
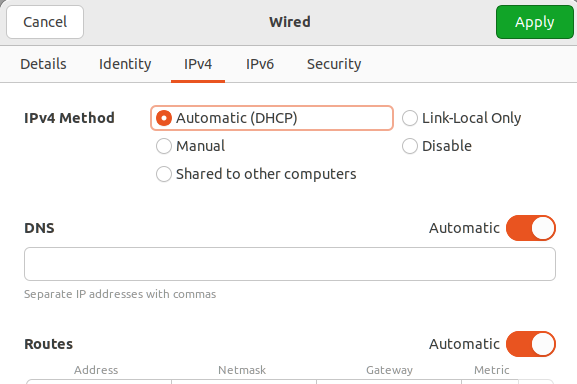
Local Network Configuration
Click “Apply” to save the settings.
After reconnecting to the network, the computer will obtain an IP address in the 192.168.xx.xx range from the DHCP server.
Set Camera IP Address
The camera is factory-configured to use a dynamic IP address. When the host computer’s network port is configured to use a dynamic IP address, the host computer can open the camera normally.
If you need to set a fixed IP address for the camera, refer to Application Example: Set Camera IP.
Download Software and Capture Images
You can choose any of the following methods to preview the images output by the camera:
Download Percipio Viewer and Capture Images
Percipio Viewer is an image processing software developed by Percipio. You can use it to preview real-time images, configure camera parameter settings, perform depth map post-processing, and import and export image data.
Download Percipio Viewer software package from the Percipio Official Website Download Center.
Percipio Viewer is available in both Windows and Linux versions. Extract the downloaded installation package, and you will find two files:
“percipio-viewer.x.x.x.exe” - Windows executable file
“percipio-viewer.x.x.x (no suffix)” - Linux executable file
Run the software:
Double click percipio-viewer.x.x.x.exe to launch the software.
modify the file permissions to make it executable by running the following command in the terminal:
sudo chmod +x percipio-viewer.x.x.x.
Double click percipio-viewer.x.x.x or run the following command in the terminal
sudo ./percipio-viewer.x.x.xto launch the software.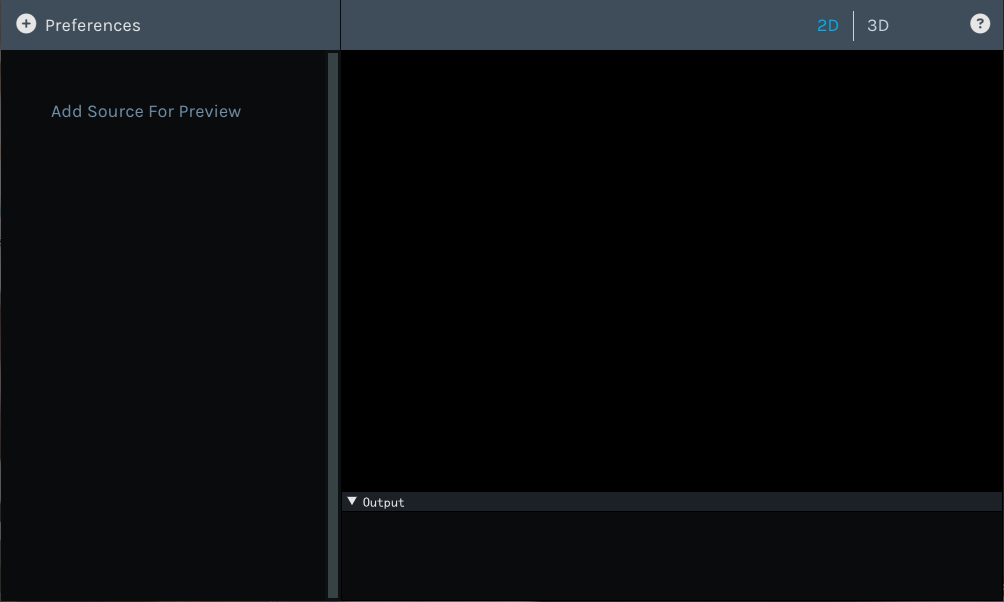
When the power indicator light of the camera blinks at a frequency of 1 Hz, click Preferences, and then click Refresh Source in the drop-down menu to refresh the device list.
Select the target camera’s serial number from the device list. The following figure uses the camera with the serial number 207000128018 as an example.
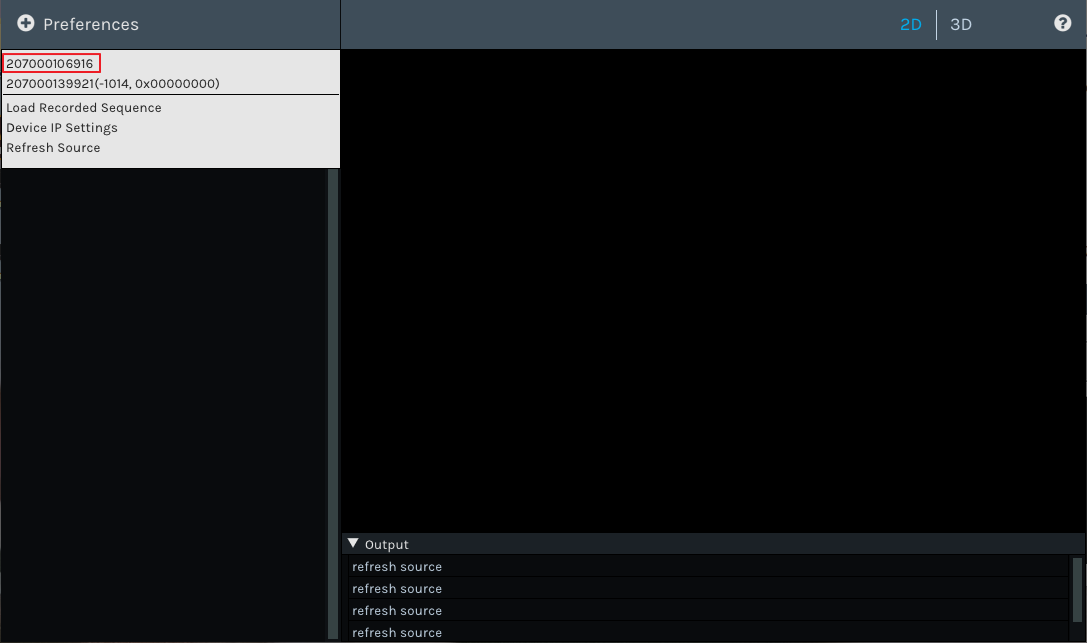
Note
If the camera status code and firmware error code (e.g., -1005, 0x00000000 as shown in the image above) are displayed next to the serial number in the device list, it indicates that the camera cannot be opened normally. Please refer to Error Codes for problem troubleshooting.
Turn on the data stream to preview the images in real-time.
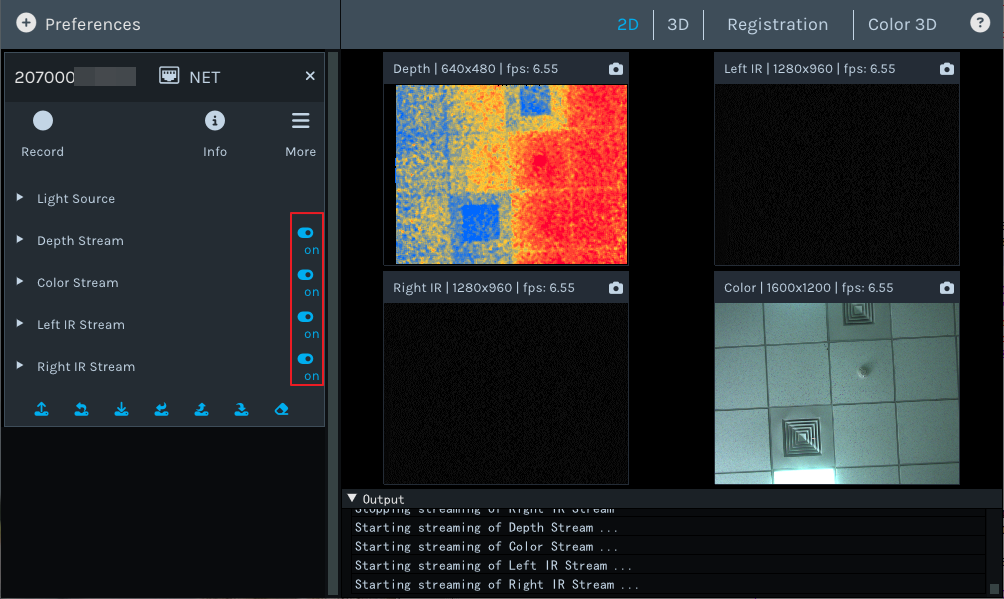
For more operations of Percipio Viewer, please refer to Percipio Viewer User Manual.
Download SDK Samples and Capture Images
Percipio provides various precompiled SDK samples that support C++, Python, and C# languages.
Before running the precompiled C++ SDK samples to capture images, ensure that the local environment is Windows X64 or Windows X86. Otherwise, you need to compile the samples yourself according to the SDK Download and Compilation.
Steps to run:
Download the precompiled C++ SDK samples: - https://github.com/percipioxyz/camport3.git
Navigate to the
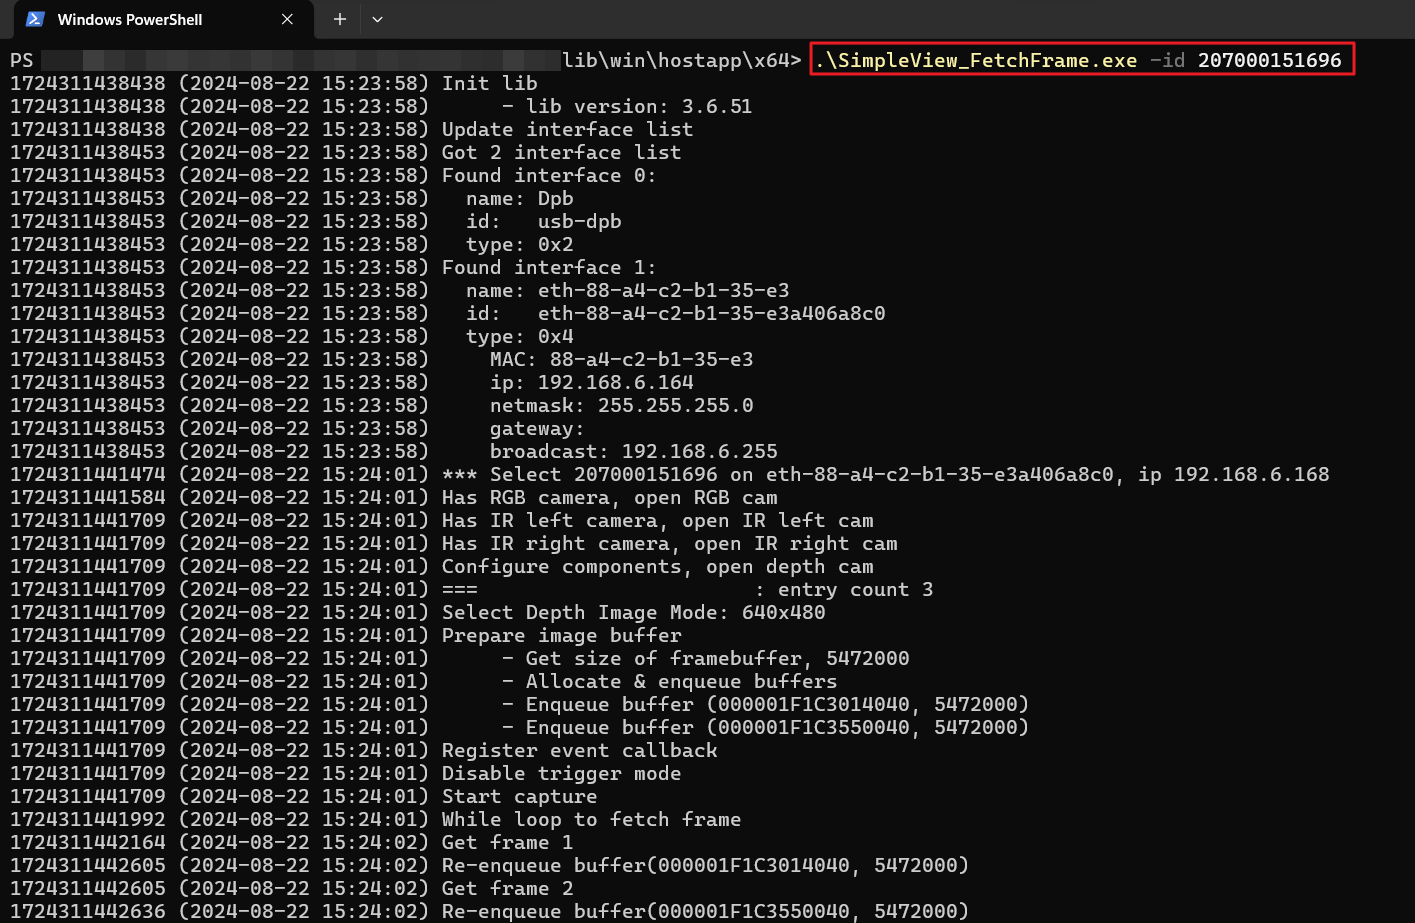
lib\win\hostapp\x64directory.Open the terminal and run the following command. The Serial Number(SN) can be found on the camera body label:
.\SimpleView_FetchFrame.exe -id <Serial Number(SN)>
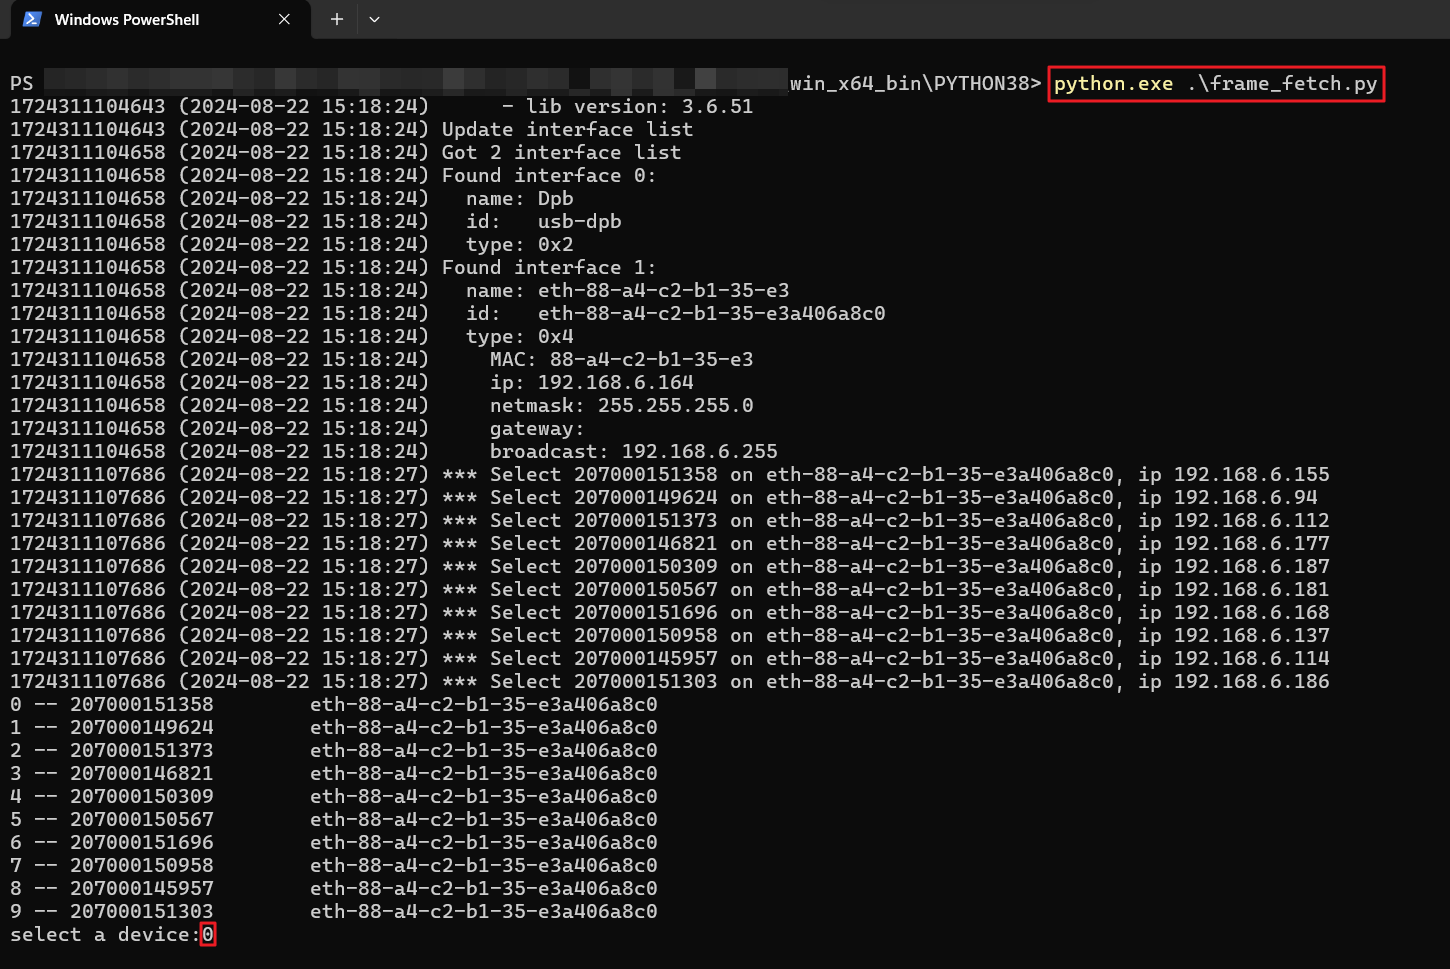
Before running the precompiled Python SDK (Win) samples to capture images, ensure that the local environment is Windows and Python 3.8 is installed. Otherwise, you need to compile the samples yourself according to the SDK Download and Compilation.
Steps to run:
Download the precompiled Python SDK samples: - https://github.com/percipioxyz/camport_multi_language_Release.git
Navigate to the “`win_x64_binPYTHON38” directory.
Open the terminal and run the following command:
python.exe .\frame_fetch.py
Select the corresponding serial number of the camera and press Enter to start capturing images.
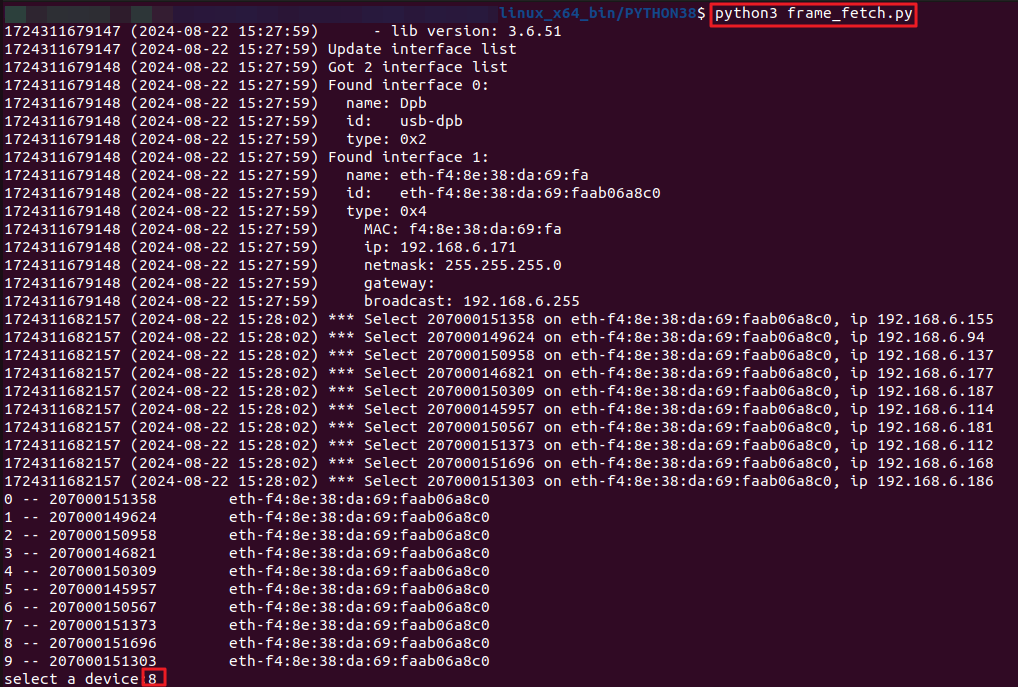
Before running the precompiled Python SDK (Linux) samples to capture images, ensure that the local environment is Linux X64 and Python 3.8 is installed. Otherwise, you need to compile the samples yourself according to the SDK Download and Compilation.
Steps to run:
Download the precompiled Python SDK samples: - https://github.com/percipioxyz/camport_multi_language_Release.git
Navigate to the “linux_x64_binPYTHON38” directory.
Open the terminal and run the following command:
python3 frame_fetch.py
Select the corresponding serial number of the camera and press Enter to start capturing images.
Before running the precompiled C# SDK samples to capture images, ensure that the local environment is Windows X64. Otherwise, you need to compile the samples yourself according to the SDK Download and Compilation.
Steps to run:
Download the precompiled C# SDK example: - https://github.com/percipioxyz/camport_multi_language_Release.git
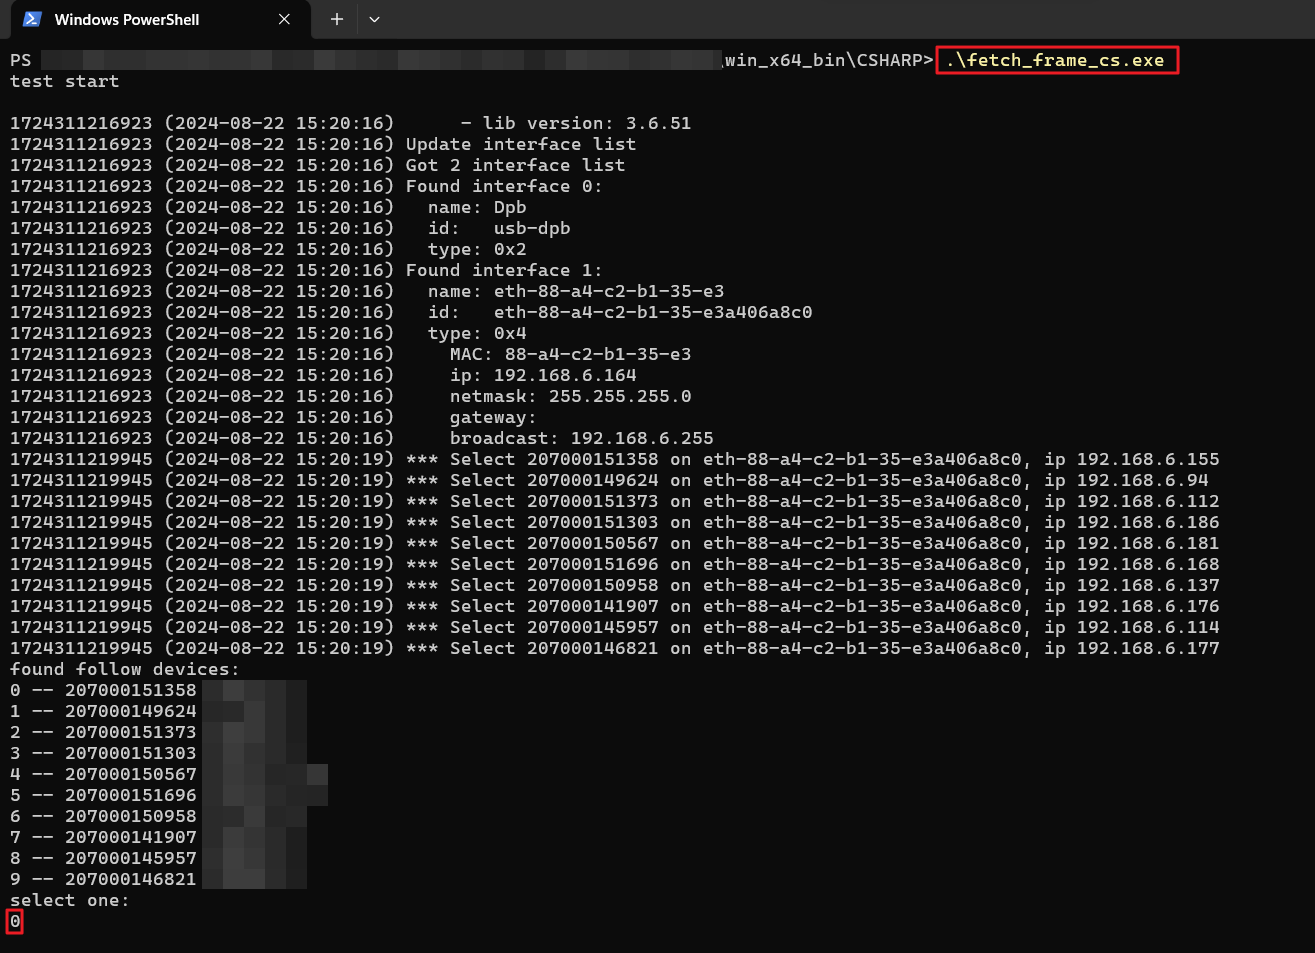
Navigate to the “win_x64_binCSHARP” directory.
Open the terminal and run the following command:
.\fetch_frame_cs.exe
Select the corresponding serial number of the camera and press Enter to start capturing images.