To ensure that the Percipio Viewer can successfully open the camera,
it is recommended to first check the IP address of the camera and make sure it is in the same network segment as the IP address of the host computer.
The Percipio Viewer supports modifying the IP address of the network camera to a static or dynamic IP address.
Prerequisites
The Percipio Viewer has not opened any camera.
Before setting a static IP address, ensure that the IP address of the host computer is in the target network segment.
Operation Steps
Click Tools ‣ IP setting in the menu bar to enter the Device IP Settings page.
Optional step: If the target camera is not found in the camera list, click Refresh to refresh the camera list.
Depending on the camera enumeration situation, choose one of the following methods to set the IP:
If the target camera can be found in the list:
Click on the target camera in the list to enter the settings page.
Fill in the camera IP address in the Device target ip field, the default gateway in the Device target gate, and the subnet mask in the Device target mask.
Leaving the Device target ip field blank means setting the current camera to a dynamic IP address, while filling it means setting it to a static IP address.
Click Accept.
If the target camera cannot be found in the list:
Click Advanced to enter the settings page.
Select the network card to which the camera is connected in the Net interface list field.
Fill in camera MAC address in the Device mac addr field. The MAC address can be obtained from the label on the camera body.
Fill in the camera IP address in the Device target ip field, , the default gateway in the Device target gate field,
and the subnet mask in the Device target mask.
Leaving the Device target ip field blank will set the current camera to use a dynamic IP address. Filling in this field will set the camera to use a static IP address.
Click Accept.
Check the Log display area:
If “Device IP setting is successful.” is displayed, it indicates the IP setting is successful.
If “Device IP setting failed.” is displayed, it indicates the IP setting has failed. Please check the computer network configuration,
hardware wiring, and whether the parameters filled in on the Device IP Settings page are correct.
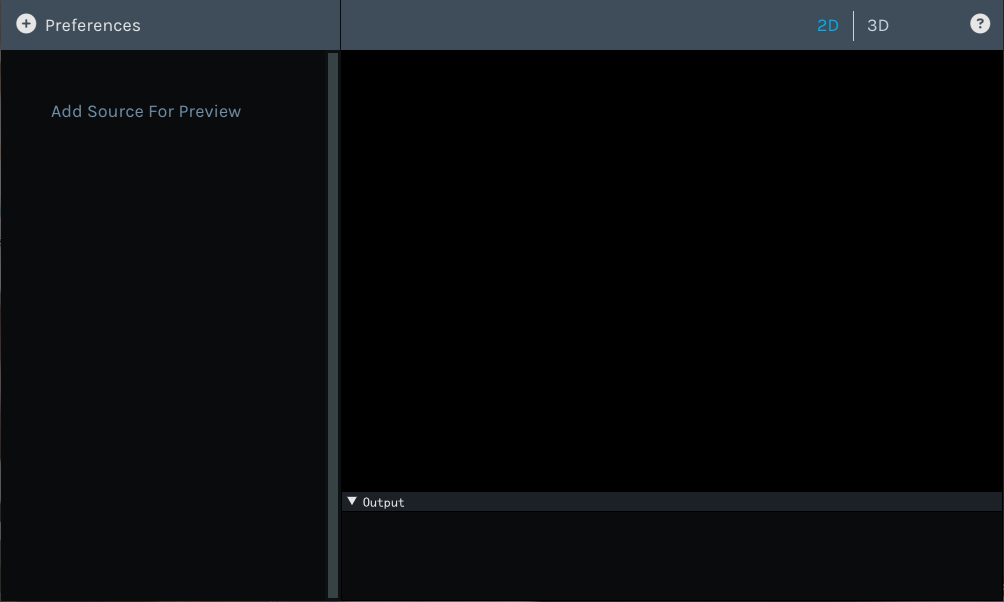
The Percipio Viewer only supports retrieving cameras via Ethernet. Starting from version V1.2.3,
the Percipio Viewer will not automatically open the camera after startup and needs to be manually selected and opened.
Operation Steps
Take a camera with the serial number 207000128018 as an example:
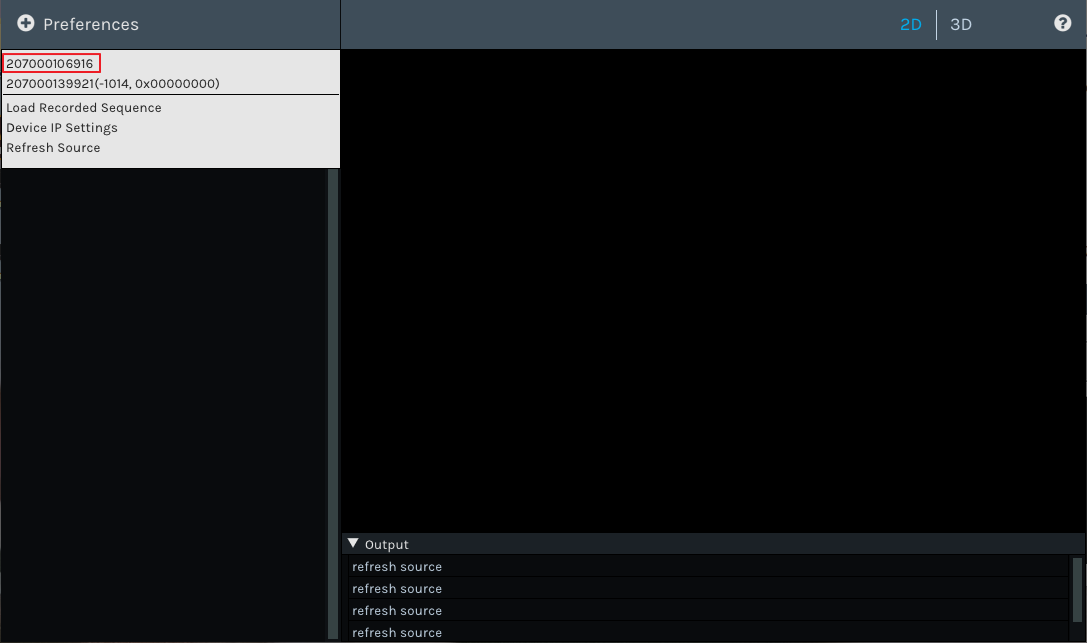
After the camera initialization is completed, click Preferences, and then click Refresh Source in the drop-down menu to refresh the device list.
Select the serial number 207000128018 of the target camera in the device list.
Note
If the camera status code and
firmware error code (such as -1005, 0x00000000) are displayed after the serial number in the device list,
it indicates that the camera cannot be opened normally. Please refer to Error Codes to troubleshoot the problem.
Percipio Viewer supports the following ways of capturing images:
Trigger Off (Continuous Capture Mode): The camera continuously captures images at the highest frame rate.
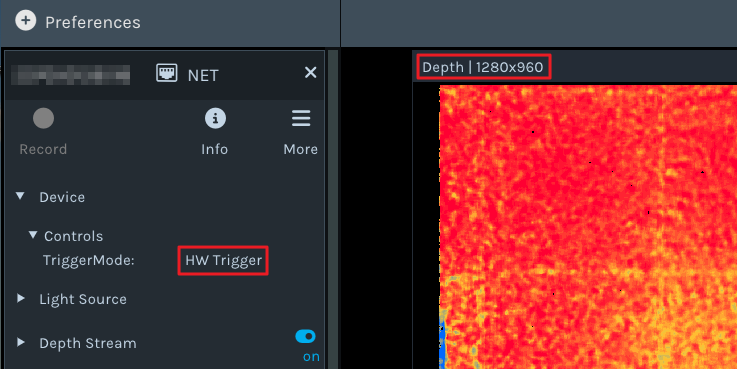
HW Trigger (Hardware Trigger Mode): The camera captures images according to the trigger signal frequency of the externally connected hard trigger signal source.
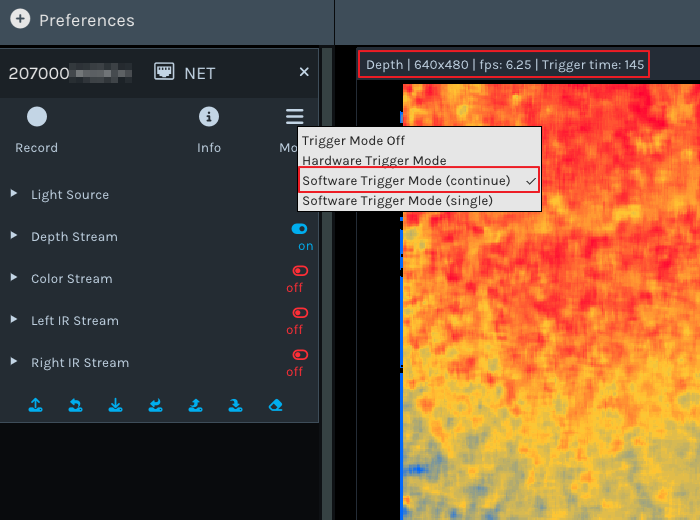
SW Trigger(continue) (Continuous Software Trigger Mode): The camera continuously receives software trigger signals and captures images.
SW Trigger(single) (Single-frame Software Trigger Mode): The camera captures one frame of image upon receiving a software trigger signal once.
Operation Steps
When all data streams are in the state, expand the Device > Controls parameter page and set TriggerMode to Trigger Off.
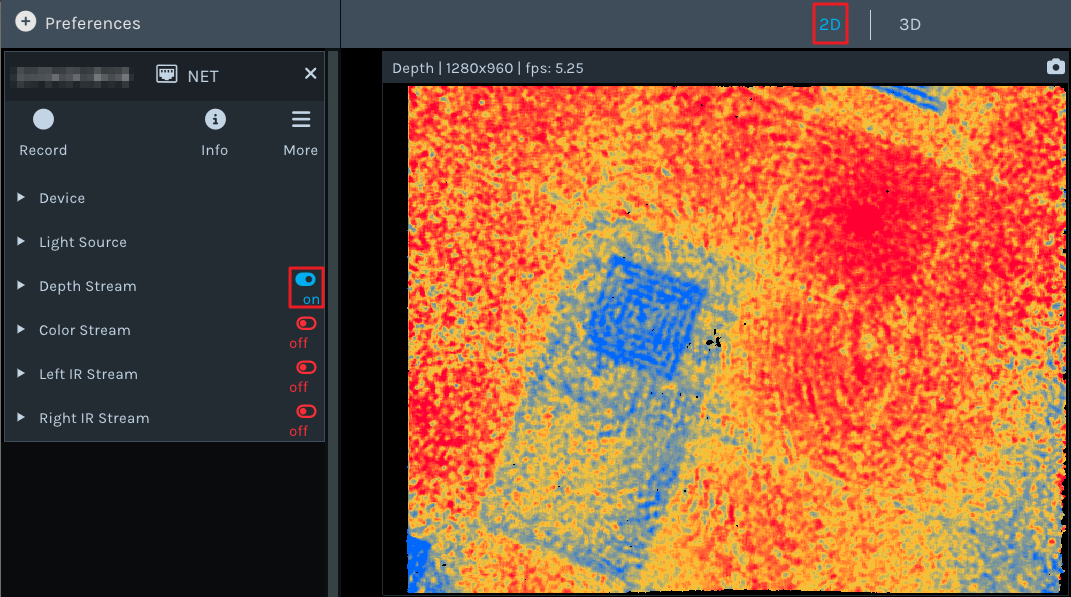
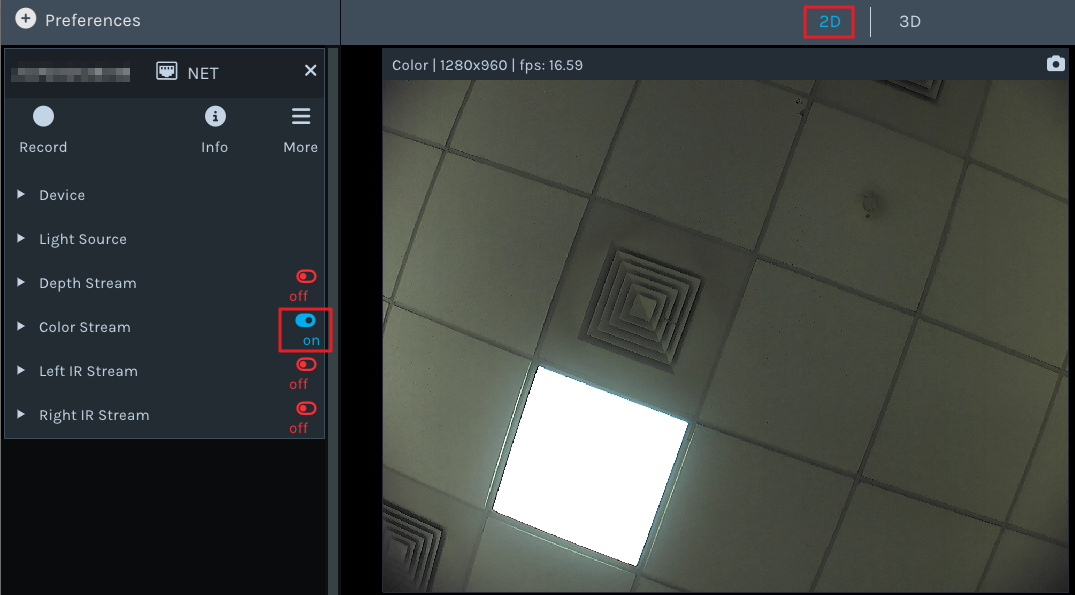
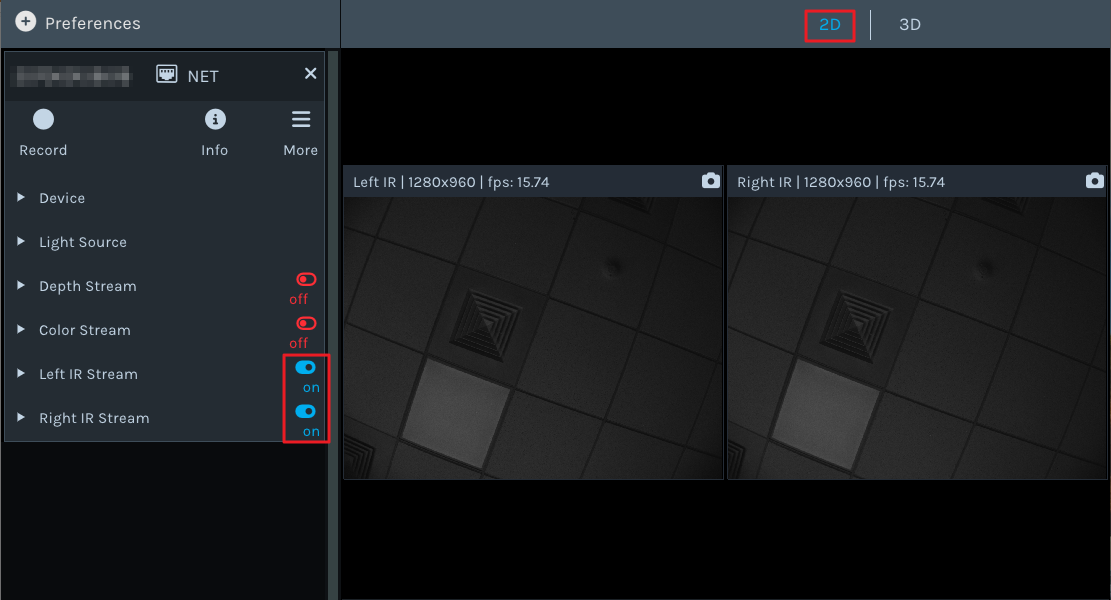
Turn on the data stream, and you can preview the images in real-time.
The name, resolution, and frame rate of the current image can be viewed in the title bar above the image.
Zoom the image: Place the mouse on the 2D/3D map and roll the mouse wheel.
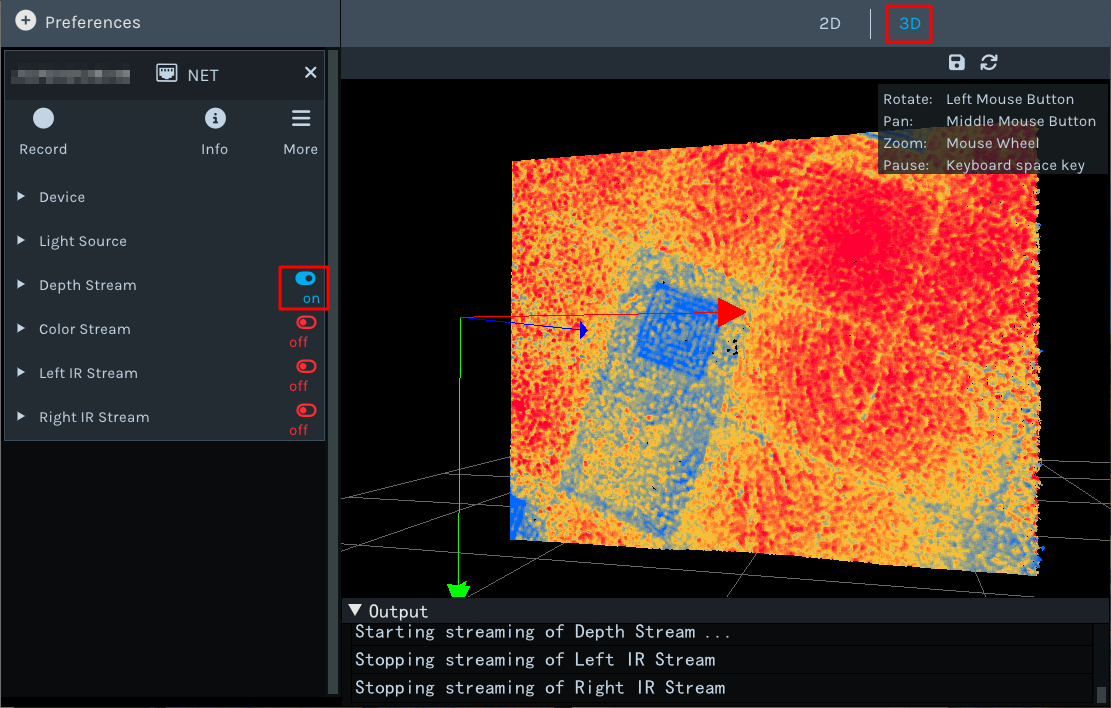
Pan the image (only supported in 3D/Color 3D views): Hold down the mouse wheel and drag.
Rotate the image (only supported in 3D/Color 3D views): Hold down the left mouse button and drag.
Reset the view (only supported in 3D/Color 3D views): Click .
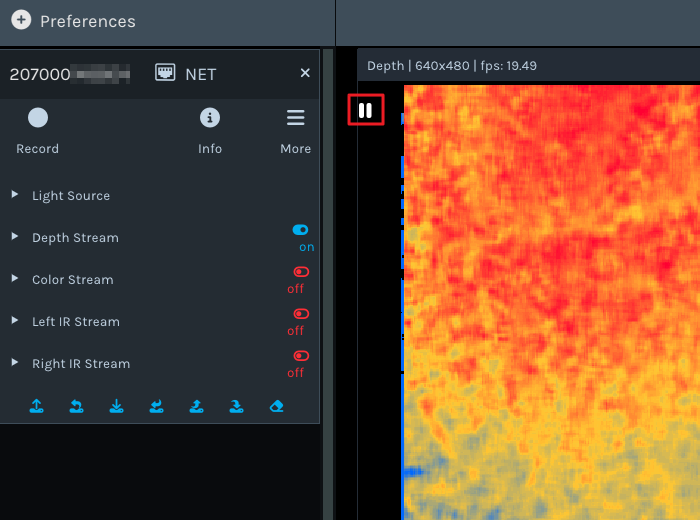
Pause the real-time image display: Press the Space key on the keyboard to pause the real-time image display.
A pause icon will appear in the image display area. Press the Space key again or switch the view,
and the pause icon will disappear, and the image will be displayed in real-time.
Different camera models support different attributes, so the parameters displayed in the Percipio Viewer interface will also change accordingly.
Note
If you want to query all the components and attributes supported by a specified camera,
you can generate a fetch_config.xml file for the camera, which lists detailed information. The operation steps are as follows:
Create a new .xml file named “fetch_config”.
Place the .xml file in the same directory level as the Percipio Viewer software.
After opening the software and selecting the camera, the system will automatically generate the corresponding fetch_config.xml file for the camera.
When the data stream is in the state, some parameters will be grayed out, which means these parameters can only be modified when all data streams are in the state.
For the adjustment instructions of each parameter, please refer to Parameter Descriptions.
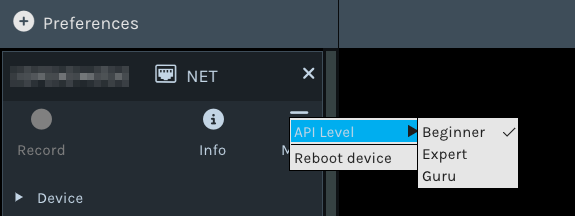
Different API level settings display different parameters.
The Beginner level contains the most commonly used basic parameters.
The Expert level contains all the parameters of the Beginner level and also provides SGBM parameters.
The Guru level contains all the parameters of the Beginner level and also provides SGBM parameters.
Typically, adjusting the Beginner-level parameters can fulfill the requirements. If the data quality is still not satisfactory,
you can adjust the Expert/Guru level SGBM parameters.
The Percipio Viewer supports saving the adjusted camera properties (parameters in the Controls category and image resolution)
to a local .json file or writing them to the camera’s Storage area,
so that this set of parameter configurations can be directly loaded when using the camera later.
Operation Steps
Run the target camera.
Adjust the camera properties as needed to achieve the best imaging effect. Camera properties include parameters in the Controls category and image resolution.
If you want to save the parameter configuration to the camera’s Storage area, select Storage in the Target field and click Save.
If you want to save the parameter configuration to a local file, select Local file in the Target field, click Save, set the .json file name, and click Save.
Check the Log display area. If “The operation was successfully completed.” is displayed, it indicates the parameter configuration has been successfully saved.
Note
Please remember to turn all data streams to before you save the parameter configuration.
Follow-up Operations
If you need to automatically load the parameter configuration saved in the camera’s Storage area when opening the camera in the Percipio Viewer, please enable the Auto-Load function. For specific operation steps, please refer to Automatically Load Storage Parameter Configuration.
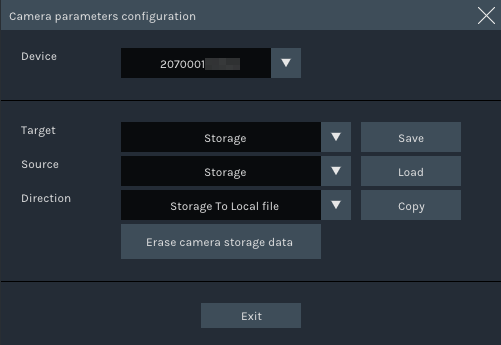
Click Tools > Parameters in the menu bar to enter the Camera parameters configuration page.
Perform the loading operation:
If you want to load the parameter configuration from the camera’s Storage area, select Storage in the Source field and click Load.
If you want to load the parameter configuration from a local file, select Local file in the Source field, click Load, specify the local .json file, and click Open.
Check the Log display area:
If “The operation was successfully completed.” is displayed, it indicates the parameter configuration has been successfully loaded.
If “Check code is invalid, maybe the data in the storage area is empty.” is displayed, it indicates there is no saved parameter configuration in the camera’s Storage area, and the loading has failed.
Click Tools > Parameters in the menu bar to enter the Camera parameters configuration page.
Perform the copying operation:
If you want to copy the parameter configuration from the camera’s Storage area to a local file, select Storage To Local file in the Direction field, click Copy, set the .json file name, and click Save.
If you want to copy the parameter configuration from a local file to the camera’s Storage area, select Local file To Storage in the Direction field, click Copy, specify the local .json file, and click Open.
Check the Log display area. If “The operation was successfully completed.” is displayed, it indicates the parameter configuration has been successfully copied.
Click Preferences, select the camera SN number, and open the camera.
Check the Log display area:
If “Loading configuration parameters completed.” is displayed, it indicates the parameter configuration in the camera’s Storage area has been successfully loaded.
If “Check code is invalid, maybe the data in the storage area is empty.” is displayed, it indicates that there are no saved parameter configurations in the camera’s Storage area, leading to a loading failure.
Switch to the 2D view, click , select the save path, and click Save.
Switch to the 3D/Color 3D view, click , select the file format (supporting “.xyz” and “.ply” formats) for exporting the 3D point cloud map and the save path, and click Save.
Note
Image files are saved in the C drive by default.
If they cannot be saved to the default path,
please refer to Unable to save the file to the C drive, what should I do?
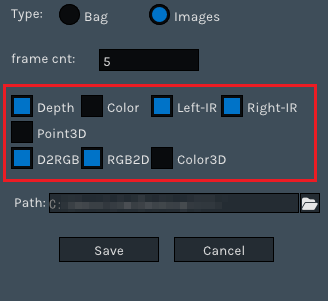
Percipio Viewer supports continuously saving images according to the preset number of frames. The supported image types include depth maps, color maps, left and right grayscale maps, aligned maps of depth maps mapped to color maps, aligned maps of color maps mapped to depth maps, point cloud maps, point cloud maps generated after aligning depth and color.
Prerequisites
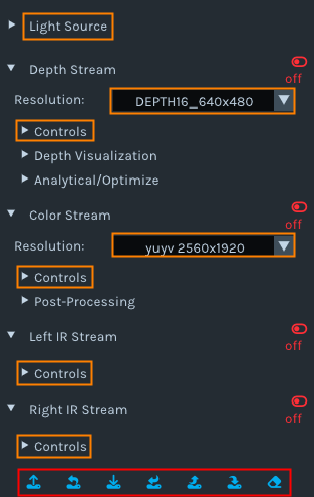
According to the type of images to be saved, turn on the corresponding data streams. The correspondence between image types and data streams is shown in the following table.
Table of Correspondence between Image Types, Data Streams, and File Formats
Image Type
Data Stream
Content and File Format of Continuously Saved Images
Depth
Depth Stream
Rendered depth map, file name format: depth_time_index-numer.jpg.
Unrendered depth map, file name format: depth_time_index-numer.png.
Color
Color Stream
color image, file name format: color_time_index-numer.png.
Left-IR
Left IR Stream
Left grayscale Image, file name format: leftIR_time_index-numer.png.
Right-IR
Right IR Stream
Right grayscale Image, file name format: rightIR_time_index-numer.png.
Piont3D
Depth Stream
Original point cloud data, file name format: Point3D_time_index-numer.xyz.
RGB2D
Depth Stream + Color Stream
Aligned map of color image and depth map, file name format: RGB2D_time_index-numer.png.
D2RGB
Depth Stream + Color Stream
Rendered aligned map of depth map and color image, file name format: D2RGB_time_index-numer.jpg.
Unrendered aligned map of depth map and color image, file name format: D2RGB_time_index-numer.png.
Distortion-corrected color image, file name format: undistort_color_time_index-numer.png.
Color3D
Depth Stream + Color Stream
Note
When saving Color3D, in addition to turning on the Depth Stream and Color Stream, you also need to check the D2RGB or RGB2D image type before you can check Color3D and perform the continuous image-saving operation.
D2RGB+Color3D
Color point cloud map aligned with color, file name format: Color3D(map_to_color)_time_index-numer.xyz.
Rendered aligned map of depth map and color image, file name format: D2RGB_time_index-numer.jpg.
Unrendered aligned map of depth map and color image, file name format: D2RGB_time_index-numer.png.
Distortion-corrected color image, file name format: undistort_color_time_index-numer.png.
RGB2D+Color3D
Color point cloud map aligned with depth, file name format: Color3D_time_index-numer.xyz.
Aligned map of color image and depth map, file name format: RGB2D_time_index-numer.png.
Distortion-corrected color image, file name format: undistort_color_time_index-numer.png.
Operation Steps
Click , and the parameter setting interface will appear.
After saving the specified number of images, the continuous image-saving operation will stop automatically. If you need to stop the saving operation during the process, click .
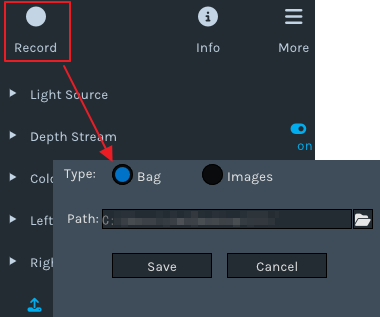
Percipio Viewer supports recording videos when the camera is capturing images.
During the video recording process, some parameters can be adjusted, while closing/opening data streams is not supported.
Prerequisites
Turn on the corresponding data streams according to the recording content.
Operation Steps
1.Click , and the parameter setting interface will appear.


 state, expand the Device > Controls parameter page and set TriggerMode to Trigger Off.
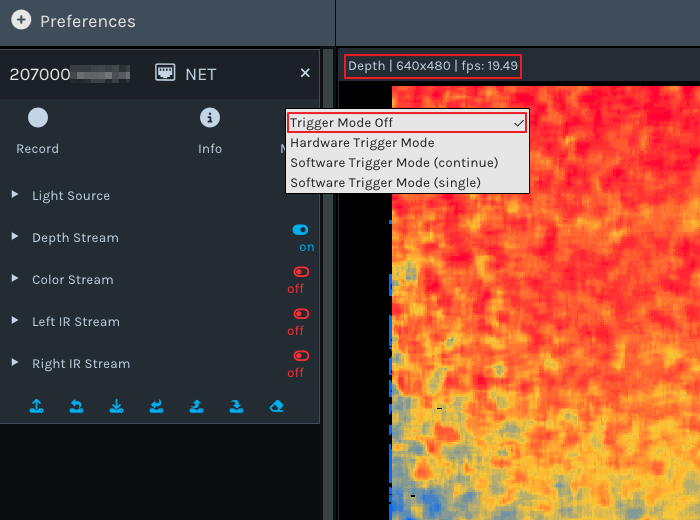
 . Each click will make the camera capture one frame of image.
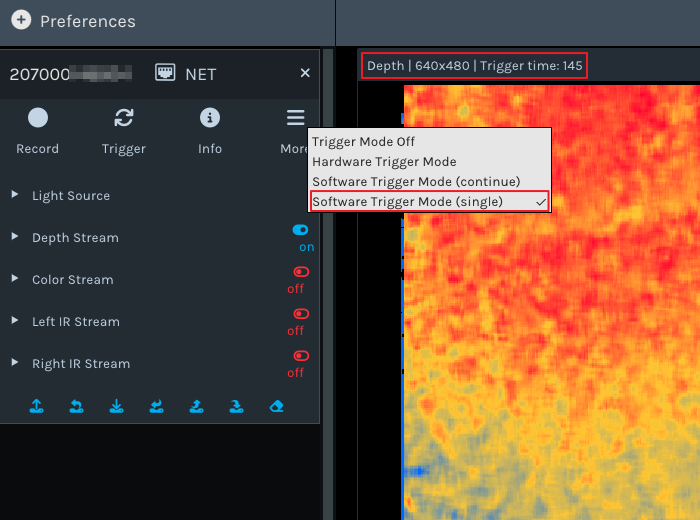


 .
.
 state, some parameters will be grayed out, which means these parameters can only be modified when all data streams are in the
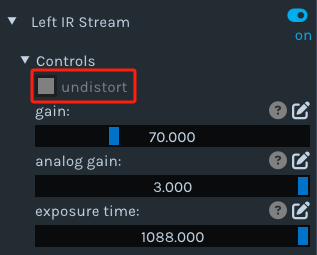

 , select the save path, and click Save.
 , select the file format (supporting “.xyz” and “.ply” formats) for exporting the 3D point cloud map and the save path, and click Save.
 , and the parameter setting interface will appear.
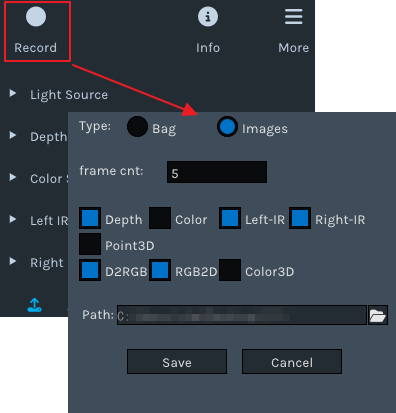
 on the right side of “Path”, and select the image save path.
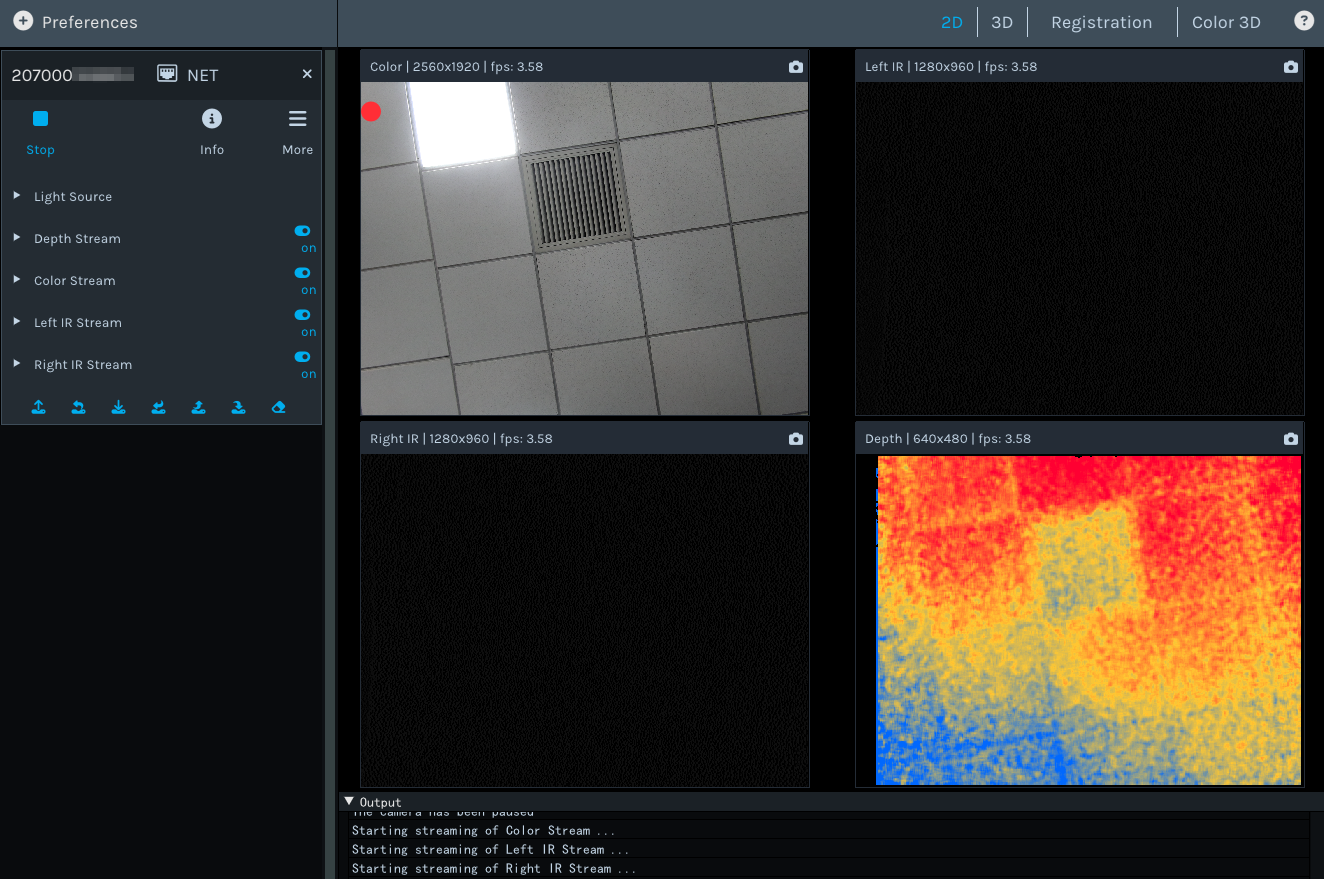
 .
.