Group usage guide
Group Basic operations
Create a Group
There are two ways to create a Group:
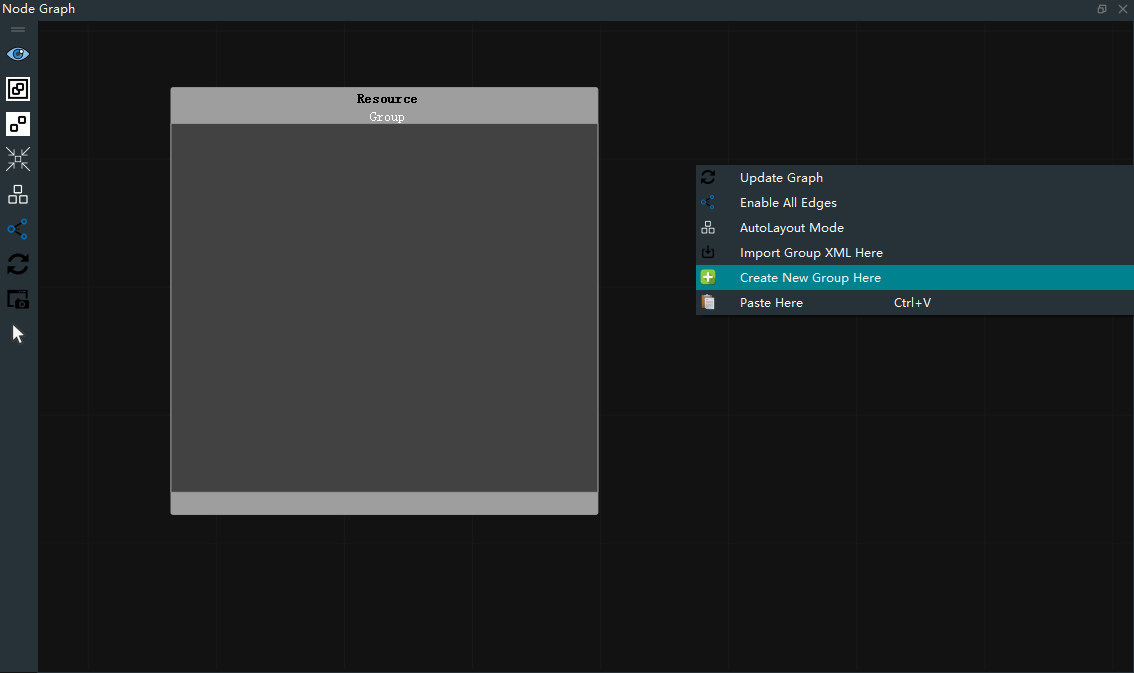
A:Right-click in the black background of “Node Graph” area, select “Create New Group Here” in the menu, the effect after creation is as follows.Once the Group is created, you can add a node internally.In addition, you can create a new Group by right-clicking on an existing Group to pop up the menu.
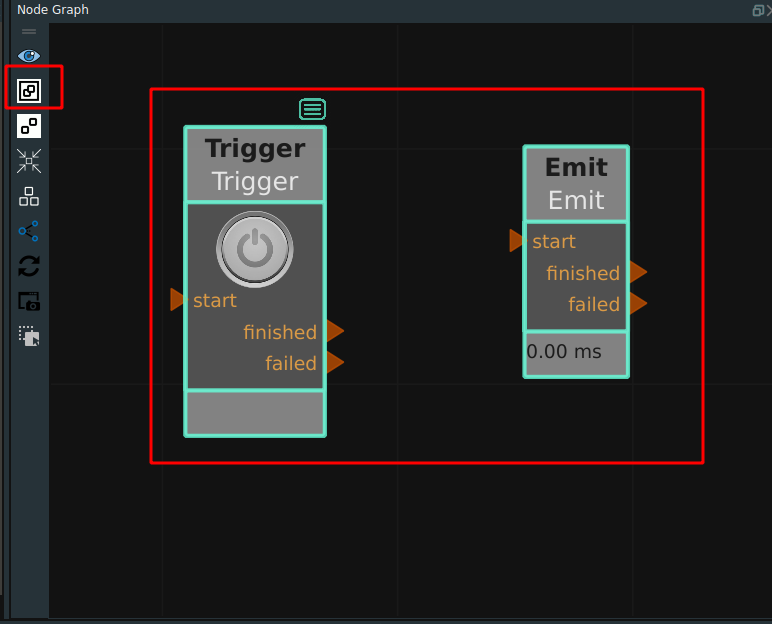
B:Mouse click to select a node (hold ctrl to click to select multiple nodes), then click on the left toolbar of the node graph area
Group Selected Node, and then automatically puts the selected node into the newly created Group.
Rename Group
Method 1:Select Group, directly press the keyboard F2 button to pop up the Rename Node window. Click OK to confirm and Cancel to cancel.
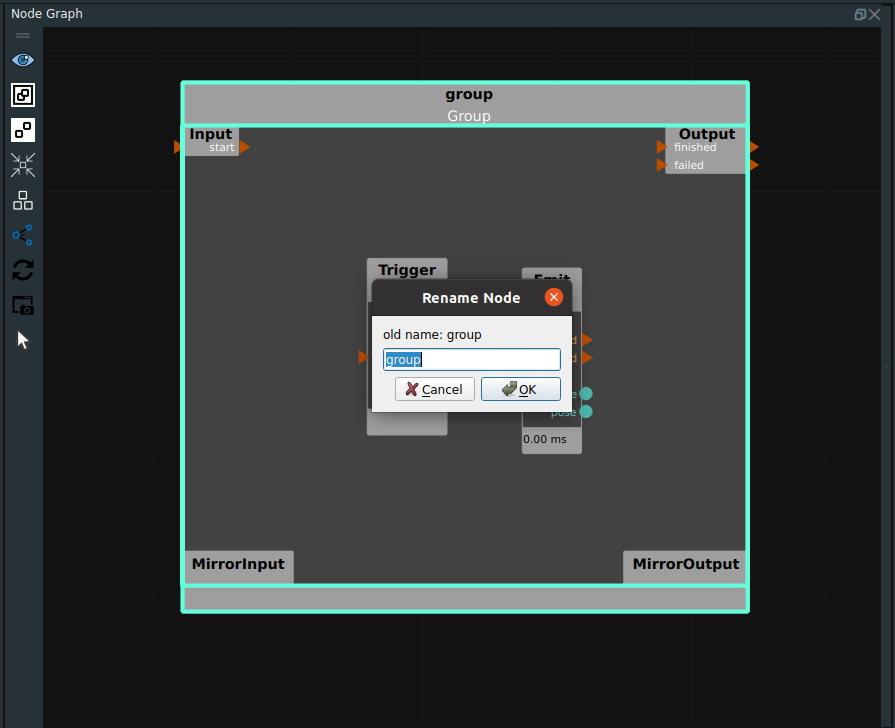
Method 2:Select Group, right-click the blank space of Group, and select Rename Node from the pop-up menu.
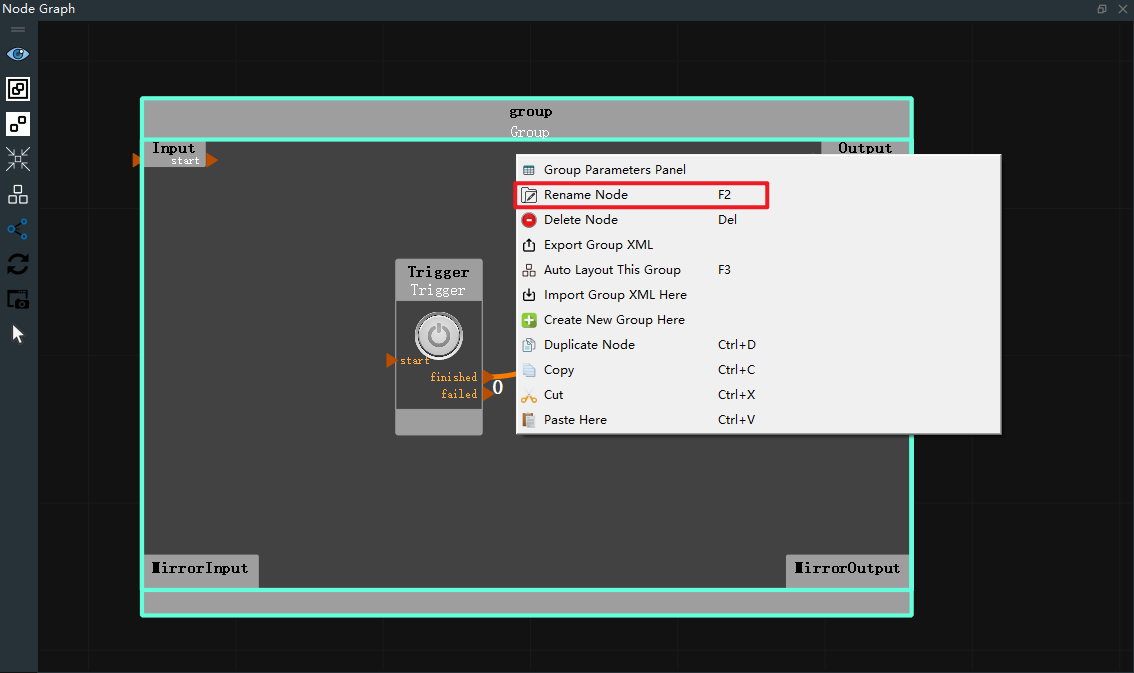
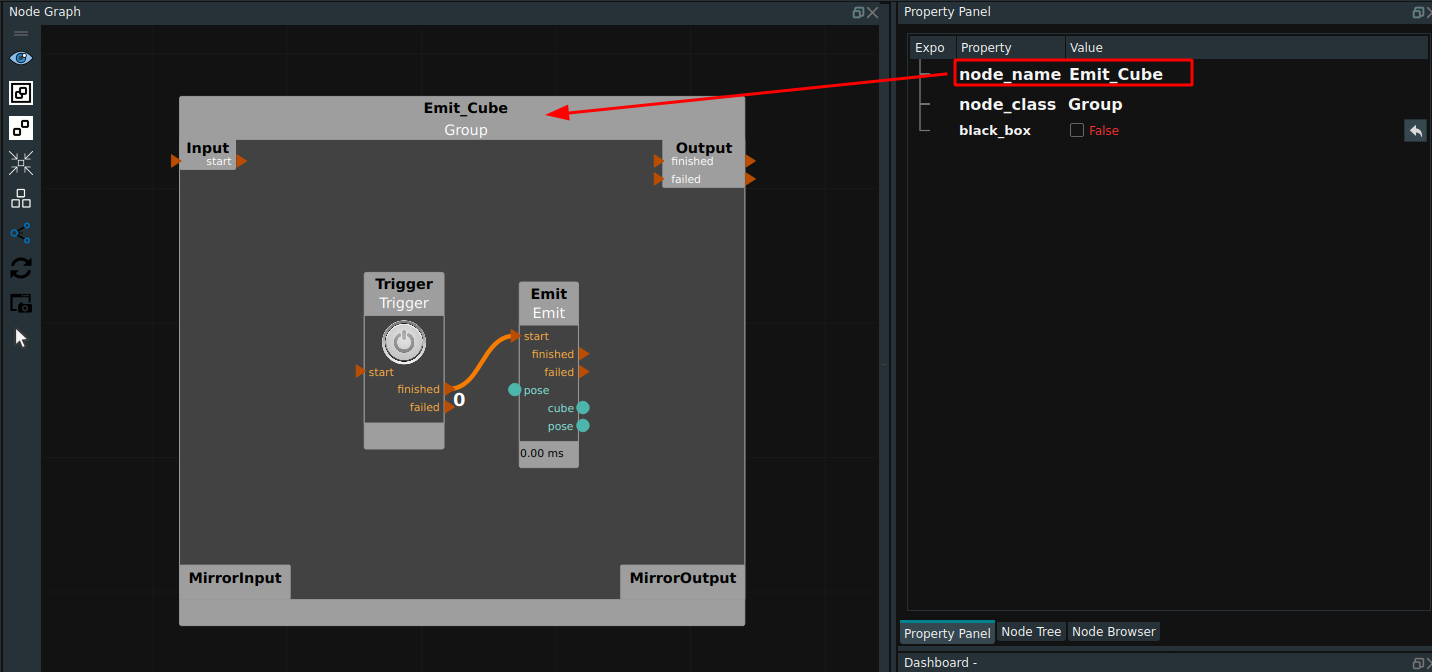
Method 3:Select Group, in the Property panel ->Double click ‘node_name’, rename it, Press Enter to confirm.
Unbundling Group
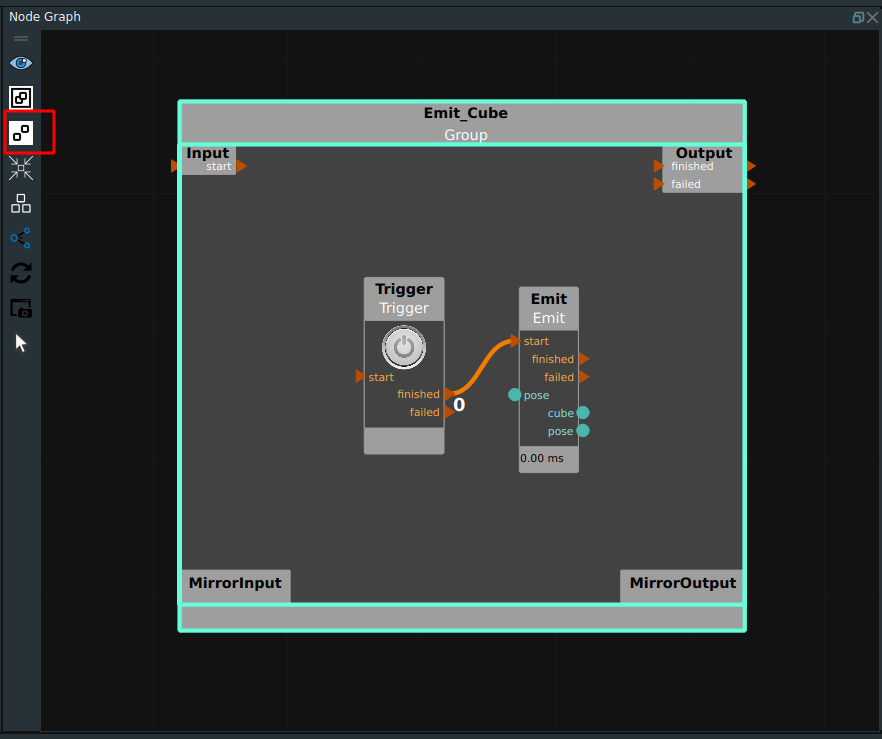
Step 1:Click to select a Group that needs to be separated, and then click on the left toolbar of the node graph area
UnGroup Selected Node.
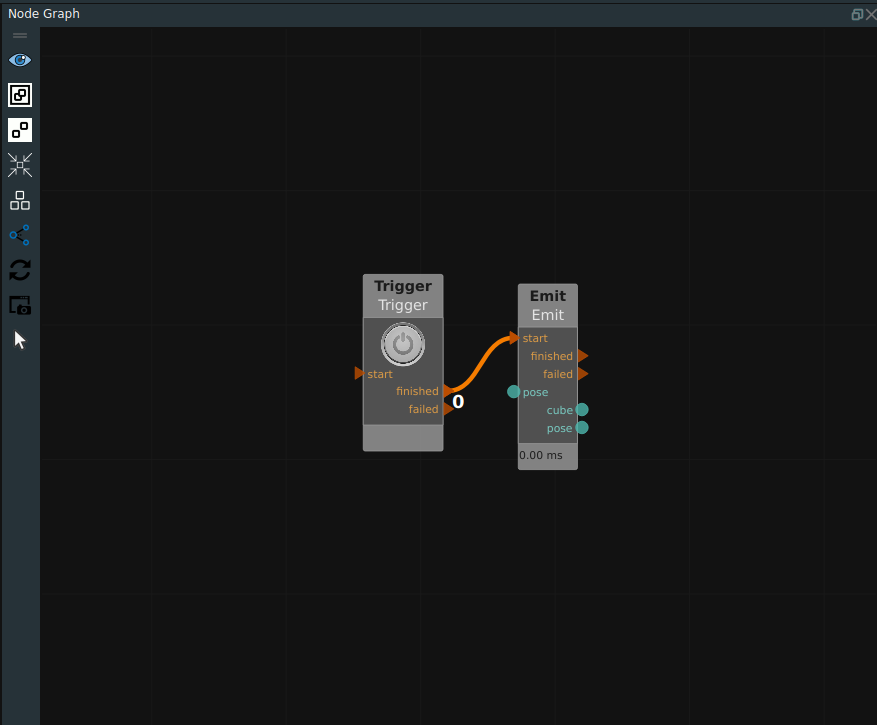
Step 2: The node graph after disaggregation is as follows.
Delete Group
Select Group, then press the keyboard Del key or right-click with the mouse and select Delete Node from the menu. Pop-up Delete window, click Yes to confirm the operation, click Cancel to cancel the operation.
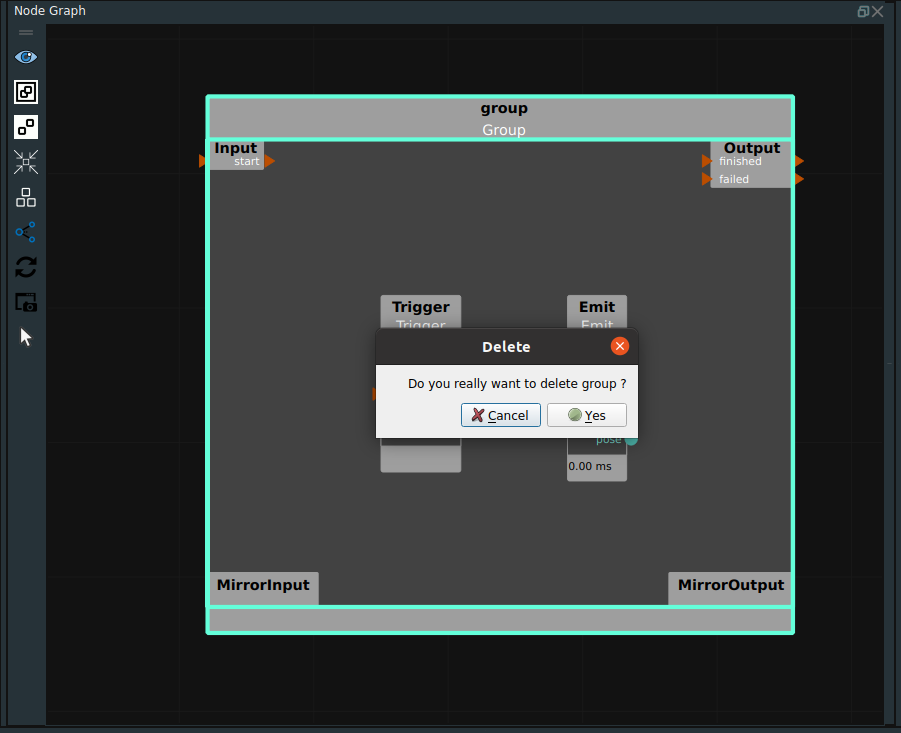
Group export and import
Export is to export a Group as a module to *.group.xml, and then import the *.group.xml file into other xml programs to reuse the group. You can import the Group either in the node graph background or inside another Group.
Operation steps:
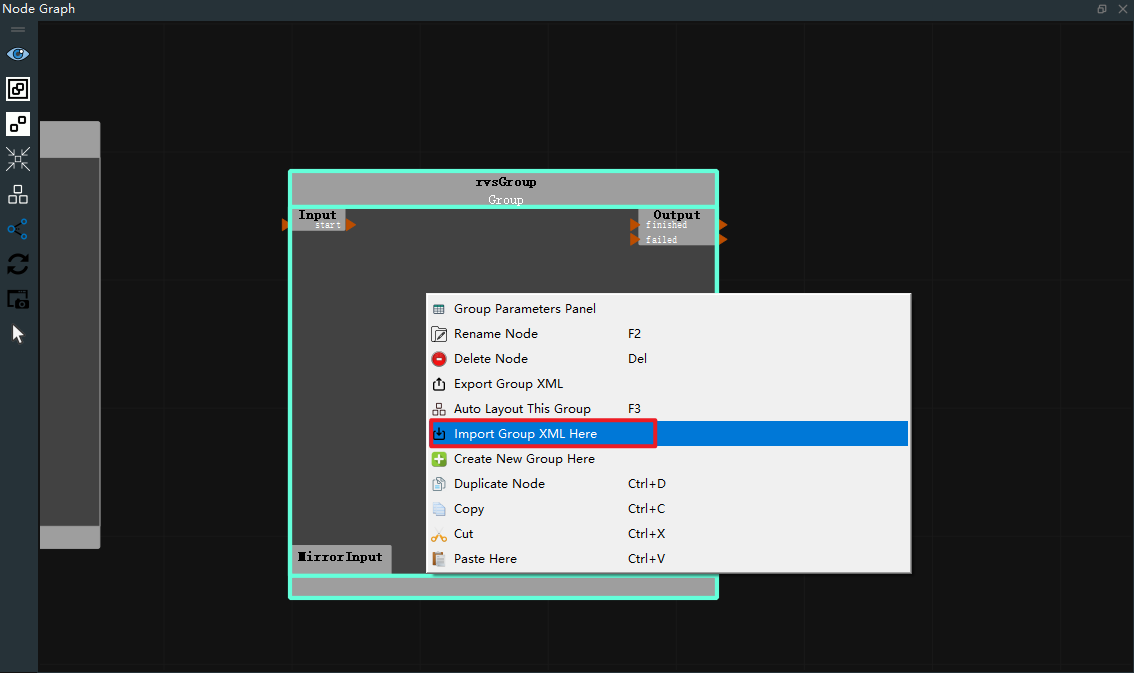
Import method 1: Right-click the node graph or group blank space, pop up the menu bar, select Import Group XML Here, pop up the folder, select the corresponding *.group.xml file.
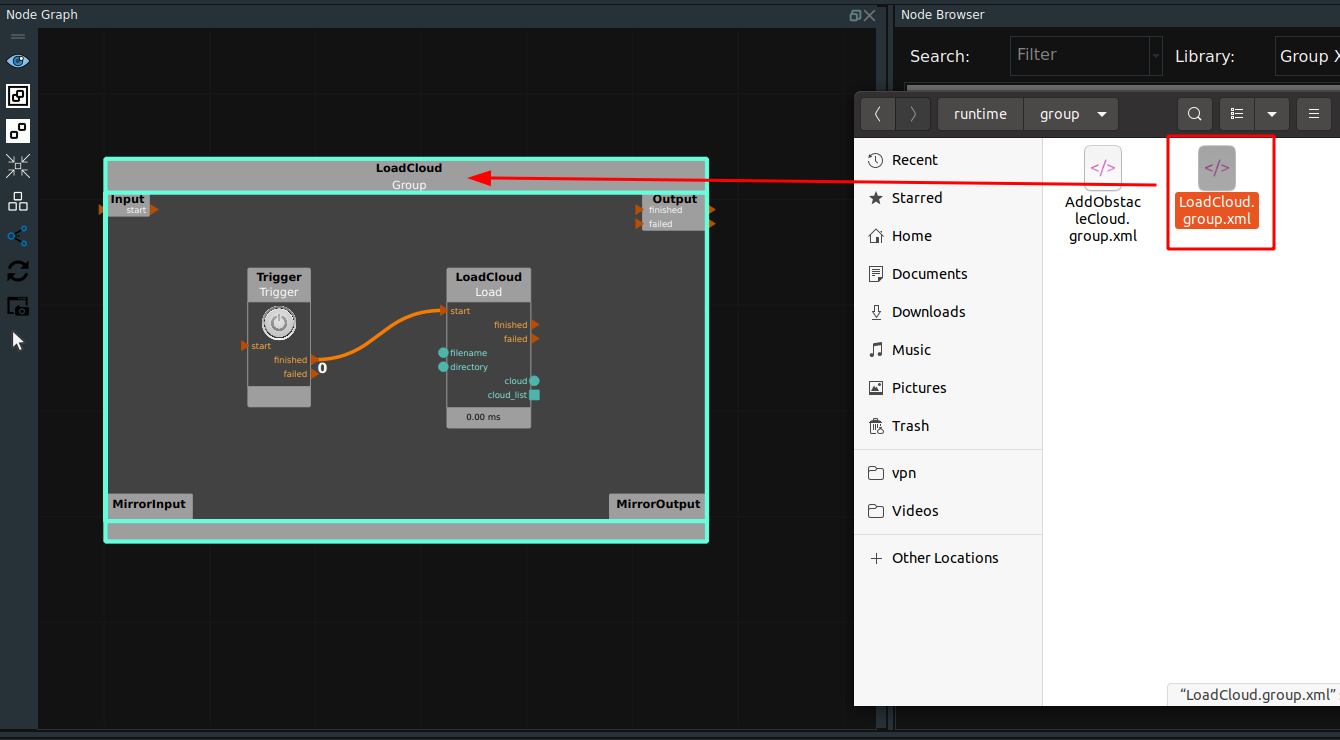
Import Method 2: Quickly import a Group. You can directly drag and drop the Group file from the external folder to the node graph.
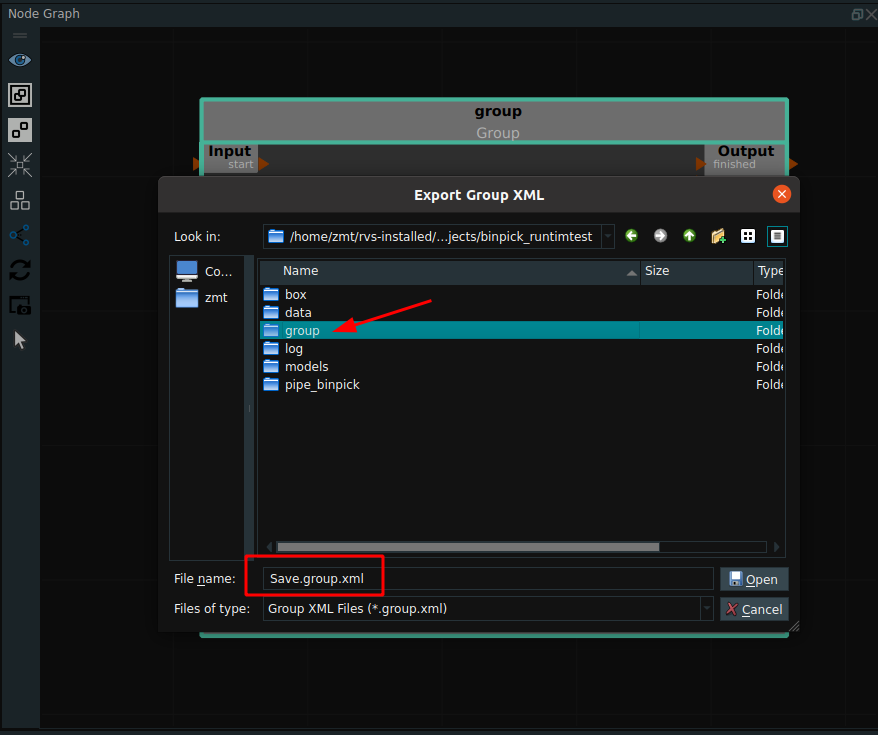
Export: Select Group, pop up the menu bar, select Export Group XML, pop up Export Group XML, you can select the specified directory, rename the Group, click Save to confirm the operation, click Cancel to cancel the operation. After confirming the operation, the Group.xml is saved in the specified directory.
View Group parameters
Before using the parameter panel, it is necessary to expose at least one parameter (such as parameter Trigger) of at least one node within the Group, then select the Group, click the mouse right-click to pop up the menu, select Group parameter panel to pop up the panel dialog box, as shown in the following picture.
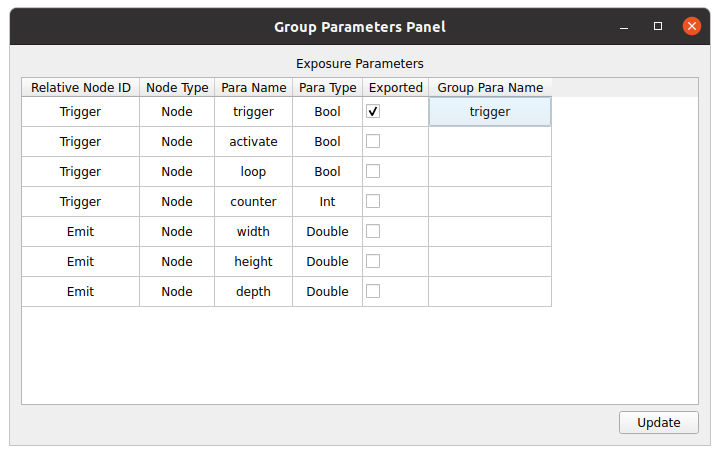
By checking the Exported column corresponding to parameter a (and changing the name of the parameter in the corresponding Group para name of the parameter Trigger), the parameter Trigger can be exposed as a Group parameter of the group. At this time, click the Update button in the lower right corner of the above picture and close it, and select the Group again, you can see the group parameters just set in the property pannel. Using this method, it is more convenient to modify and adjust the node parameters in the Group.
Group Indicates the basic operation of a port
Adding a Group Port
The general Group has two types of port areas: the I/O port area on the upper side (including start, finished, and failed ports), and the mirrored port area on the lower side (including MirrorInput and MirrorOutput).
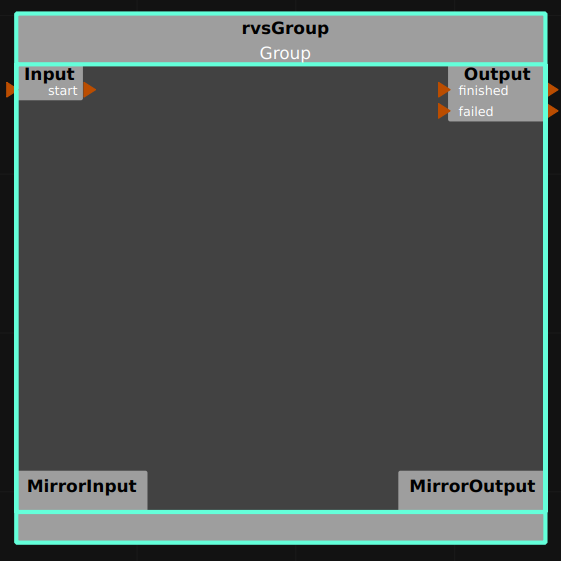
Add a port to the I/O port area:Directly from any port of any internal node of the Group, drag out a cable with the left mouse button and move it to the IO port area Release the mouse to automatically create a port, each port has both inner and outer ends.
If the node’s data signal or control signal is connected to the Group port, the Group port automatically adds a port with the same name. The Group connection is as follows.
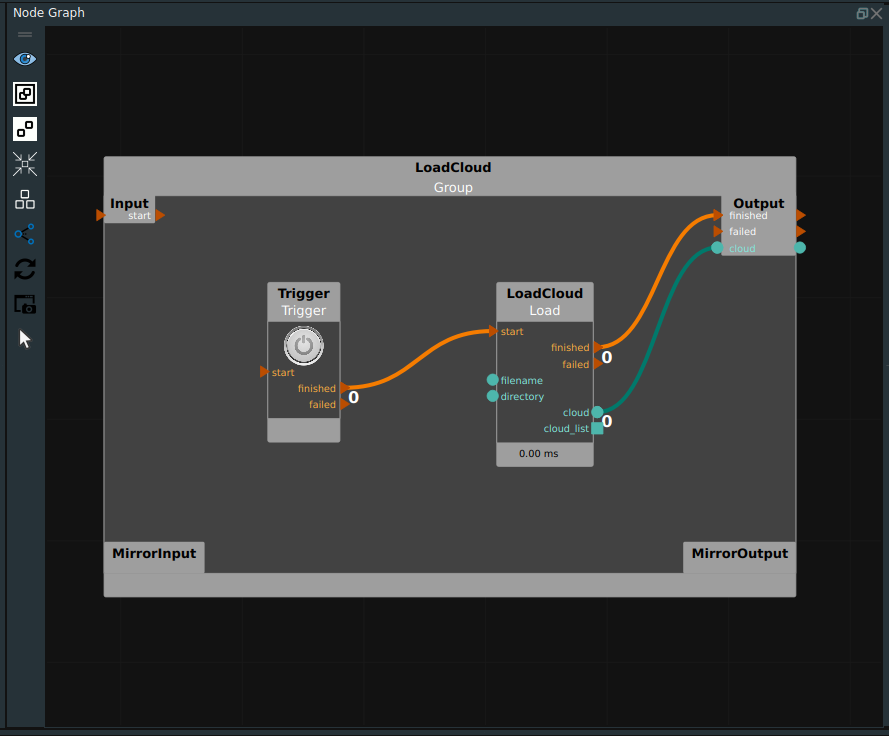
Connecting Group ports
Rules for connecting an I/O port area:It is the same as common node connection rules, except that the IO port of the Group must be connected to both the inner and outer ends.
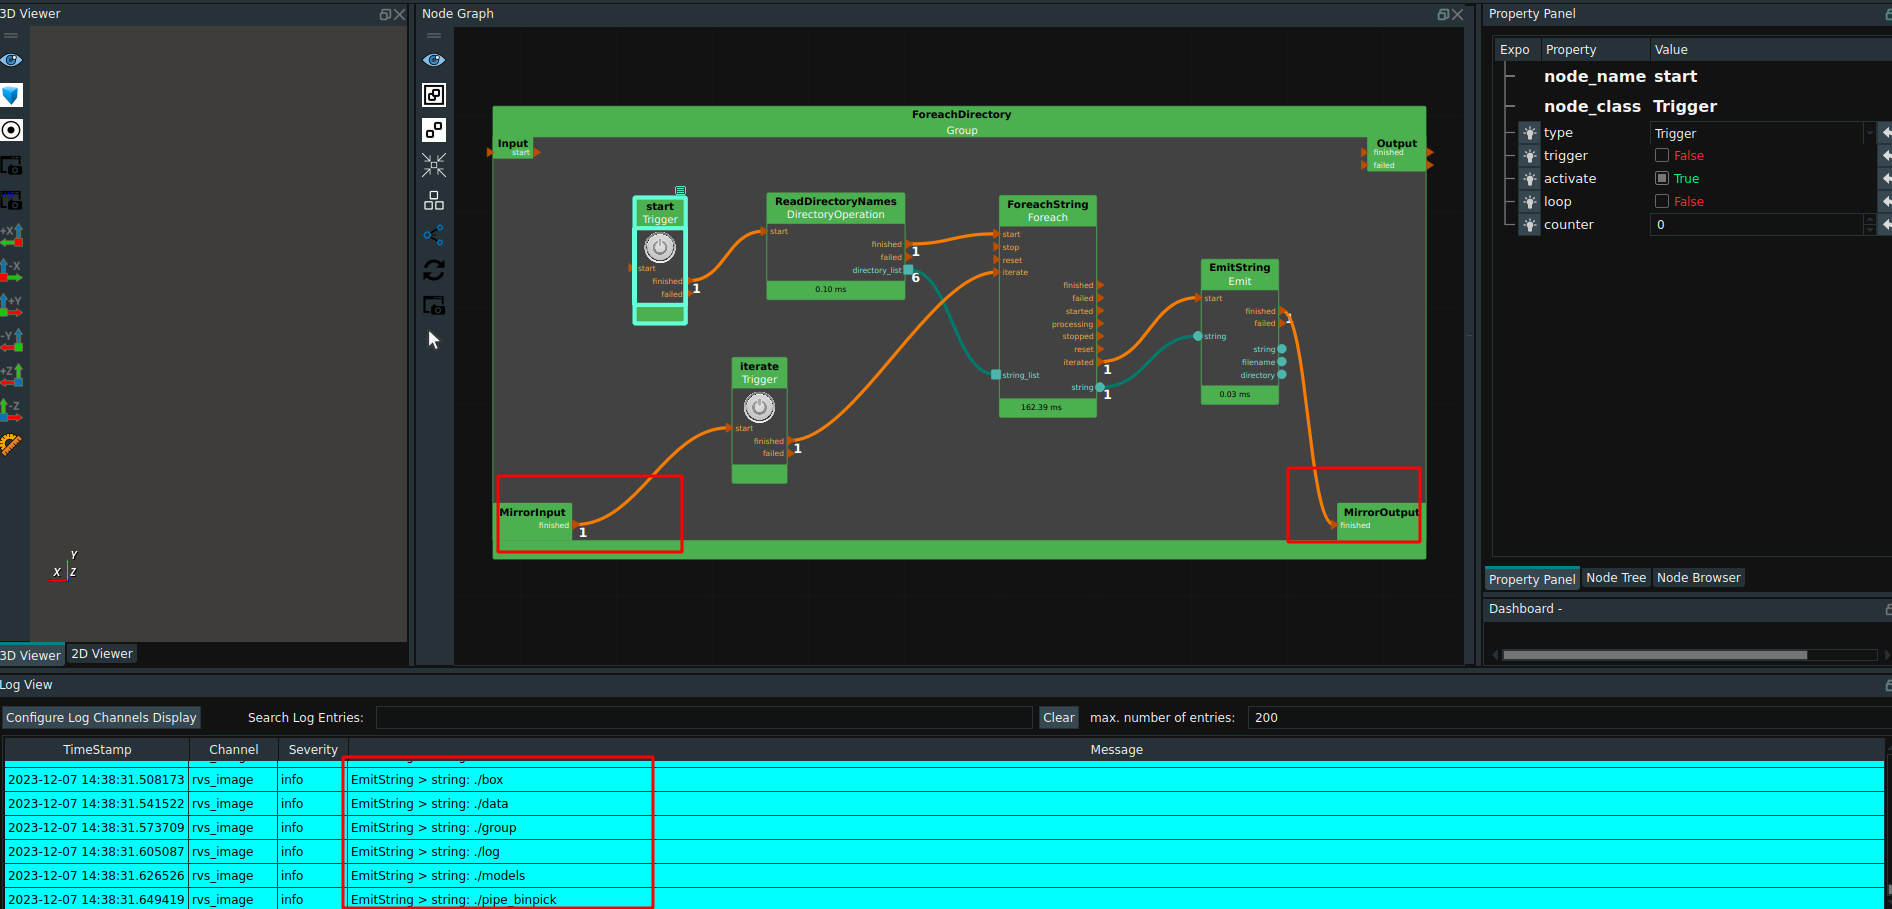
Function and connection method of mirroring port area:The nodes in Group are arranged according to the sequence of control signal flows. If you need to connect an output port of node B to an input port of node A, an error message is displayed when you connect the node directly.
In this case, you can connect the output port of B to the MirrorOutput area in the lower right corner. After the connection is complete, A port with the same name will automatically appear in the MirrorInput area in the lower left corner, and then connect the port to the input port of node A.
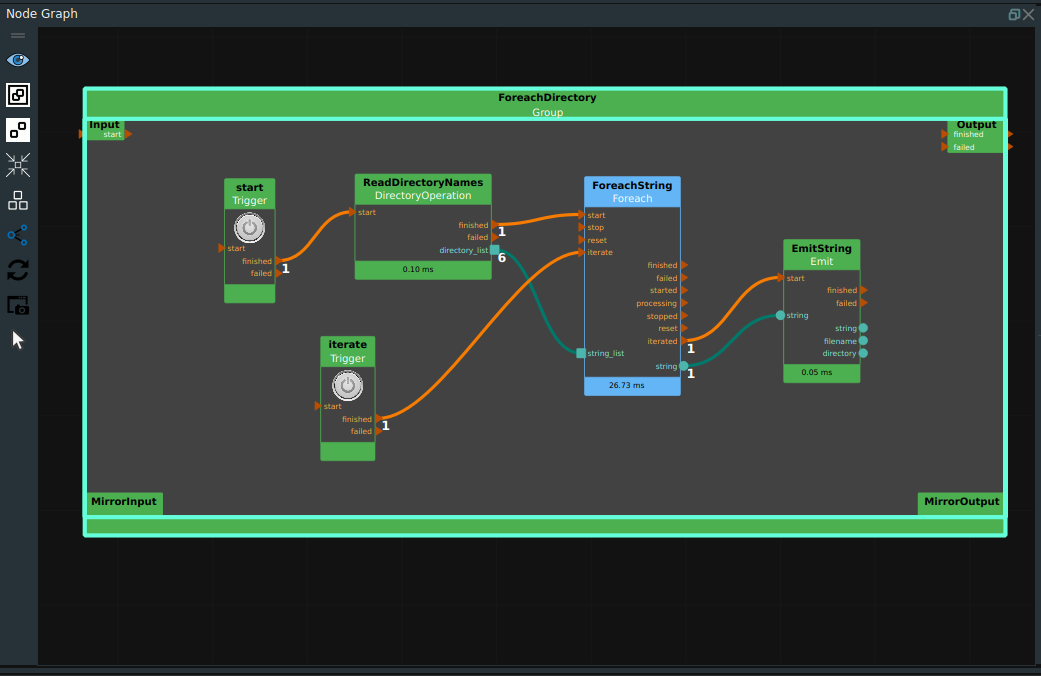
As shown in the following picture, the role of Group is to traverse all folder names in the directory, connecting the finish port of the EmitString node to the MirrorOutput area and the finish port of the MirrorInput area to start for automatic traversal effect.
Deleting a Group Port
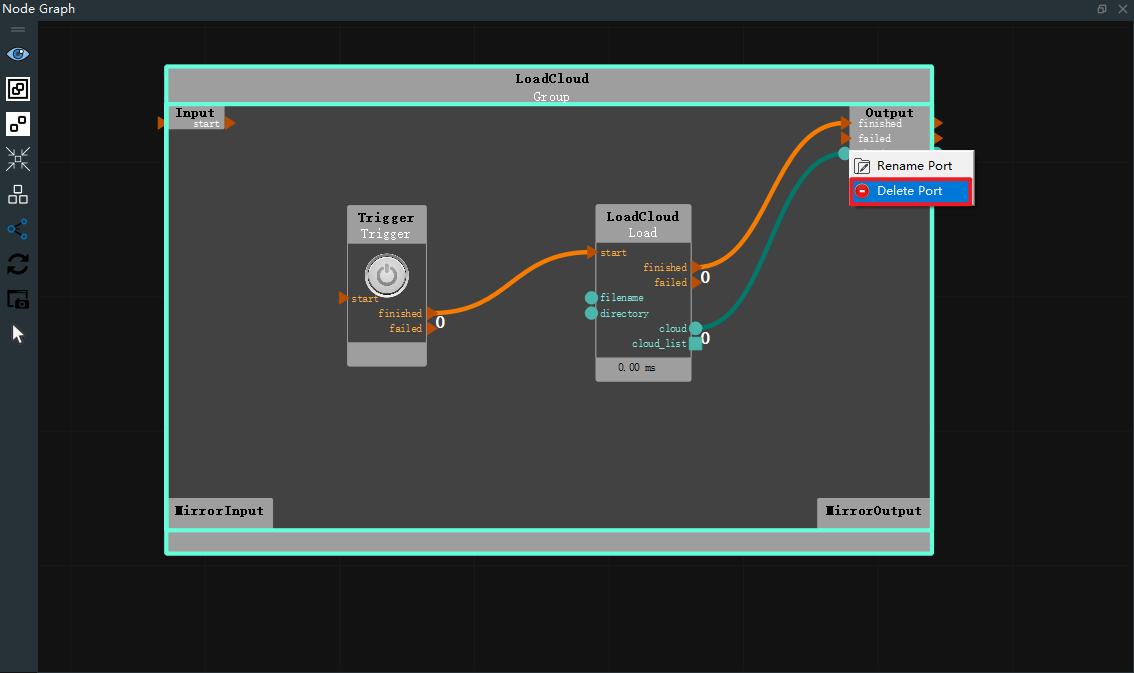
Select the port to be deleted, right-click pop-up menu bar, select Delete Port, that is, the deletion is complete.
Notes:The two existing finished ports and failed ports cannot be deleted.
Rename the Group port
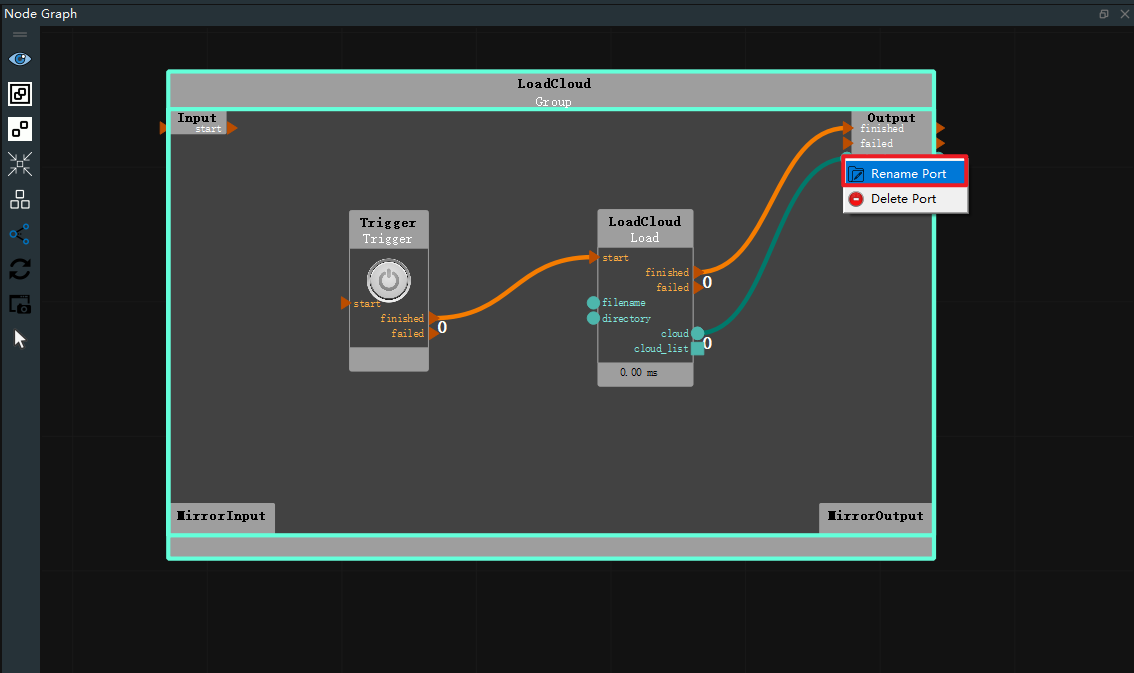
Step 1:Select the port you want to rename, right-click pop-up menu bar, select Rename Port, pop-up Rename port window.
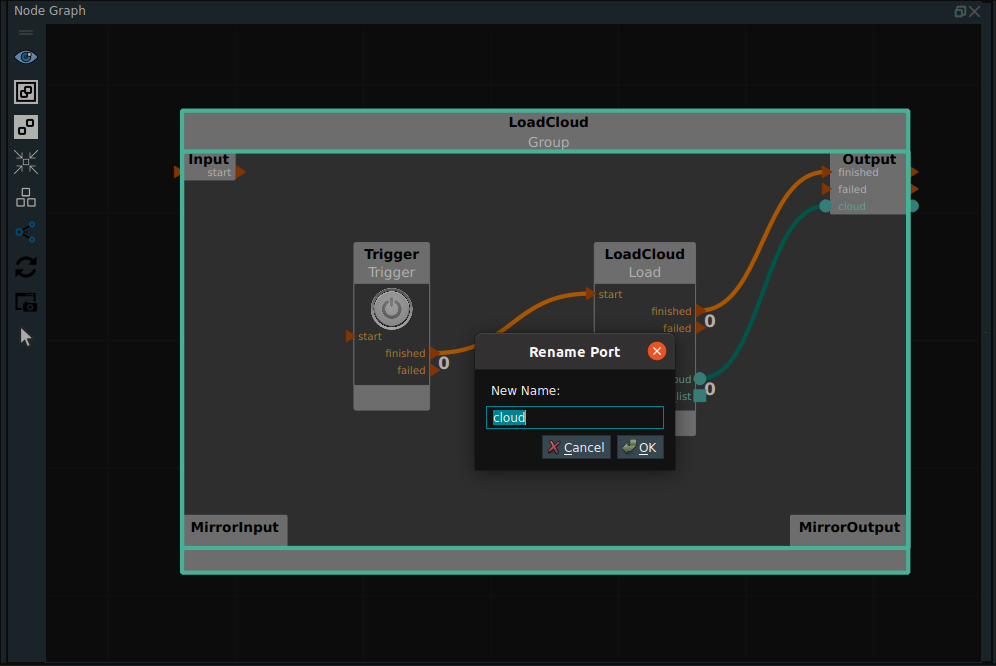
Step 2:Enter a new name, click OK to confirm the action, and Cancel to cancel the action.
Group folding, expansion and layout
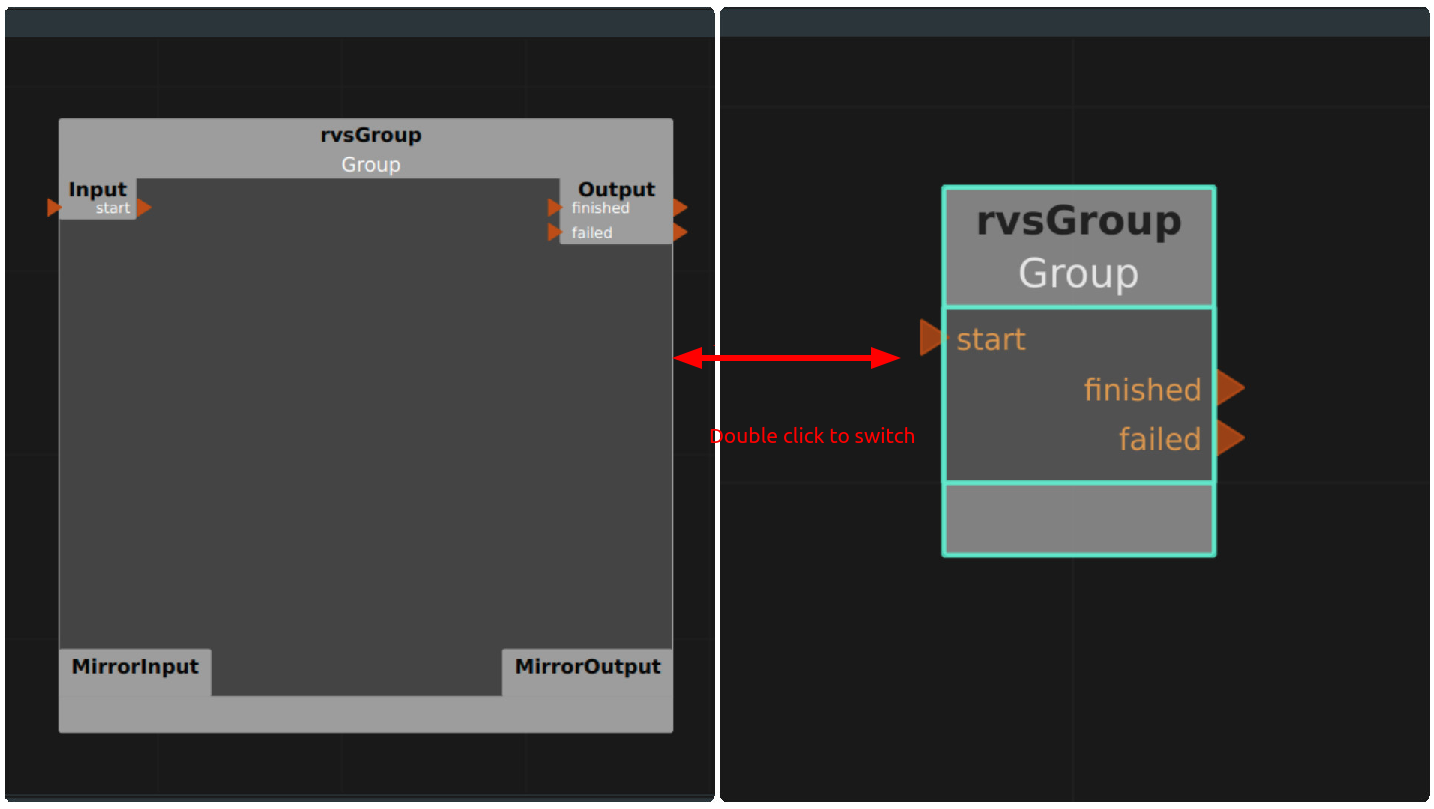
After the Group is successfully created, the default state is expanded. At this time, you can switch to the folded state by double-clicking the Group with the mouse (as shown below) to hide the internal details, and then switch to the expanded state by double-clicking the group again. With the folding shape and the property panel, Group can be regarded as a common node in effect, which greatly improves the simplicity and readability of the overall interface.
Run Group
If the input port is connected, the run can be triggered outside the Group. If the input port is not connected, connect the Trigger node in the Group to trigger the trigger to run the Group.
