Download and install RVS
RVS-WIN-CPU/GPU software installation
Hardware configuration requirements for WINDOWS
| Requirements | Configuration |
|---|---|
| CPU | I3 6300 Dual core 4 threads |
| GPU | CPU version: NVIDIA graphics card GPU version: NVIDIA GTX 1060 (6G)and above |
| Internal memory | Minimum:8G Recommended:16G |
| Hard disk | 128G Free |
| System | Windows11 and above |
Install the RVS software
The RVS CPU and GPU versions are installed in the same way. The following uses the CPU version as an example to describe how to install RVS.
The installation steps are as follows:
Open the Percipio.XYZ > developer community > RVS developer community > download link, download RVS software package.
Decompress the package.
CPU version compression package name:RobotVisionSuite_XXX_ WinCPU.zip
GPU version compression package name:RobotVisionSuite_XXX_ WinGPU.zip
Get the installation file.
CPU version file name:RobotVisionSuite_XXX_WinCPU.exe
GPU version file name:RobotVisionSuite_XXX_WinGPU.exe
Double-click the exe to start the installer.
Note: If the window displays a similar security warning,please select "Remove protectio and open".
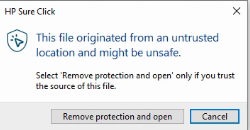
Please enter the admin user name and password, click
yes.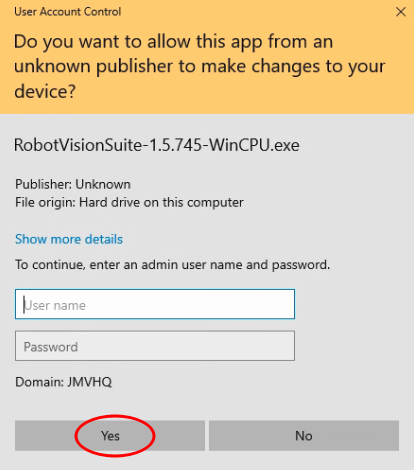
Select the installation language, “English” is recommended, and click
OK.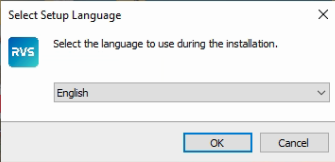
Browse the RobotVisionSuite Software License Agreement and click
Next.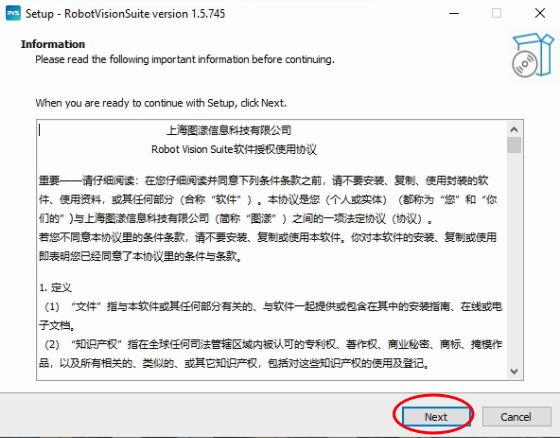
Select the installation location.
Note: The path does not contain Chinese characters. Disk C is not recommended. If you have to install C disk, please remember to set administrator rights for subsequent use.
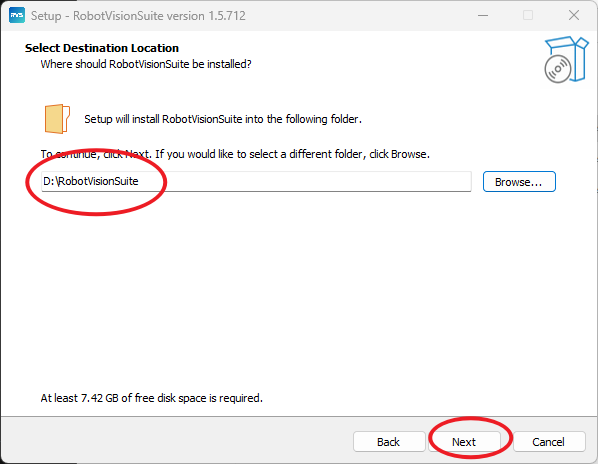
It is recommended to choose the
Create desktop shortcut, which contains the rvsruntime directory, and is convenient for subsequent projects.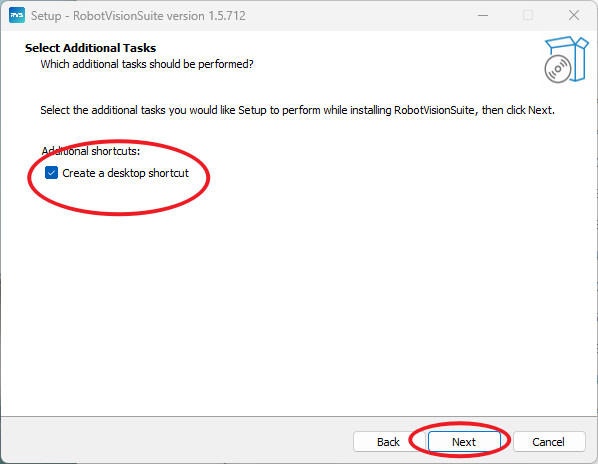
Click
Install.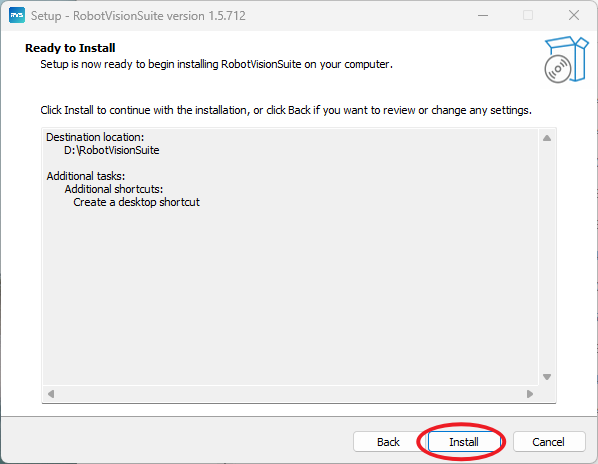
Click
Finishwhen the installation is complete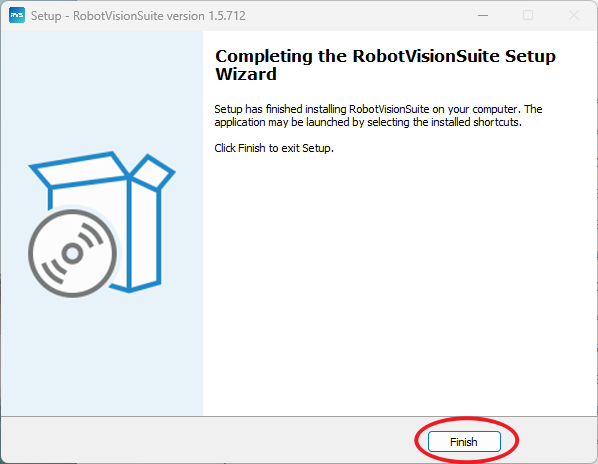
Run the RVS software for the first time
Install Percipio camera driver
A USB driver is required for the first use of the Tuyang USB camera.
Right clickon on the RVS desktop shortcut and select
Open File Location.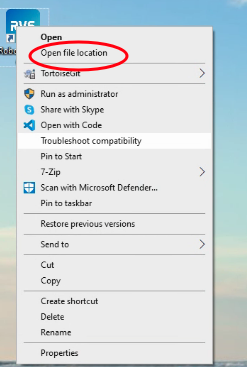
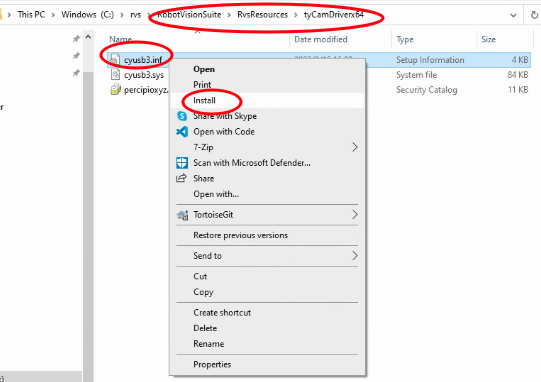
Find the cyusb3.inf file in the {installation directory}\RvsResources\tyCamDriverx64 directory and install it.
Give permission to the software administrator
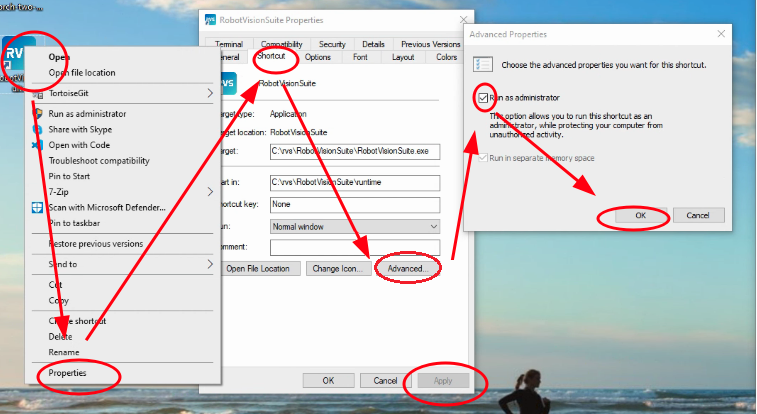
This step is mandatory for users whose software is installed on drive C or other administrator drive letters. Other users can skip this step.
Right-click the shortcut -> Properties -> Shortcut -> Advanced -> Select Run as administrator -> OK ->Apply
Run and activate (Apply for version license)
Double-click the shortcut to start RVS for the first time. After the startup animation ends, the following prompt will appear.
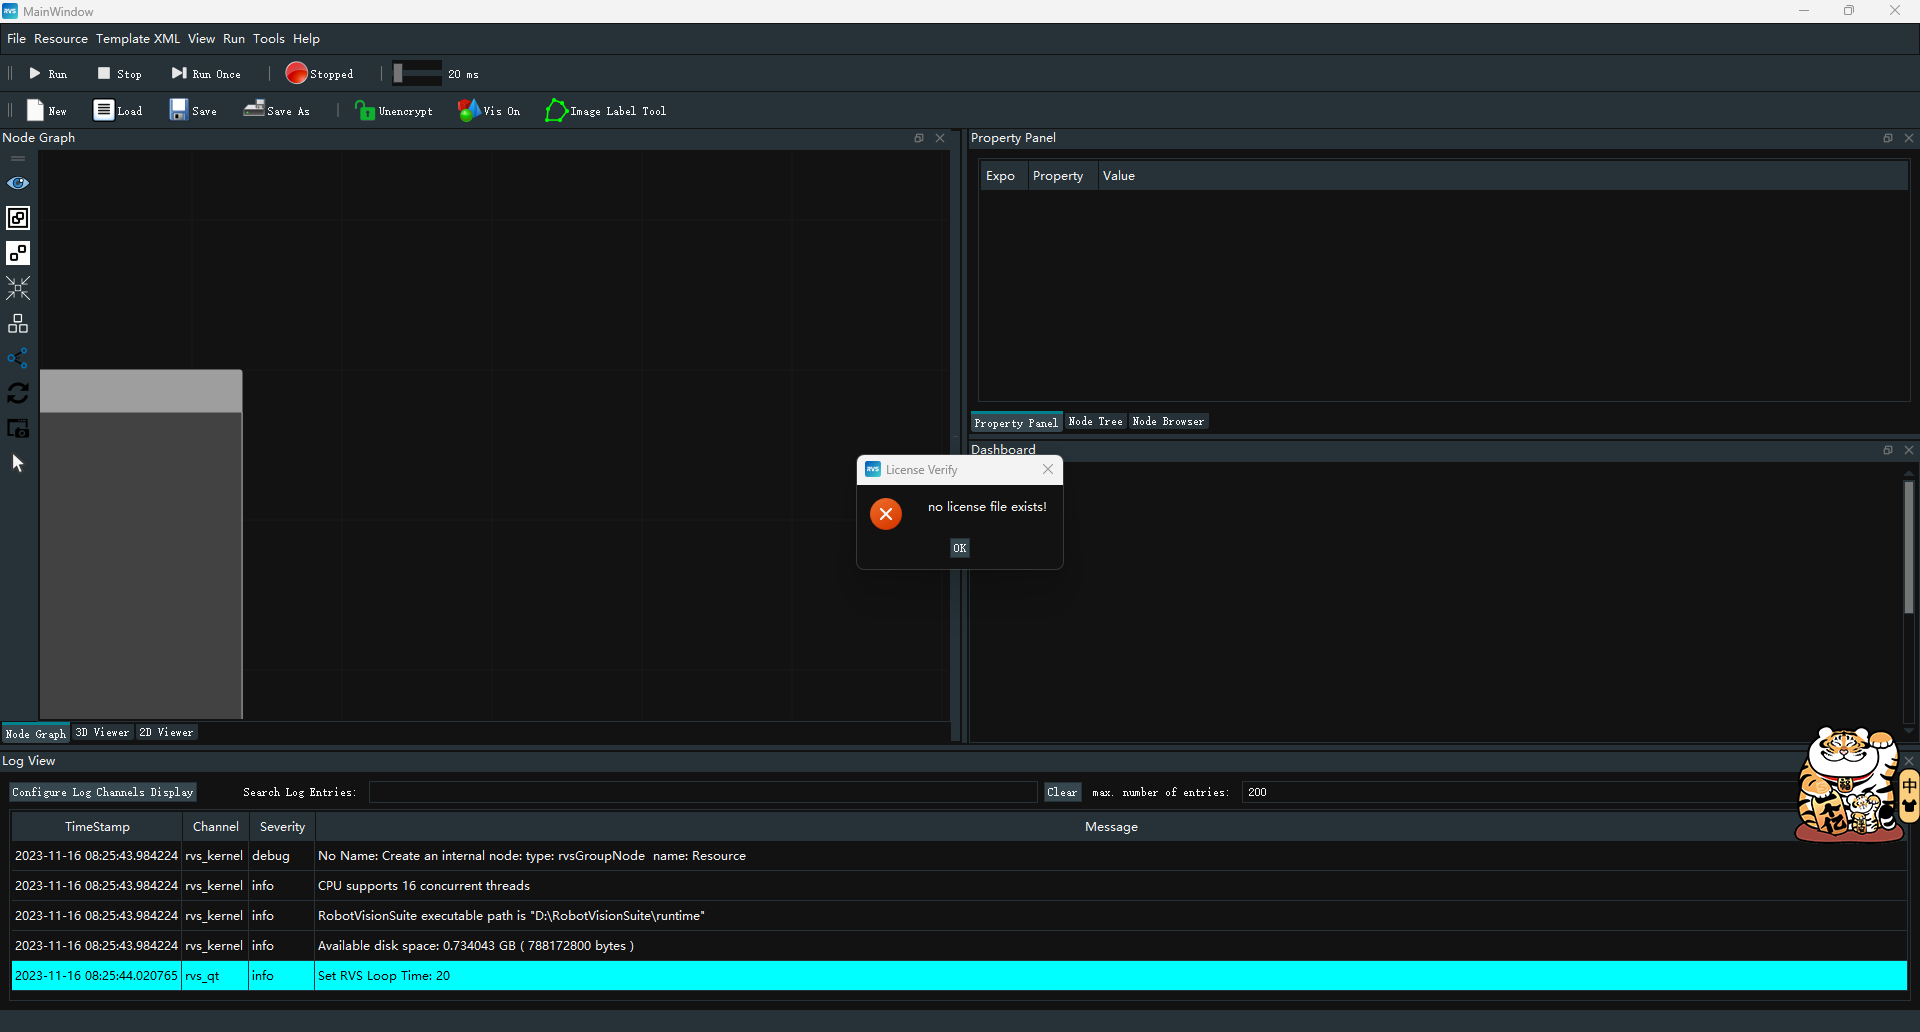
Click “OK” and click “Copy” in the license dialog box to copy the machine code.
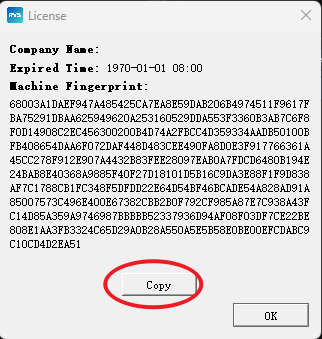
Email the machine code to Info@percipio.xyz or contact Percipio sales staff. The content of the email includes but is not limited to, the subject is RVS authorization and the content is user information or your company information.Please upload a txt file containing the machine code .Subsequently, the authorization code and common Q&A files will be sent to the email address specified by the customer through rvs-support@percipio.xyz.
The received activation file is a license.txt or a string. Save the file as license.txt. Copy the txt file to the License directory in the RVS installation directory.
Operation steps:
Desktop shortcut Right-click → Open the location of the file → Find the license folder
Copy the license.txt file to the License directory.
Note: When Windows hides file extensions by default, a common mistake is to write a file extension with two suffixes, such as the license.txt file extension with the wrong license.txt.txt.
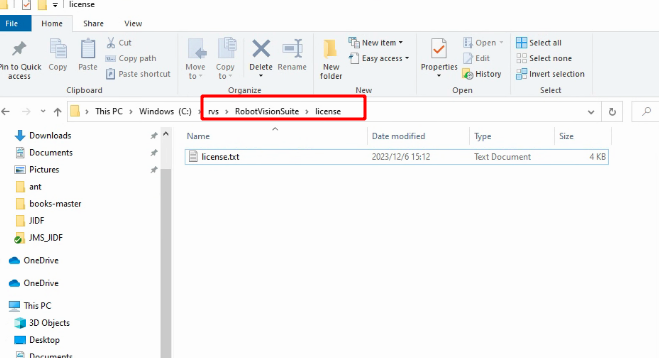
At this point, RVS activation is complete. Double-click the desktop shortcut again to start.
Trial License
Trial License need not apply directly to RVS developer community - > trial License download to download.
After you click the link, a string is displayed and save it as license.txt. Copy the txt file to the License directory in the RVS installation directory.
The procedure is the same as that for applying for a version license.
Q&A
White screen after software startup (software interface is all white)
Phenomenon: After double-clicking to start the software, the pop-up software interface is always white, and the console is displayed as follows:
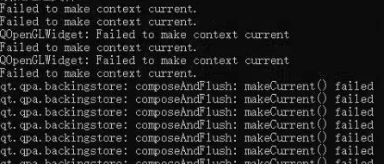
Solution : This problem is usually caused by the laptop is not enabled by the graphics card (due to not connected to the power supply or non-high performance mode, or the default setting does not enable the graphics card, etc.).
Steps : Go to Windows11 Settings → System → Screen → Display Card → Custom Options of Applications → Add Applications (or Browse), find RobotVisionSuite.exe, and then use a unique display for this selection.
For devices without NVIDIA graphics cards, this software is not considered compatible at this time.
Flash back when activating machine code generation
Check your computer’s network card Settings for any virtual network cards that are not enabled or in the wrong state.
Unable to save project data pictures and logs
Check whether the software installation path or save path is the C disk address that requires administrator privileges, refer to the [give software administrator privileges](# give software administrator privileges) section of this article or reinstall the software to another disk.
XXX.dll not found
Check the environment variable to see if “{RVS installation path}\RvsResources\bin” exists under the path entry, if not, manually add this directory to the PATH.
The terminal prints Error: Error=XML_ERROR_FILE_NOT_FOUND
Check the environment variable to see if there is an entry RVS_ROOT with the value of RVS installation directory. If not, add it manually.
Update Online
Note: RVS 1.3.239 and above can only be updated online.
Operation steps:
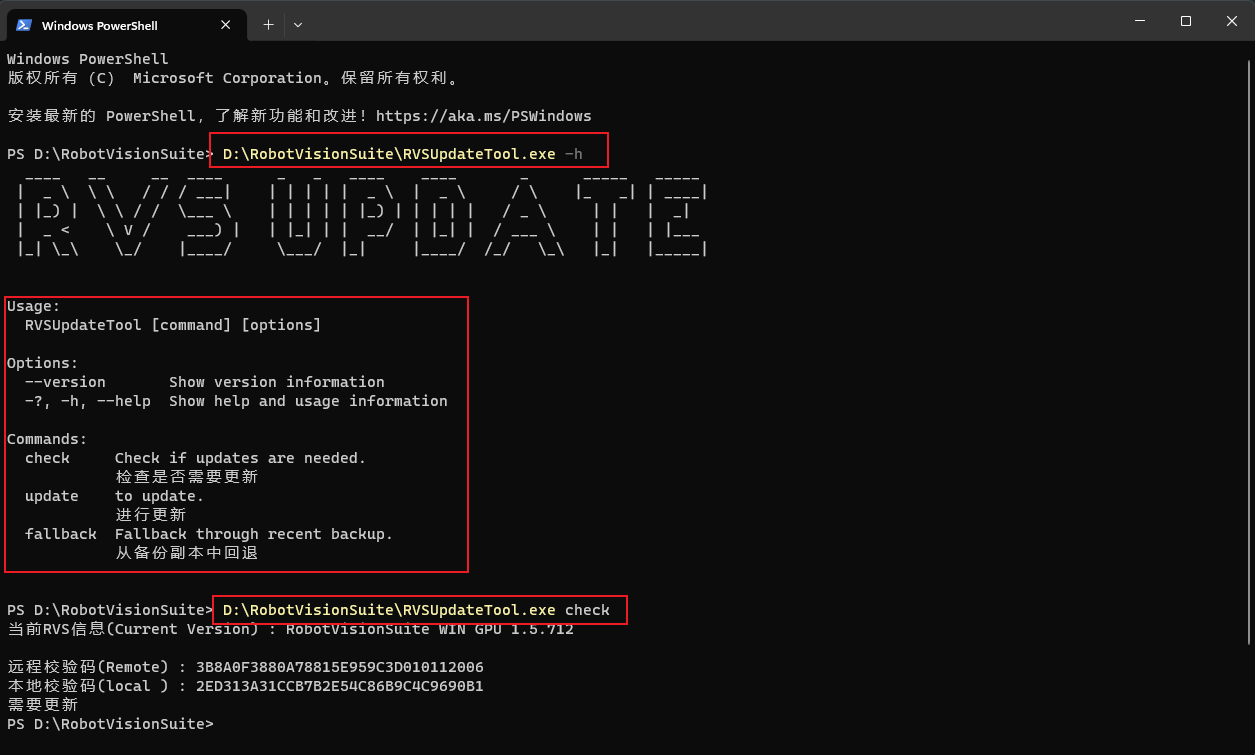
Open a command line window and go to the RVS installation path or open a command line window under the RVS installation path.
See usage help.
RVSUpdateTool.exe -h
Check for updates.
RVSUpdateTool.exe check
Perform the update.
RVSUpdateTool.exe update
Rollback from the backup copy.
RVSUpdateTool.exe fallback
RVS-Ubuntu-GPU version software installation
Install and configure the GPU software
| Requirements | Configuration |
|---|---|
| CPU | I7 6700 4 cores 8 threads or more |
| GPU | The minimum:NVIDIA GTX1050 (AI module can only reason, not train) Recommended:NVIDIA GTX1060 (Full features) |
| Internal memory | Minimum:8G Recommended:16G |
| Hard disk | 128G Free |
| System | Ubuntu 20.04 STL |
Update the NVIDIA driver
Installation Method 1
Open the system menu bar and select
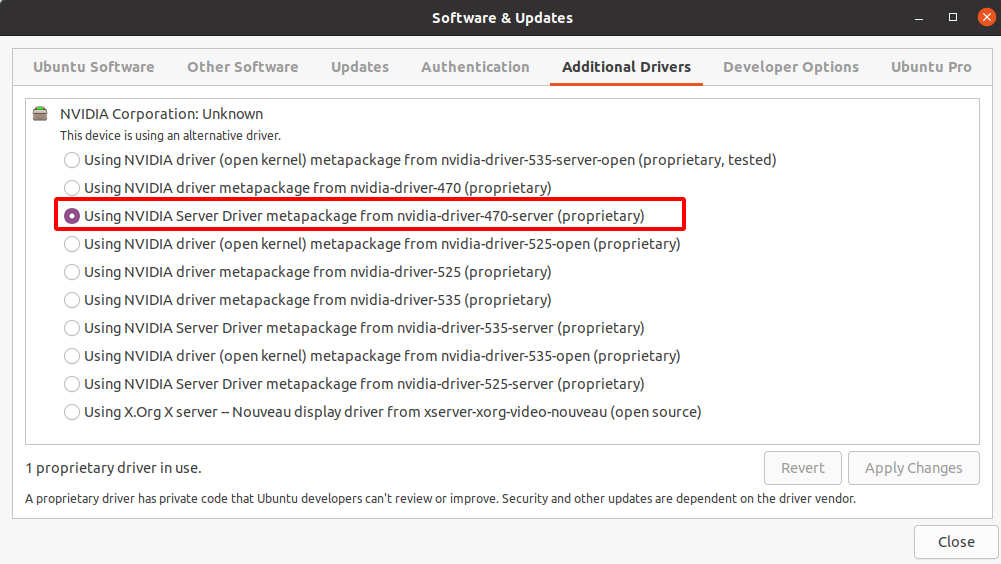
Software & Updates→Additional Drivers.Select driver version 470 and above and click
Apply changes.Wait until the installation is complete and restart the computer.
Installation Method 2
Keep the domestic source of Ubuntu 20.04 native system unchanged.
Update the source list.
sudo apt-get update
Added nvidia graphics driver dedicated source.
sudo add-apt-repository ppa:graphics-drivers/ppa
Update the download source.
sudo apt-get update
Lists the current system’s video card driver information and drivers that can be installed.
ubuntu-drivers devices
Select the driver version 470 or later, nvidia-driver-470-distro non-free recommended.
sudo apt-get install nvidia-470
Restarting after installation will overwrite the original driver, so there is no need to manually mask the old driver.
sudo reboot
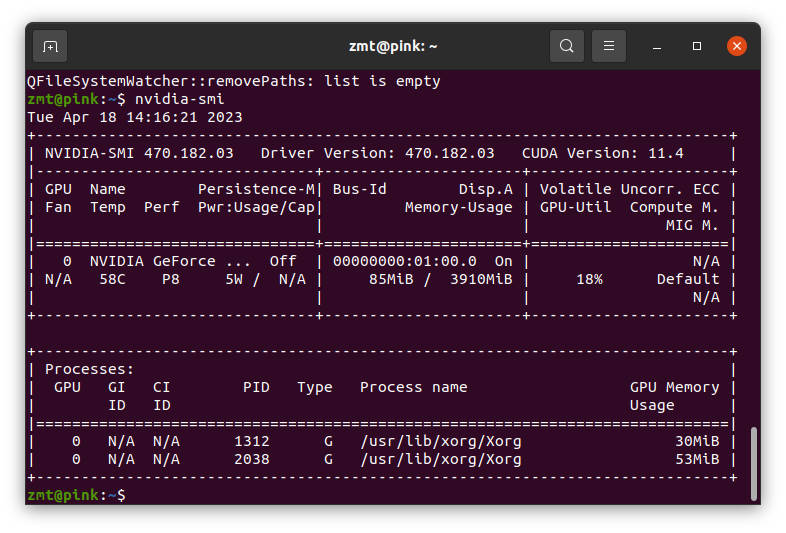
After restarting, check the graphics card information: nvidia-smi, if there is normal graphics card information output, the installation is successful, as shown below:
Note: Unable to access system issues
If the ubuntu OS is dual, a black screen may be displayed after the restart or the Ubuntu OS cannot be accessed. There are two reasons for this problem.
Reason 1 : The new graphics driver is not loaded by ubuntu
The solution:After booting into grub selection interface, press “e” to enter the boot script editing mode. Add acpi_osi=linux nomodeset after quiet splash to tell the kernel that linux is about to start, and then load linux related drivers. In this way, you can match the newly installed nvidia driver. nomodeset means to tell the kernel not to load the graphics card and to use BIOS mode until the graphical interface runs. This configuration item needs to be added to /boot/grub/grub.cfg after boot.
Reason 2: The computer does not support the above installation method to install the graphics card
Solution: Go to the official website to download NVIDIA closed source driver package.deb for manual installation, after installation will shield ubuntu built-in driver, no need to manually shield.
Install the RVS software
Download the RVS package with the file name RobotVisionSuite-XX-GPU.run. This case uses RobotVisionSuite-1.5-GPU.run.
Give the user executable permission for the software package:
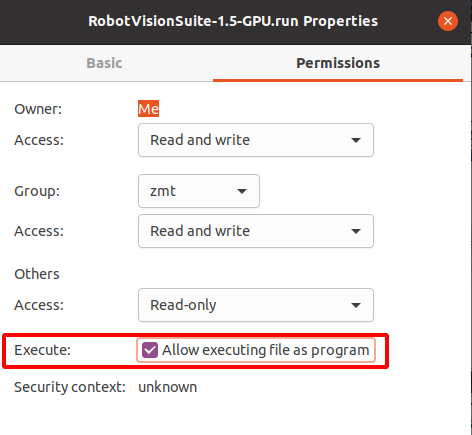
Method 1 : Right-clicksoftware package, select Properties, in the content ofPermissions, check the box after Execute.
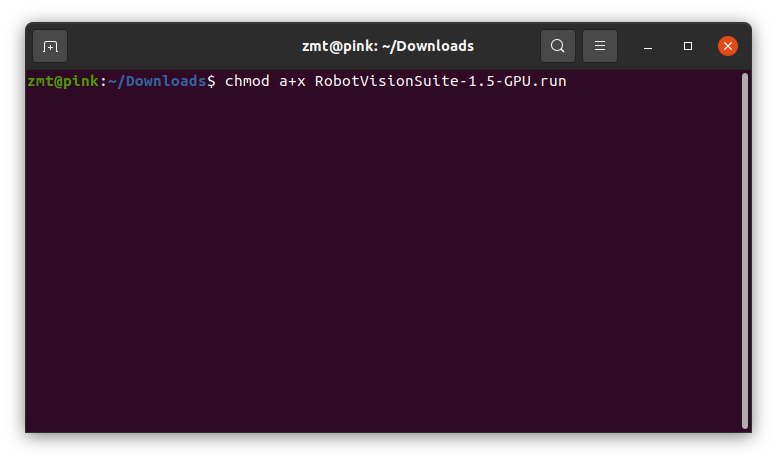
Method 2 : Open the terminal and enter the command.
chmod a+x RobotVisionSuite-XXX-GPU.run (Note the path)
Double-click the installation package to install it, or enter./RobotVisionSuite-XXX-GPU.run on the terminal (note the path). Click
Next.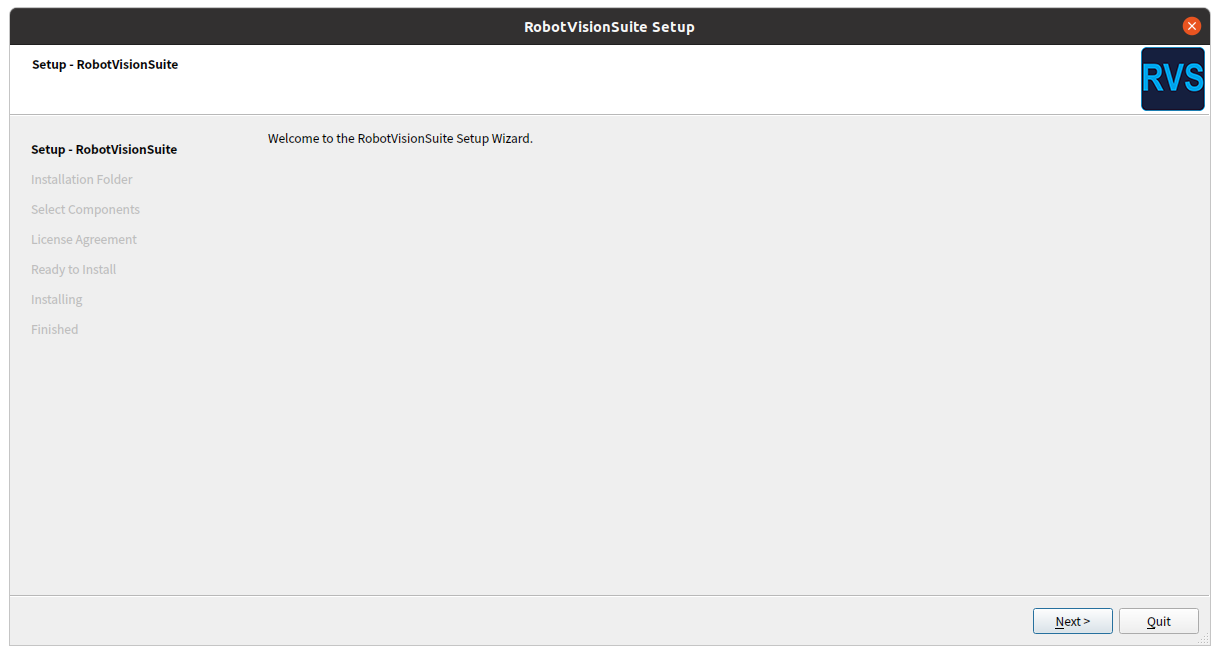
The default installation directory is ~/rvs-installed. Click
Next.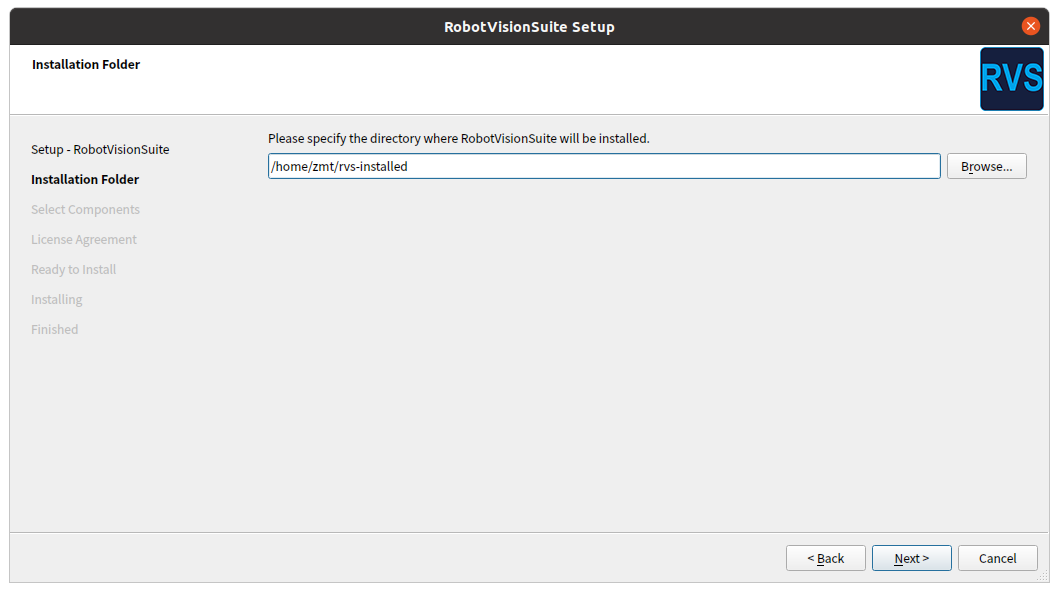
Select the installed component, usually Select All , select
Select All, and clickNext.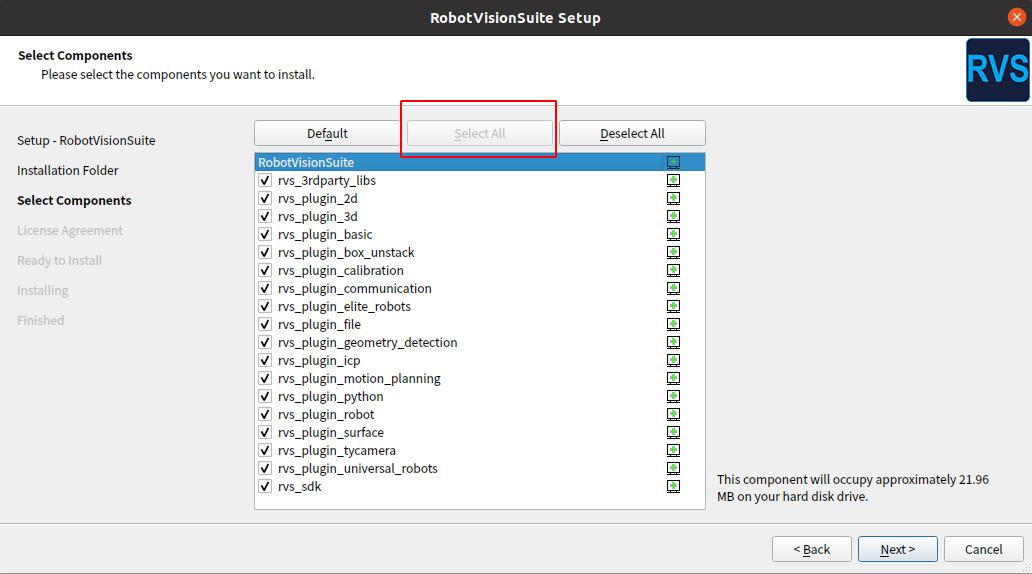
For the license, select ‘I accept the license’ and click
Next.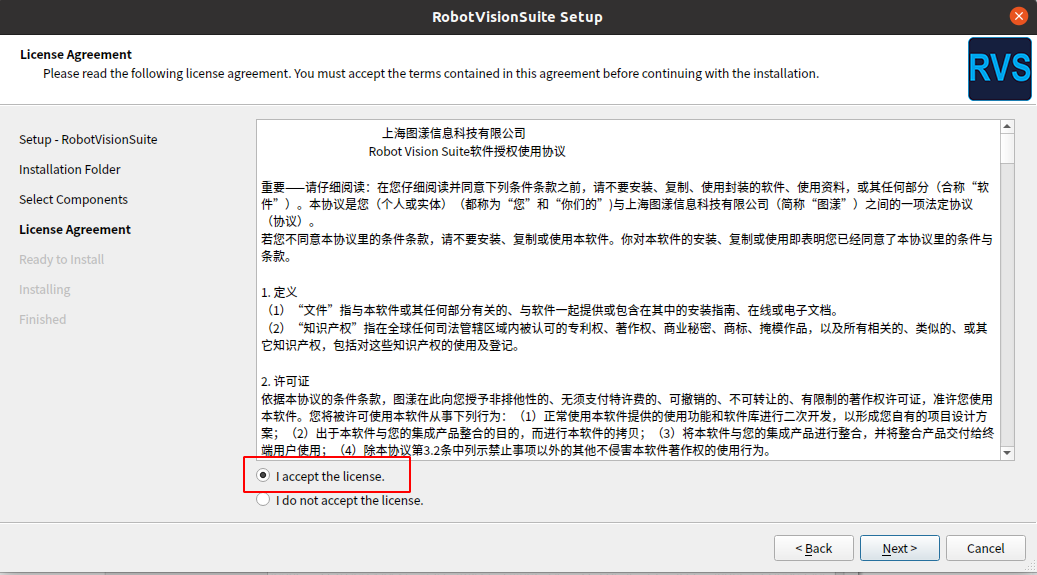
To start the installation, click
install.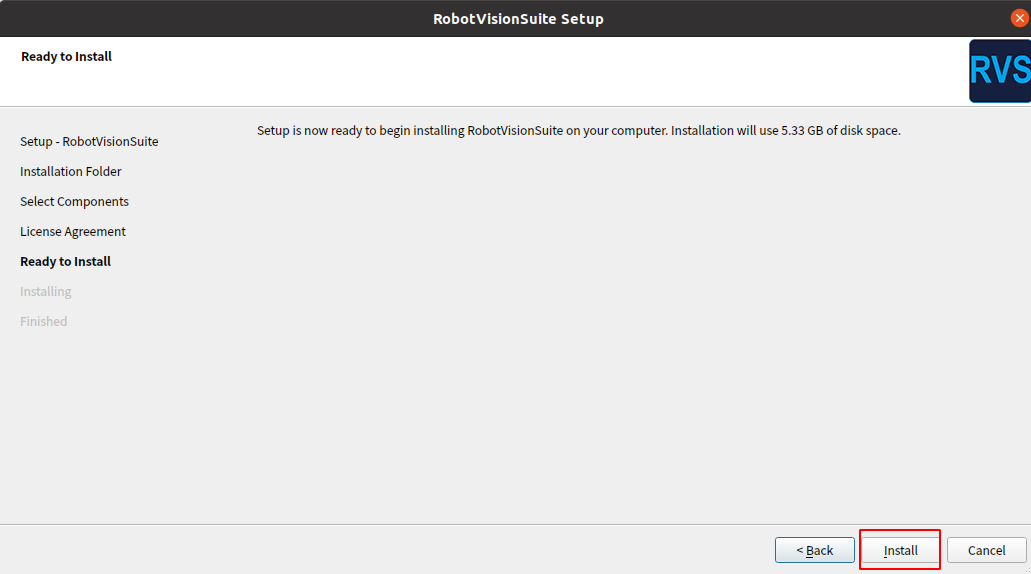
If the Installer Error pop-up window is displayed during the installation process,
Ignorecan be used.
The user password is required here.
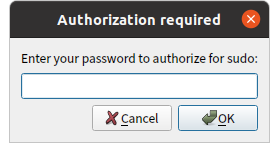
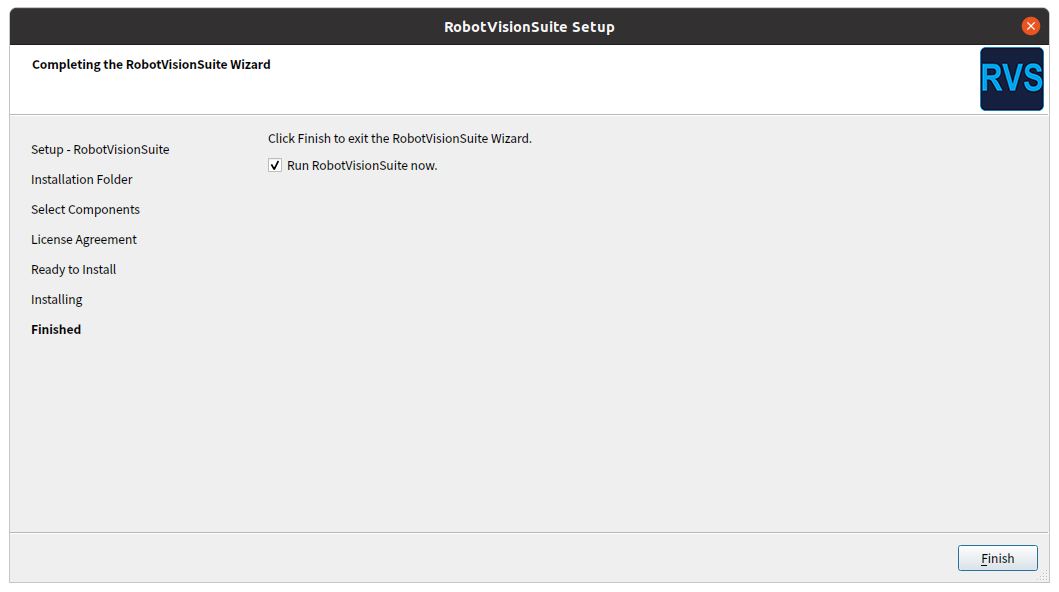
Wait for the installation to Finish and click
Finish.
Start RVS
Run RVS for the first time
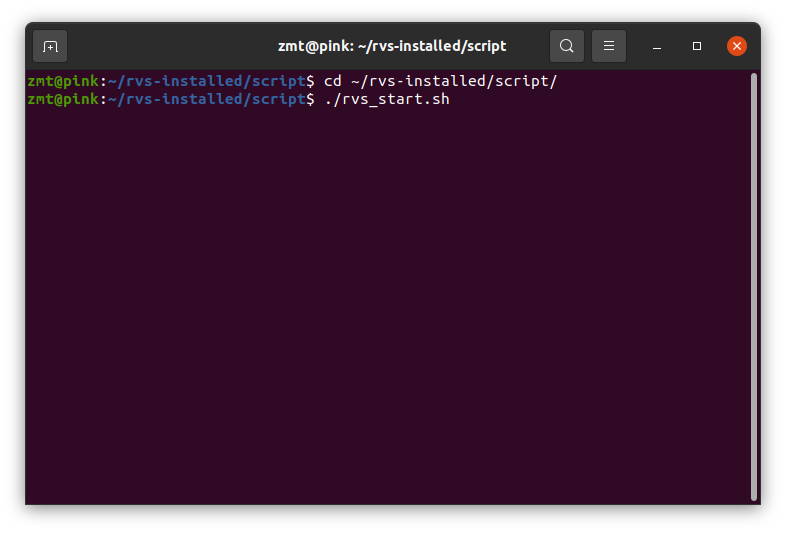
Script to start RVS: Open the terminal, first go to the script in the RVS installation directory:
cd ~/rvs-installed/script/
Start the software:
./rvs_start.sh
If the page starts normally, skip this step. If the page fails to start normally, a message is displayed indicating that the library is missing, for example, error while loading shared libraries:XXX:cannot open shared object file,RVS environment dependencies need to be supplemented.
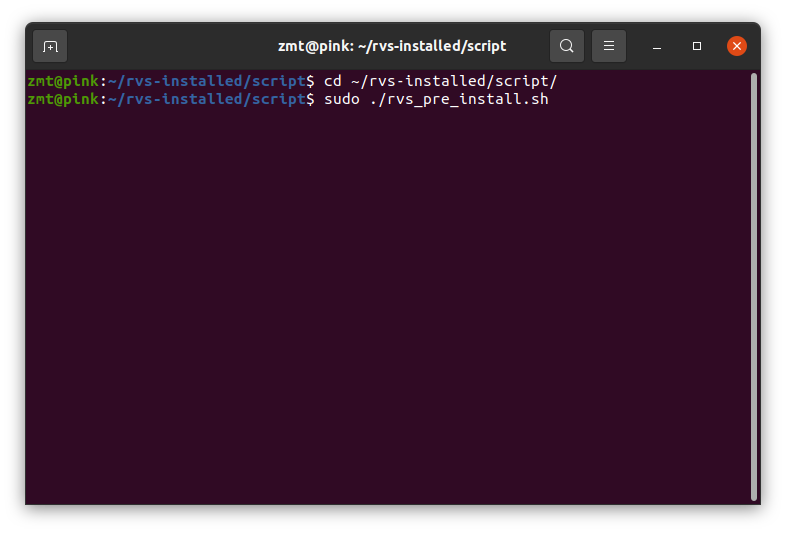
Still under script in the RVS installation directory, execute rvs_pre_install.sh. Enter the following command.
sudo ./rvs_pre_install.sh
When the interface starts normally, the pop-up window that needs to activate the file will pop up. Click
OK.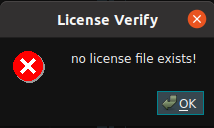
The License window will then pop up to activate the software.
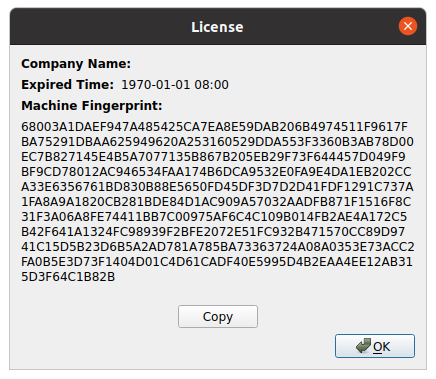
Get software activation (Apply for version license)
Click copy this string of machine code and send an email to Info@percipio.xyz or contact percipio sales staff. The content of the email includes but is not limited to, the subject is RVS authorization and the content is user information or your company information. Please upload the txt file containing machine code in the attachment. Subsequently, the authorization code and common Q&A files will be sent to the mailbox designated by the customer through rvs-support@percipio.xyz.
The activation file name is license.txt. Copy this txt file to the Licenses (~/ rvs-installed /Licenses) in the RVS installation directory to complete rvs activation.
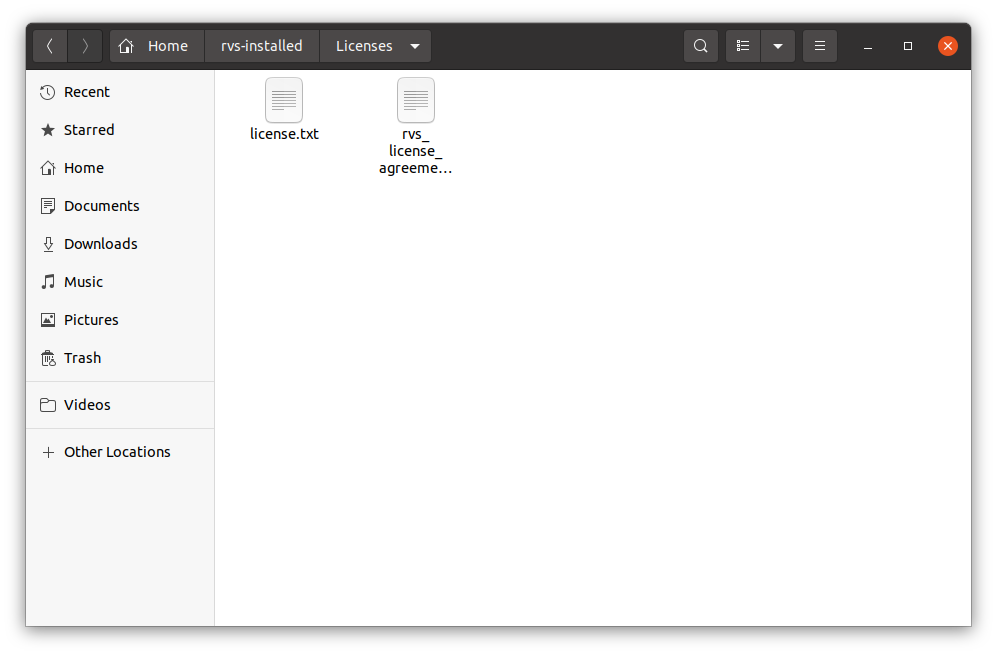
Get software activation (trial license)
Trial License need not apply directly to RVS developer community - > trial License download to download.
After you click the link, a string is displayed and save it as license.txt. Copy the txt file to the License directory in the RVS installation directory.
The procedure is the same as that for applying for a version license.
Icon to run RVS
After activation, the boot mode is still script boot: script Start RVS: Open the terminal and go to Script in the RVS installation directory.
cd ~/rvs-installed/script/
Start the software:
./rvs_start.sh
Or you can use the icon to quickly access the RVS software:
When the script is started for the first time, find the RVS software icon in the dock bar, right-click the icon and select Add to Favorites to fix it in the dock bar.
RVS-GPU version of docker image installation
The docker image of RVS is applicable to the working environment where node needs to be compiled. However, you can still manually add the compiled dynamic link library to rvs_sdk/build/lib in the RVS installation directory (if no manual creation is required). This allows devices that do not have an image installed to use the compiled dynamic library.
Install docker
Download dockerInstall Installation script. The file name is dockerInstall.sh.
./dockerInstall.sh
Test whether docker was installed successfully.
sudo docker run --rm --gpus all nvidia/cuda:11.0.3-base-ubuntu20.04 nvidia-smi
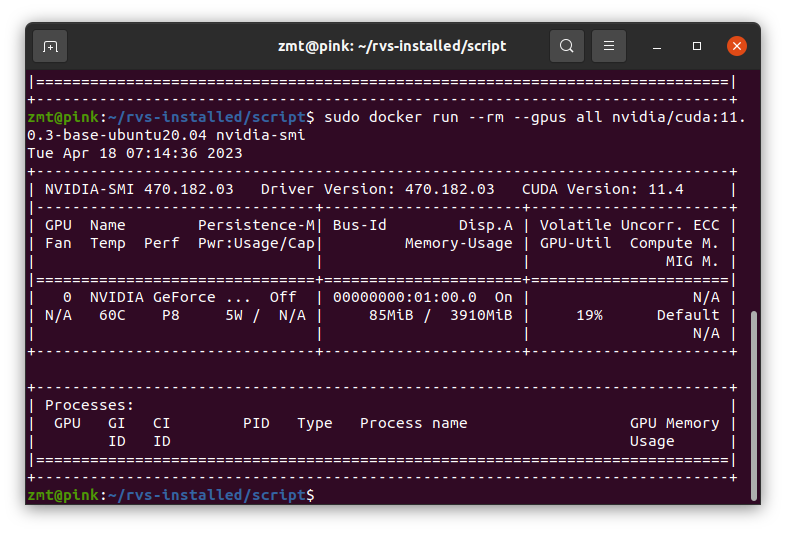
If the output is similar to the above table style, it proves successful. If cuda11.0 is not installed, this step will be automatically installed.
Ubuntu adds users to docker group users, running without sudo
Method 1 : Executing the docker command directly will encounter permission problems, because the /var/run/docker.sock file, except the root user, only docker group users can read and write.
View all group users.
cat /etc/group
Add the current user to the docker group.
sudo gpasswd -a 用户名 docker
Then logout the current user, log in again, or restart, and cat /etc/group is shown below.
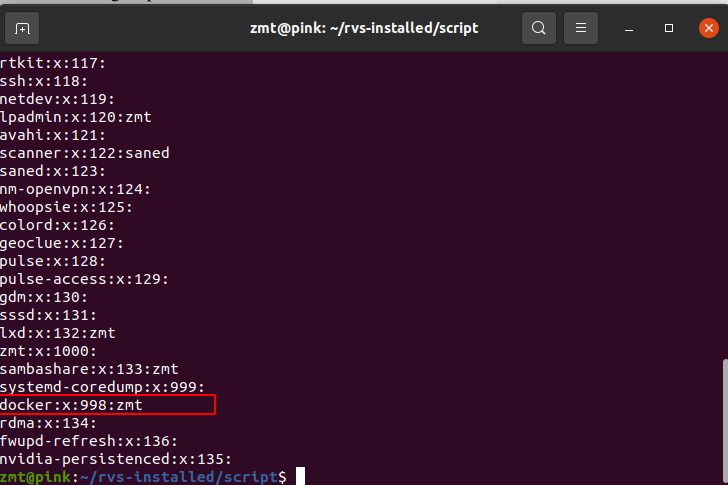
Method 2: If docker does not exist in /etc/group/, sudo permissions are not required to add a user to a docker user group using the following method.
Create a user group first.
sudo groupadd docker
Add a user to a group.
sudo gpasswd -a${USER}dockerRestart the service.
sudo service docker restart
The current session is switched to the new group.
newgrp - docker
Docker loading the image
Download rvs-runtime - x.x.x.tar. gz installation package, extract the file after called rvs-runtime-x.x.x.tar.
In the decompressed directory, type:
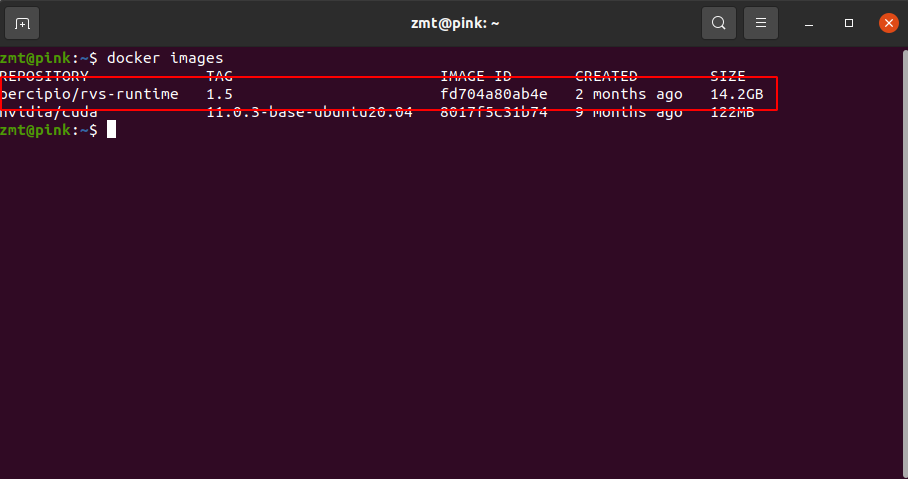
docker load -i rvs-runtime-x.x.x.tar
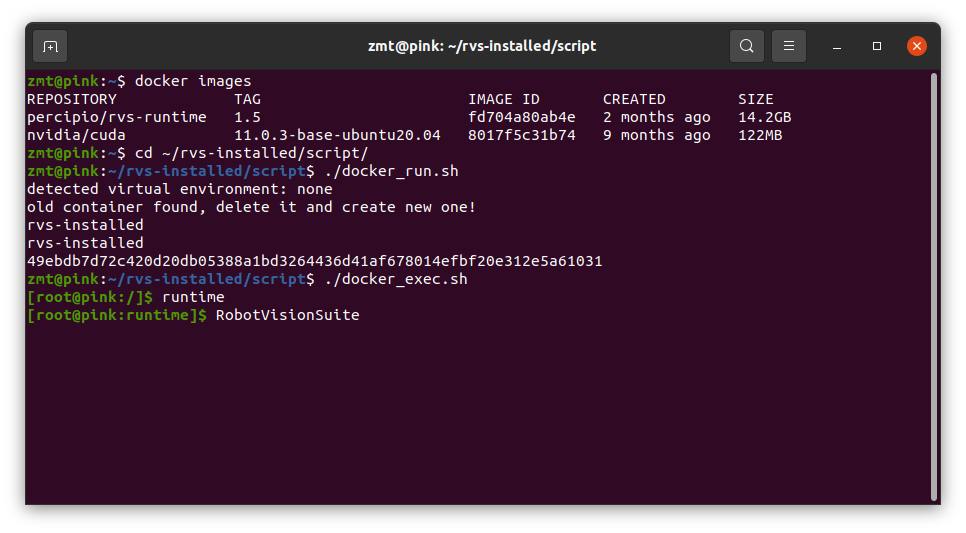
After loading, run the docker images command to view the currently loaded image, as shown in the figure:
Docker start software
Script start docker: Open the terminal. First go to script in the RVS installation directory:
cd ~/rvs-installed/script/
Start the docker image:
./docker_run.sh
Enter the docker container:
./docker_exec.sh
If you successfully enter docker, you will appear as the root user.
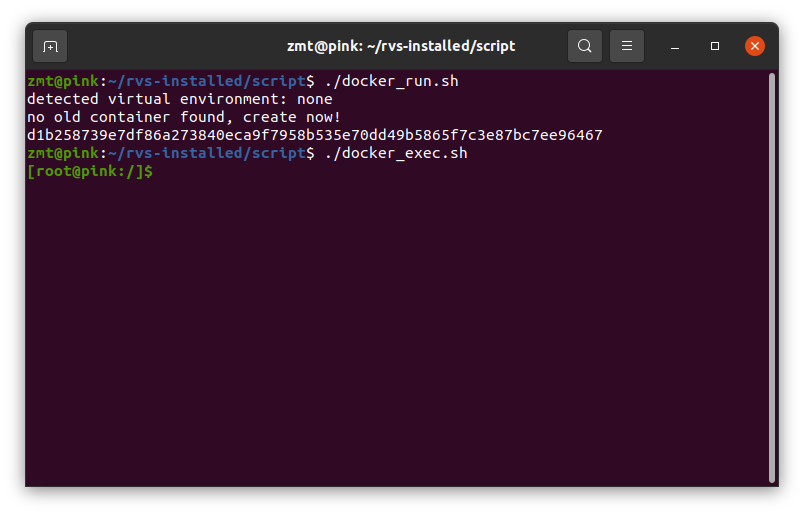
Start RVS software: Enter runtime in docker to quickly enter the project directory.
runtimeStart RVS
RobotVisionSuite
 When activating the RVS-GPU version, you can start the software interface normally. However, when you want to enter the docker environment of RVS-GPU to start the software interface, the dialog box “no license file exists!” is displayed. Please enter the following command in the terminal that has entered docker:
export RVS_LICENSE_DIR="/rvs/Licenses"
In general, it is only recommended to compile in docker, and try not to launch a graphical interface in docker.
You can also manually enter the projects directory to manage multiple projects:
cd /rvs/projects
Browse for multiple items in the current folder.
ls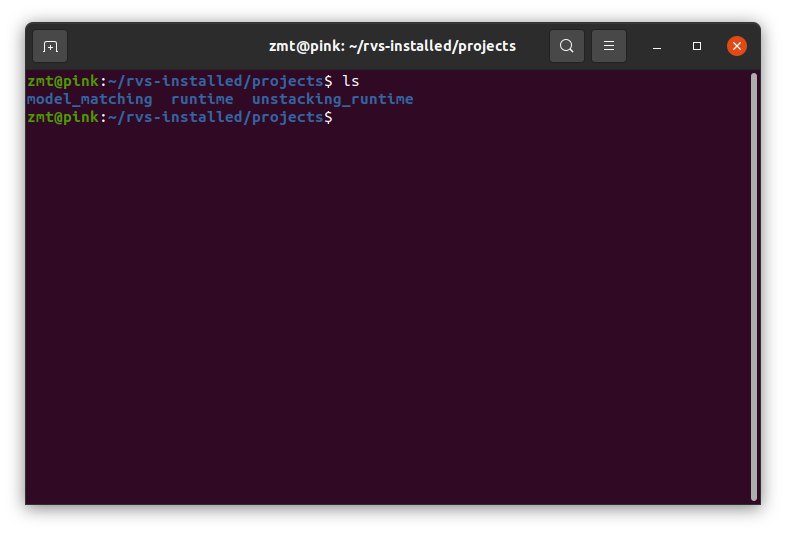
Online update
Note: RVS 1.5.239 and above can only be updated online.
**Operation steps: **
Open the command line window in./rvs-installed/script.
See usage help.
./RVSUpdateTool -h
Check for updates.
./RVSUpdateTool check
Perform the update.
./RVSUpdateTool update
Rollback from the backup copy.
./RVSUpdateTool fallback
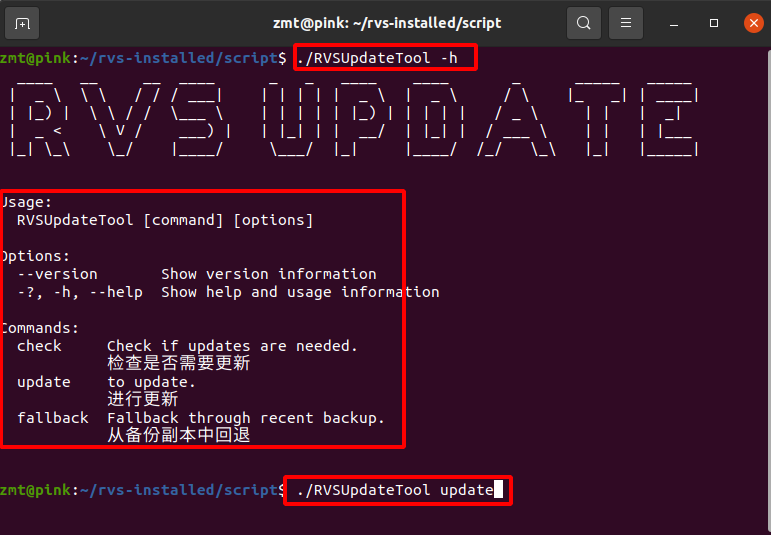
RVS-Ubuntu-CPU version software installation
Install and configure the CPU software
| Requirements | Configuration |
|---|---|
| CPU | I3 6300 Dual core 4 threads |
| GPU | No GPU required or GPU below 1050 |
| Internal memory | Minimum: 8G Recommended: 16G |
| Hard disk | 128G Free |
| System | Ubuntu 20.04STL |
Install the RVS software
The CPU and GPU versions are installed the same way. Reference RVS - Ubuntu - GPU installation operation.
Install docker
Download the dockerInstall installation script in dockerinstall-cpu.sh. In addition to testing whether the docker installation is successful and the GPU is different, the rest of the docker image installation and startup software are consistent with the GPU description, which will not be described in this chapter. Refer to RVS - Ubuntu - GPU section operation.
./dockerInstall-cpu.sh
To test whether docker was installed successfully:
docker run ubuntu:20.04 /bin/echo “Hello world”
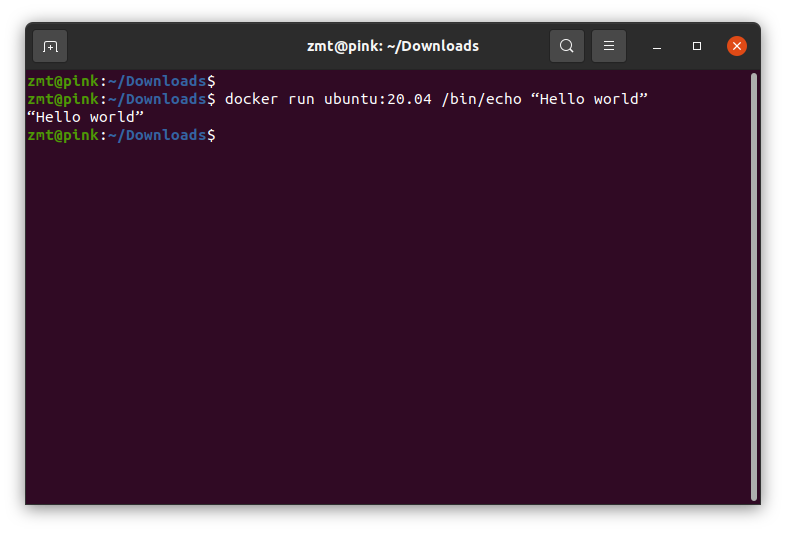
If the output is similar to the above table style, it proves successful. If the ubuntu20.04 image is not installed, this step will be automatically installed.