ROS (Robot Operating System, hereinafter referred to as ROS) is an open-source meta-operating system for robots. It provides services that an operating system should have, including hardware abstraction, low-level device control, implementation of common functions, inter-process message passing, and package management.
Use git command to get a local copy: Open a terminal, navigate to the working directory where you want to store the SDK, and enter the git clone command to clone the remote repository.
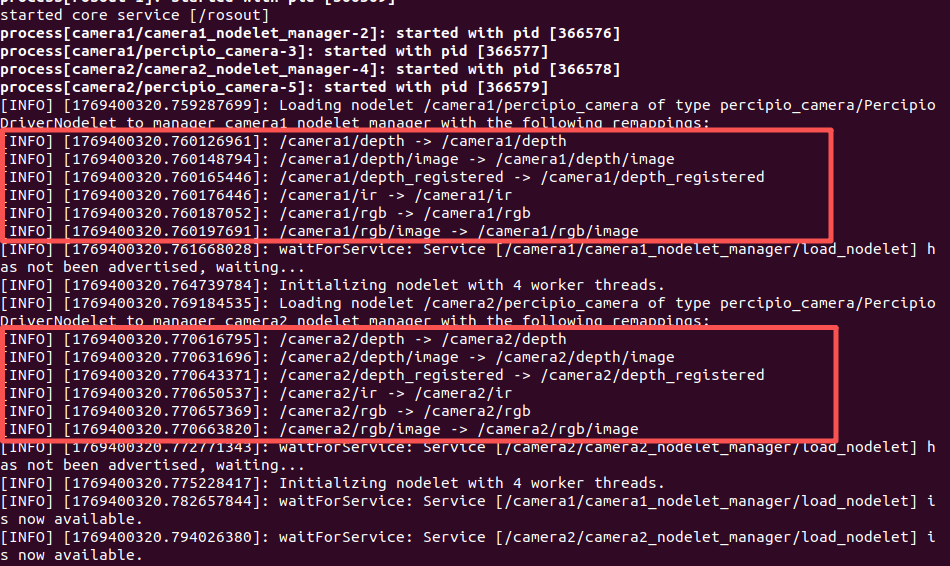
percipio_launch: Launch configuration module, including the launch package.
This package implements ROS node startup and configuration through XML configuration files, supporting attributes such as node name, type, and parameters. Additionally, its launch files support the declaration of service nodes, facilitating the integration of subscription service functionality. Python example programs are provided within the package. For specific usage, refer to Subscribe to Topics.
percipio_launch/
├── 📂 launch/ # ROS launch configuration file directory
│ ├── 📂 includes/ # Common include files
│ ├── 📄 percipio.launch # Single camera launch configuration
│ └── 📄 percipio_multi.launch # Multiple camera launch configuration
├── 📄 CHANGELOG.rst # Version changelog
├── 📄 cloud.py # Point cloud display and save script
├── 📄 CMakeLists.txt # CMake build configuration
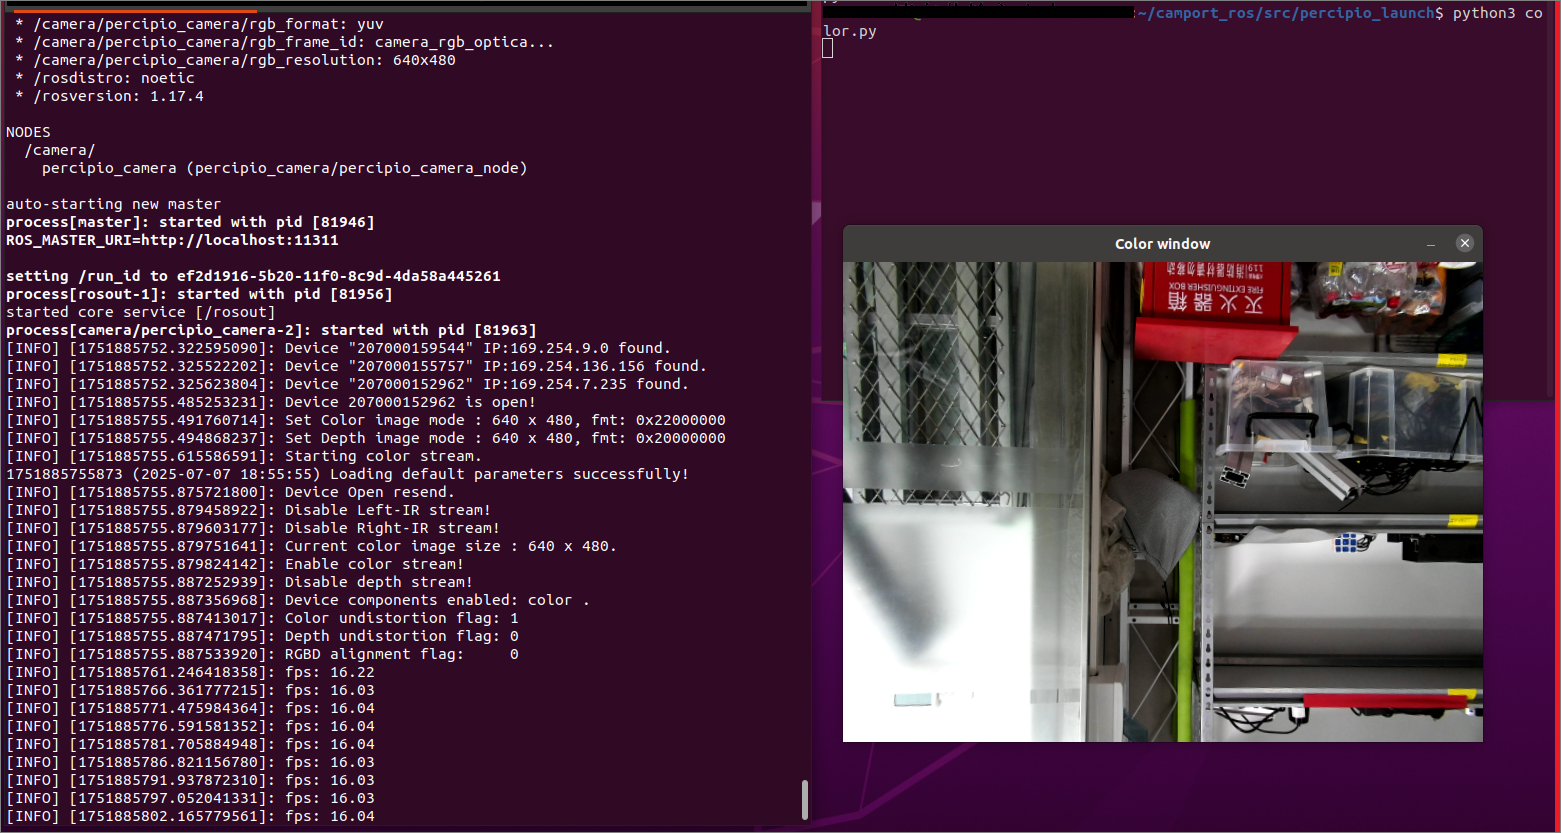
├── 📄 color.py # Color image display script
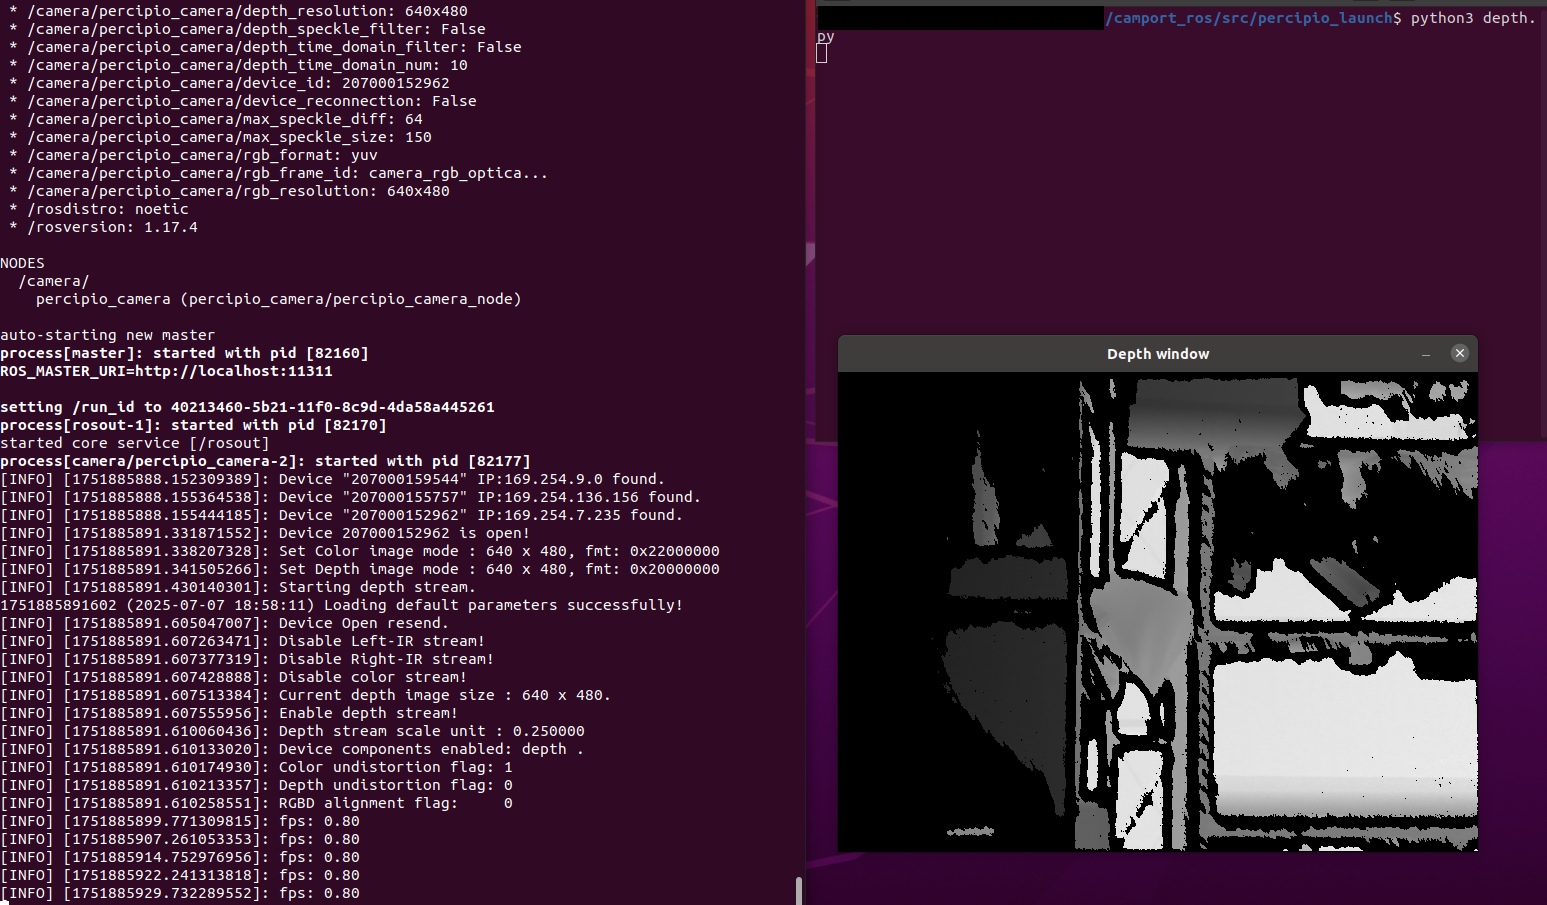
├── 📄 depth.py # Depth image display script
├── 📄 depthcloud.py # Colored point cloud display and save script
├── 📄 device_event_listen.py # Camera event monitoring script
├── 📄 dynamic_config.py # Dynamic parameter configuration script
├── 📄 package.xml # ROS package definition file
├── 📄 parameters.xml # Camera parameter configuration file
├── 📄 reset.py # Camera software reset script
└── 📄 soft_trigger.py # Software trigger control script
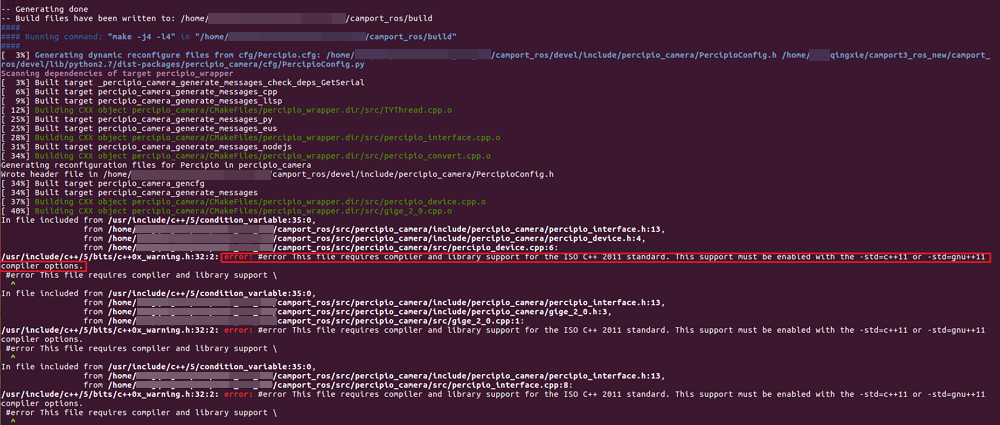
After compilation, a build folder (containing intermediate files) and a devel folder (containing final files: header files, dynamic/static libraries, executables) will be generated.
ROS 1 supports three ways to modify camera parameters.
Method 1: Pre-configure parameters using Viewer software and save them to the camera (Recommended)
GigE2.1 Cameras (PMD Series and GM Series Cameras)
Use Viewer software to save parameter settings to a UserSet attribute group and set this group as the default User Set attribute group to load. The camera will automatically load the parameter configuration from this User Set attribute group upon power-up.
GigE2.0 Cameras (Cameras other than PMD Series and GM Series)
Use Percipio Viewer software to save parameter settings to the camera’s Storage area. ROS will automatically load the parameter configuration from the Storage area upon startup and begin image acquisition.
Method 2: Edit percipio.launch configuration file
Configure parameters to be loaded when the camera node starts in the percipio.launch file. This method is only applicable to parameters included in the configuration file.
Specific steps are as follows:
Execute the following command to open the percipio.launch file:
cdsrc/percipio_launch/launch/geditpercipio.launch
Adjust parameter values in the configuration file according to actual needs.
Example: Specifying a Camera
Find the device_id parameter in the file and modify its default value.
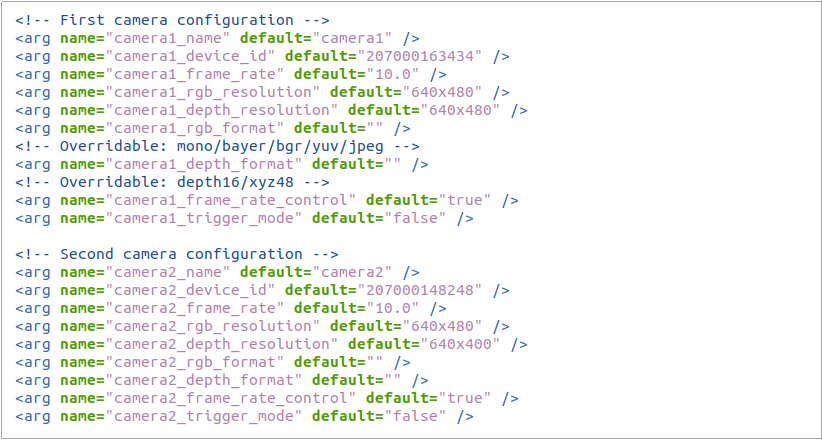
<argname="device_id"default="207000106930"/>
Tip
The default value for device_id is #1, meaning the first camera found will be opened by default.
Setting default to a camera SN means opening the camera by specifying its serial number.
Setting default to a camera IP means opening the camera by specifying its IP address.
For more parameter configuration descriptions, refer to the table below.
Configurable Parameters in percipio.launch
Attribute Name
Description
Value Range
device_id
Specify camera
#1 / Camera SN / Camera IP
device_reconnection
Camera reconnection switch
true/false
device_log_enable
Enable/Disable camera Log
true/false
device_log_level
Set camera Log level
VERBOSE/DEBUG/INFO/WARNING/ERROR
device_log_server_port
Set server port
Default: 9001
frame_rate_control
Frame rate control switch
true/false
frame_rate
Set output frame rate
Float, Default: 5.0
trigger_mode
Trigger mode switch
true/false
frame_rate_control and trigger_mode cannot be enabled simultaneously.
If both are enabled, frame_rate_control takes effect, trigger_mode does not.
rgb_resolution
Color resolution
Width x Height of color image
depth_resolution
Depth resolution
Width x Height of depth image
rgb_format
Color image format
mono/bayer/bgr/yuv/jpeg
bayer: Includes CSI_BAYER10GRBG, BAYER8GB, BAYER8BG, CSI_BAYER12GBRG
mono: Includes MONO10
yuv: Includes YUYV, YCbCr
depth_format
Depth image format
depth16/xyz48
depth_registration
Depth and color image alignment switch
true/false
This enable switch only takes effect when both color and depth images are enabled simultaneously.
This setting is invalid for cameras without an RGB component.
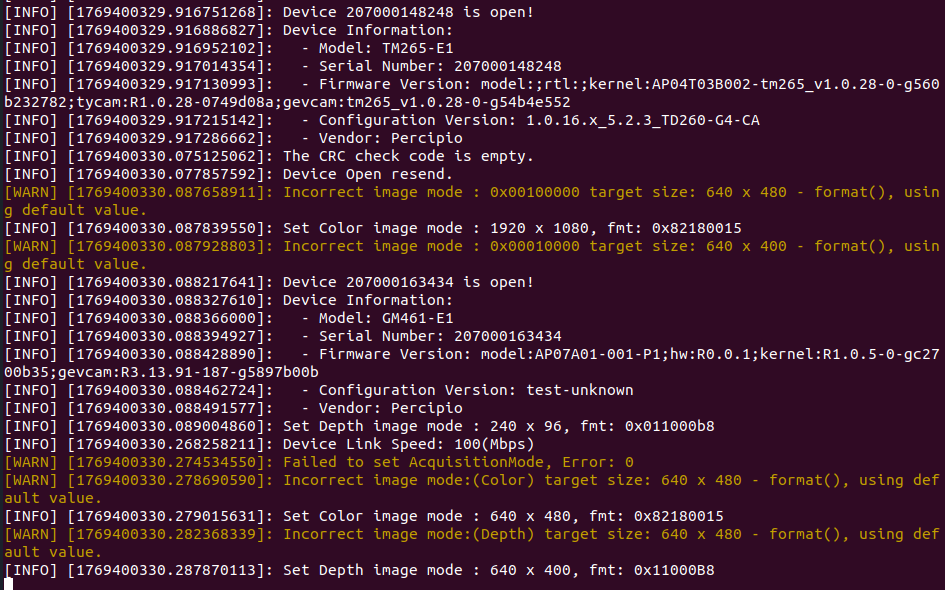
If a camera outputs images with a format or resolution not supported as configured in the percipio.launch file, the camera will output images with the default configuration.
Method 3: Edit parameters.xml configuration file
Navigate to “src/percipio_launch” to configure parameters loaded when the camera node starts. This method is only applicable to parameters included in the configuration file.
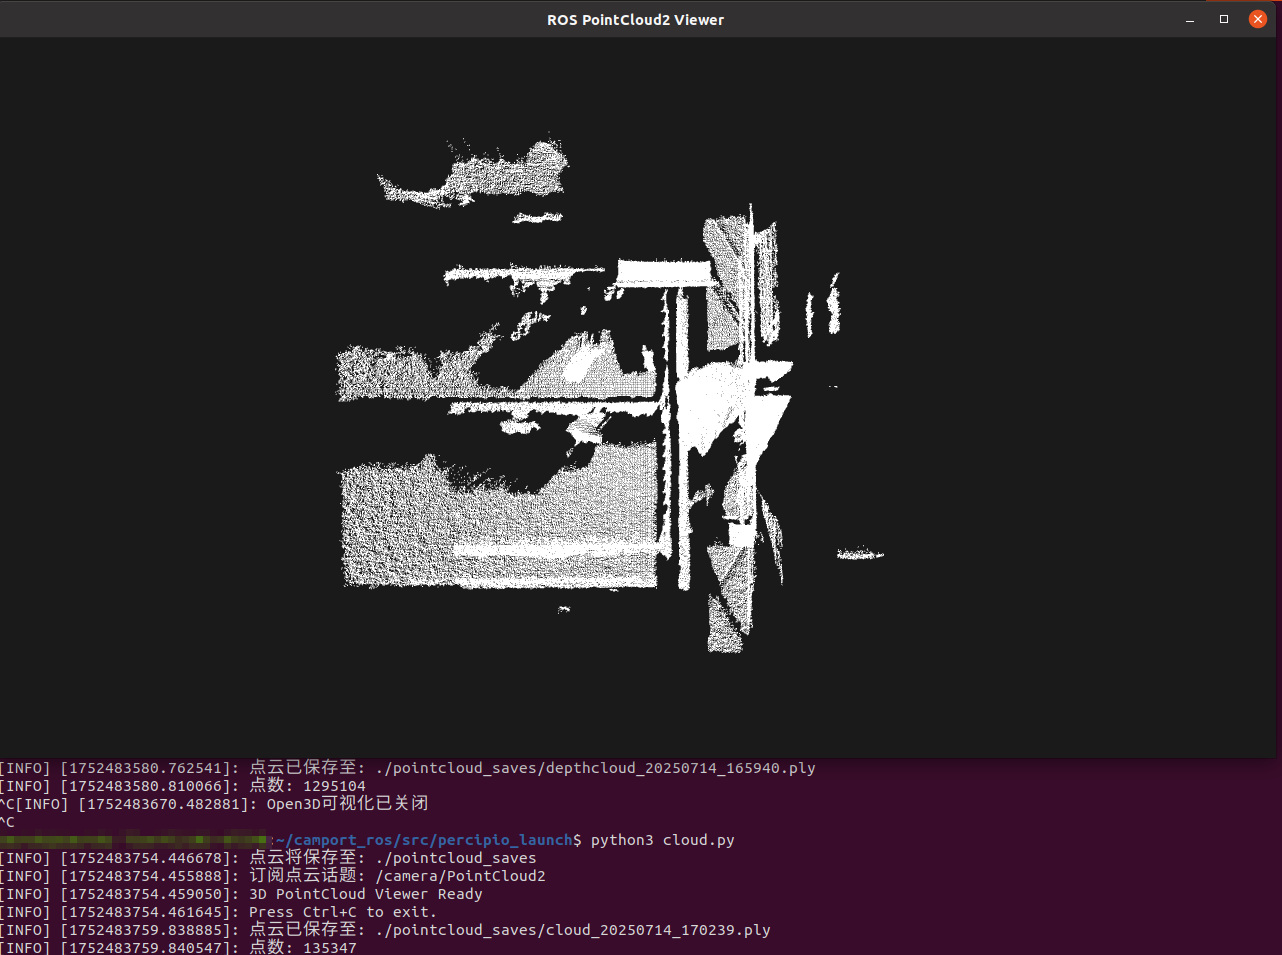
cloud.py: Enables the specified camera to acquire a point cloud with a specified format and resolution, and save it.
a. Open Terminal 1, run roslaunchpercipio_launchpercipio.launch to start the camera node.
b. Open Terminal 2, navigate to the “src/percipio_launch” path. Enter python3cloud.py and run it.
A window will pop up, displaying the raw point cloud from the specified camera in real-time. Simultaneously, Terminal 2 will print the point cloud save path and point count.
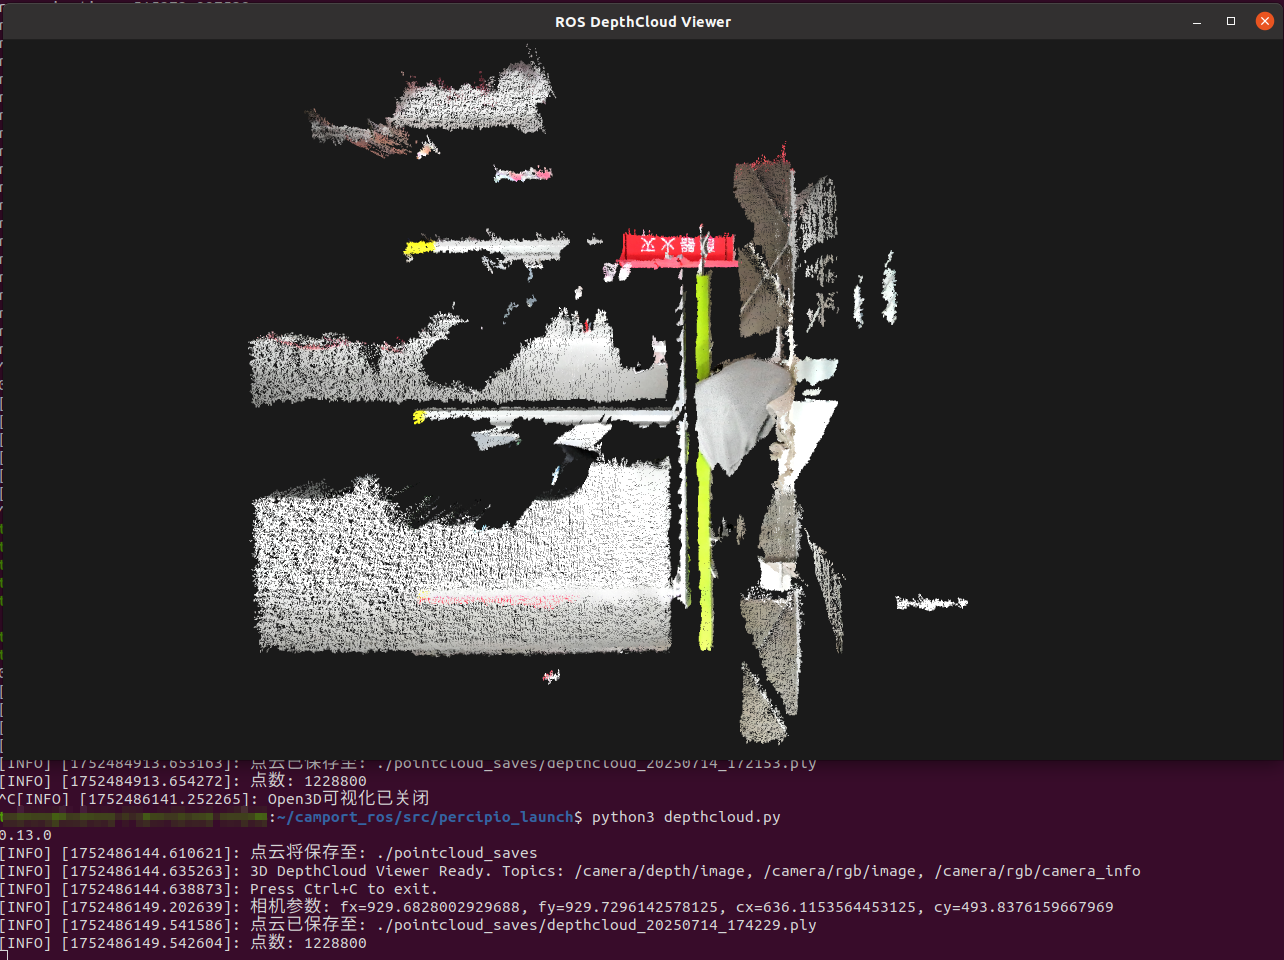
depthcloud.py: Enables the specified camera to acquire a colored point cloud with a specified format and resolution, and save it.
a. In the percipio.launch file, set depth_registration to true and save.
b. Open Terminal 1, run roslaunchpercipio_launchpercipio.launch to start the camera node.
c. Open Terminal 2, navigate to the “src/percipio_launch” path. Enter python3depthcloud.py and run it.
A window will pop up, displaying the colored point cloud from the specified camera in real-time. Simultaneously, Terminal 2 will print the point cloud save path and point count.
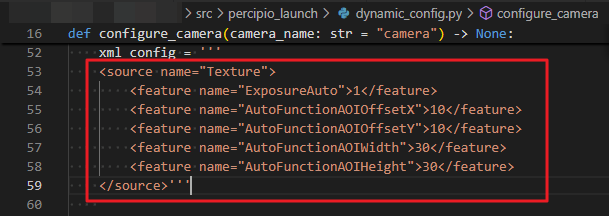
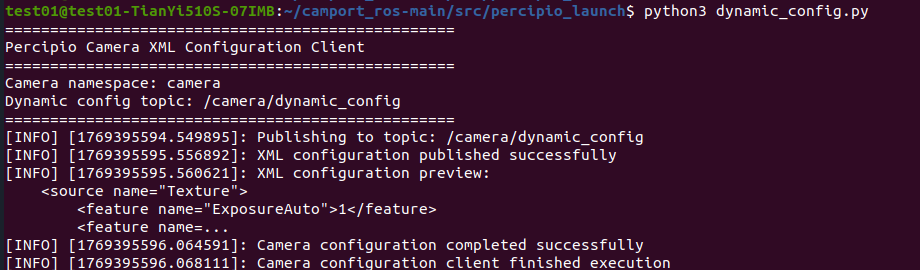
dynamic_config.py: Camera parameters can be dynamically modified during operation using this script.
a. Open Terminal 1, run roslaunchpercipio_launchpercipio.launch to start the camera node.
b. Navigate to the “src/percipio_launch” path, modify parameters in the dynamic_config.py file.
Note
Dynamically configured parameters can only be those that can be modified during camera acquisition, such as exposure time, gain, analog gain, laser brightness, etc.
c. Open Terminal 2, enter python3dynamic_config.py and run it.
d. Run python3color.py to view the effect after parameter adjustment.
reset.py: When a camera encounters an error during operation and it’s inconvenient to power cycle the camera, you can use this script to reset the camera.
a. Open Terminal 1, run roslaunchpercipio_launchpercipio.launch to start the camera node.
b. Open Terminal 2, navigate to the “src/percipio_launch” path. Enter python3color.py and run it to enable camera image acquisition.
c. Open Terminal 3, navigate to the “src/percipio_launch” path, enter python3reset.py and run it to reset the camera.
d. Return to Terminal 2, observe the output information. If the camera successfully resets and begins acquiring images again, it indicates the reset operation is complete.
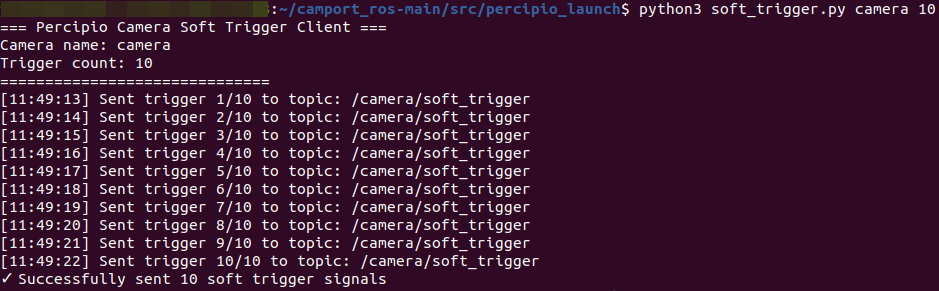
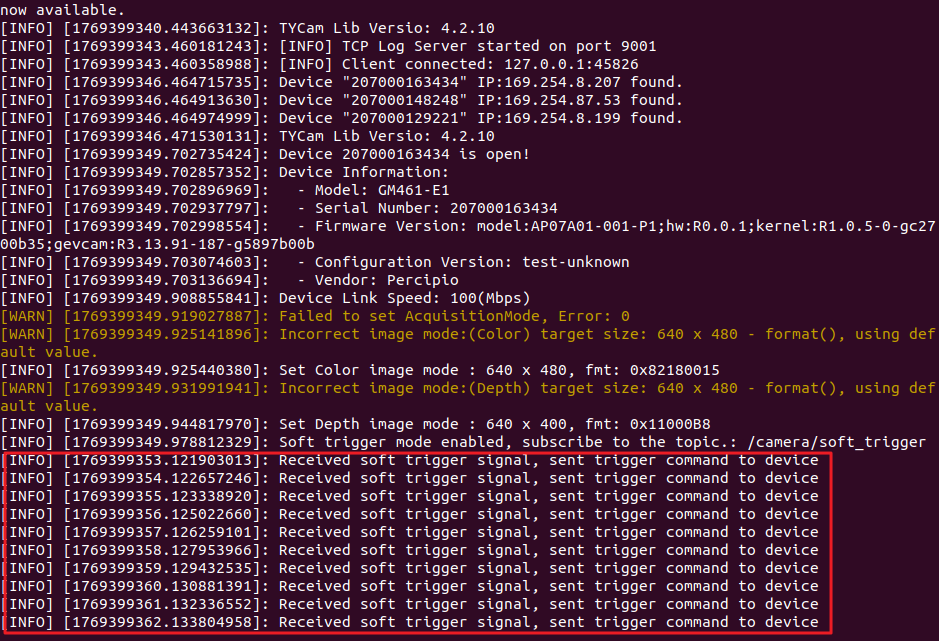
soft_trigger.py: Used to send software trigger signals. The camera will capture an image upon receiving the signal.
a. Open the percipio.launch file and set the trigger_mode parameter to true.
b. Open Terminal 1, run roslaunchpercipio_launchpercipio.launch to start the camera node.
c. Open Terminal 2, navigate to the “src/percipio_launch” path, enter python3soft_trigger.pycamera10 and run it to send 10 software trigger commands to the camera.
d. Return to Terminal 1, it will display that 10 software trigger commands have been received.
No depth image output immediately when running python3depth.py after enabling temporal filtering
The temporal filtering function requires collecting 2-10 frames of raw depth data to fill the buffer (specific frame count configurable). Depth images are output after multi-frame temporal fusion calculation. Therefore, there will be a brief delay after program startup.
Camera output image format or resolution does not follow UserSet preset parameters or Storage area configuration
If the camera storage area or UserSet has set the image format and resolution, and the percipio.launch file also configures the image resolution and format, ROS will dynamically set these parameters via the launch file with priority.