ROS 2 (Robot Operating System 2) is the second-generation version of the Robot Operating System. It is an open-source robotics software framework designed to provide tools and libraries for robot development, simplifying the creation and management of robotic applications. Developed and maintained by Open Robotics, ROS 2 inherits many advantages from ROS 1 while making architectural and functional improvements to meet the requirements of modern robotic systems.
Use git command to get a local copy: Open a terminal, navigate to the working directory where you want to store the SDK, and enter the git clone command to clone the remote repository.
src/percipio_camera/launch: Contains ROS 2 launch files for starting nodes and configuring parameters. percipio_camera.launch.py is used to start a single camera, while multi_cam.launch.py is used to start multiple cameras. Additionally, several Python scripts included in the package can be used to subscribe to nodes and display image data, send software triggers, perform offline detection, etc. For details, refer to Subscribe to Camera Node.
src/percipio_camera/src: Contains main source code files, including node implementation and camera drivers.
src/percipio_camera/CMakeLists.txt: CMake build system configuration file.
src/percipio_camera/package.xml: Package manifest file describing the package name, version, author information, license information, build dependencies, etc.
README.md: Briefly describes the ROS 2 compilation process.
--event-handlersconsole_direct+: This option specifies the event handler. console_direct+ means detailed information about build events is output directly to the console. This allows you to see each step of the build process and any potential error messages more clearly.
--cmake-args-DCMAKE_BUILD_TYPE=Release: This option passes additional CMake arguments. In this case, -DCMAKE_BUILD_TYPE=Release sets the CMake build type to Release. This means the build will be optimized for a release version, not a debug version.
The following folders are generated after compilation:
build: Intermediate files and target files.
install: Executables, library files, header files, and other resource files.
log: Contains log files generated during compilation and runtime.
ROS 2 supports three ways to modify camera parameters.
Method 1: Pre-configure parameters using Viewer software and save them to the camera (Recommended)
GigE2.1 Cameras (PMD Series and GM Series Cameras)
Use Viewer software to save parameter settings to a UserSet attribute group and set this group as the default User Set attribute group to load. The camera will automatically load the parameter configuration from this User Set attribute group upon power-up.
GigE2.0 Cameras (Cameras other than PMD Series and GM Series)
Use Percipio Viewer software to save parameter settings to the camera’s Storage area. ROS will automatically load the parameter configuration from the Storage area upon startup and begin image acquisition.
Method 2: Edit launch.py configuration file
Configure parameters to be loaded when the camera node starts in percipio_camera.launch.py / multi_cam.launch.py. This method is only applicable to parameters included in the configuration file. Specific steps are as follows:
Navigate to “camport_ros2/install/percipio_camera/share/percipio_camera/launch”.
Modify parameter configuration.
If using a single camera, open the percipio_camera.launch.py file and modify parameter configurations as needed.
If a camera is not specified by SN or IP, the first camera found will be opened by default.
For more parameter configuration descriptions, refer to the table below.
If using multiple cameras, open the multi_cam.launch.py file and modify parameter configurations as needed.
The multi_cam.launch.py file is configured for two cameras by default. To configure more cameras, add launch x (x=3,4…n) following the content of launch 1 and launch 2.
For parameter configuration descriptions, refer to the table below.
Configurable Parameters in launch.py
Parameter Name
Description
Value Range
camera_name
Node name
Customizable, can be used to distinguish cameras in multi-camera scenarios
serial_number
Camera SN
Can be empty; or fill in the SN of the camera to connect
device_ip
Camera IP address
Can be empty; or fill in the IP address of the camera to connect
device_log_enable
SDK log switch
true/false
device_log_level
SDK log level
VERBOSE / DEBUG / INFO / WARNING / ERROR / NEVER
device_log_server_port
SDK log server port
Default: 9001
frame_rate_control
Frame rate control switch
true/false
frame_rate
Set output frame rate
Float, Default: 5.0
device_workmode
Camera trigger mode
trigger_off/trigger_soft/trigger_hard
(Corresponding to: continuous output, software trigger, and hardware trigger modes respectively)
device_auto_reconnect
Camera offline reconnection
true/false
color_enable
Color image enable
true/false
color_resolution
Color image resolution
Setting range, refer to the camera’s fetch_config.xml file
SYSTEM_DEFAULT: Uses the system’s default QoS settings, typically defined by the underlying DDS (Data Distribution Service) implementation. The effect depends on the specific DDS implementation.
DEFAULT: Provides reliable message delivery, suitable for most general communication needs. Retains up to 10 of the latest messages.
PARAMETER_EVENTS: QoS settings specifically for parameter events, ensuring reliable delivery of parameter change events. Retains up to 1000 of the latest messages.
SERVICES_DEFAULT: Default QoS settings for service communication, ensuring reliable delivery of service requests and responses. Retains all service request and response messages.
PARAMETERS: QoS settings specifically for parameters, ensuring reliability for parameter setting and retrieval. Retains up to 1000 of the latest messages.
SENSOR_DATA: QoS settings for sensor data, suitable for high-frequency, low-latency data stream transmission. Retains up to 5 of the latest messages.
If a camera outputs images with a resolution not supported as configured in the percipio.launch file, the camera will output images with the default configuration.
Method 3: Edit parameters.xml configuration file
Navigate to “camport_ros2/install/percipio_camera/share/percipio_camera/launch” to configure parameters loaded when the camera node starts. This method is only applicable to parameters included in the configuration file.
When color_point_cloud_enable is enabled, point_cloud_enable will be automatically set to false. Therefore, /camera/depth_registered/points and /camera/depth/points will not exist simultaneously.
The “install/percipio_camera/share/percipio_camera/launch” path contains Python example programs, such as viewing depth images, color images, point clouds, and colored point clouds.
depth.py: Enables the specified camera to acquire depth images with a specified format and resolution.
a. In the percipio.launch file, set depth_enable to true and save.
b. Open Terminal 1, start the camera node.
c. Open Terminal 2, navigate to the “install/percipio_camera/share/percipio_camera/launch” path, enter python3depth.py and run it.
A window will pop up, displaying the depth image from the specified camera in real-time.
color.py: Enables the specified camera to acquire color images with a specified format and resolution.
a. In the percipio.launch file, set color_enable to true and save.
b. Open Terminal 1, start the camera node.
c. Open Terminal 2, navigate to the “install/percipio_camera/share/percipio_camera/launch” path, enter python3color.py and run it.
A window will pop up, displaying the color image from the specified camera in real-time.
cloud.py: Enables the specified camera to acquire a point cloud with a specified format and resolution, and save it.
a. In the percipio.launch file, set depth_enable and point_cloud_enable to true, and set color_point_cloud_enable to false.
b. Open Terminal 1, start the camera node.
c. Open Terminal 2, navigate to the “install/percipio_camera/share/percipio_camera/launch” path, enter python3cloud.py and run it.
A window will pop up, displaying the raw point cloud from the specified camera in real-time. Simultaneously, Terminal 2 will print the point cloud save path and point count.
registered_cloud.py: Enables the specified camera to acquire a colored point cloud with a specified format and resolution, and save it.
a. In the percipio.launch file, set color_enable, depth_enable, depth_registration_enable, and color_point_cloud_enable all to true and save.
b. Open Terminal 1, start the camera node.
c. Open Terminal 2, navigate to the “install/percipio_camera/share/percipio_camera/launch” path, run python3registered_cloud.py.
A window will pop up, displaying the colored point cloud from the specified camera in real-time. Simultaneously, Terminal 2 will print the point cloud save path and point count.
When a camera encounters an error during operation and it’s inconvenient to power cycle the camera, you can use the camera software reset function.
Method 1: After starting the camera node, open another terminal, navigate to the “install/percipio_camera/share/percipio_camera/launch” path. Enter python3reset.py and run it.
Method 2: Send a software reset command via topic.
You can monitor camera events, such as disconnection, camera coming online, etc.
Method 1: After starting the camera node, open another terminal, navigate to the “install/percipio_camera/share/percipio_camera/launch” path. Enter python3offline_detect.py and run it.
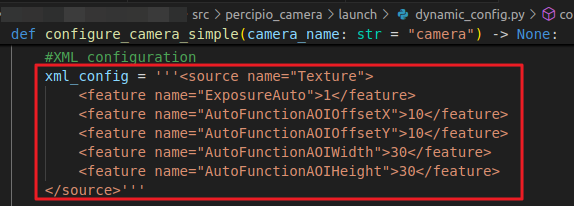
Method 1: Start the camera node. Navigate to the “install/percipio_camera/share/percipio_camera/launch” path, modify parameters in the dynamic_config.py file. Open another terminal, enter python3dynamic_config.py and run it.
Method 1: Use send_trigger.py to send a software trigger signal. The camera will capture an image upon receiving the signal.
a. Open the percipio_camera.launch.py file and set the trigger_mode parameter to true.
b. Open Terminal 1, start the camera node.
c. Open Terminal 2, navigate to the “install/percipio_camera/share/percipio_camera/launch” path, enter python3send_trigger.pycamera10 and run it to send 10 software trigger commands to the camera.
d. Return to Terminal 1, it will display that 10 software trigger commands have been received.
Method 2: Send a software trigger signal via command.
a. Set the camera work mode to trigger_mode via command.
Error when both ROS 1 and ROS 2 are configured on the system
After deleting compiled files, temporarily hide ROS1.
sudomv/opt/ros/noetic/opt/ros/noetic.HIDDEN
Modify ‘noetic’ according to your system, then recompile.
No depth image output immediately when running python3depth.py after enabling temporal filtering
The temporal filtering function requires collecting 2-10 frames of raw depth data to fill the buffer (specific frame count configurable). Depth images are output after multi-frame temporal fusion calculation. Therefore, there will be a brief delay after program startup.
Camera output image format or resolution does not follow UserSet preset parameters or Storage area configuration
If the camera storage area or UserSet has set the image format and resolution, and the percipio.launch file also configures the image resolution and format, ROS will dynamically set these parameters via the launch file with priority.