ROS 1 Platform
ROS (Robot Operating System, hereinafter referred to as ROS) is an open-source meta-operating system suitable for robots. It provides the services that an operating system should have, including hardware abstraction, underlying device control, implementation of common functions, inter-process messaging, and package management.
Set up ROS 1 Development Environment
Install the corresponding ROS 1 development platform according to the Ubuntu version.
Ubuntu16.04: ROS Kinetic
Ubuntu18.04: ROS Melodic
Ubuntu20.04: ROS Noetic
Set Up USB Camera
If you need to use a USB camera, complete the Set Up USB Camera steps first.
Download Camport ROS 1 SDK
ROS 1 SDK supports the ROS Kinetic, ROS Melodic and ROS Noetic platforms.
Choose any of the following methods to download Camport ROS 1 SDK:
Access https://github.com/percipioxyz/camport_ros.git using a browser and download the Camport ROS 1 SDK.
Use the git command to obtain a local copy: Open the terminal, switch to the working directory where the SDK should be stored, and enter the git clone command to clone the remote repository.
git clone https://github.com/percipioxyz/camport_ros.git
The directory of Camport ROS 1 SDK is shown in the following figure:
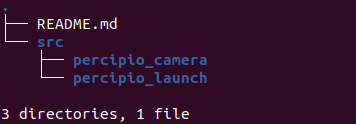
Camport ROS 1 SDK Directory
percipio_camera: includes source files and configuration files.percipio_launch: launch package.
Compile ROS 1 SDK
To compile the ROS 1 SDK, execute the following command in the root directory of the development package:
catkin_make
After compilation, the build folder (containing intermediate files) and the devel folder (containing header files, dynamic/static libraries and executable files) will be generated.
Note
If a compilation error occur on Ubuntu 16.04, refer to Failed to compile ROS 1 SDK on Ubuntu 16.04.
Configure Environment Variables
To configure the environment variables, execute the following command in the root directory of the development package:
echo "source <the root directory of the development package>/camport_ros/devel/setup.bash" >> ~/.bashrc
Modify Configurations in Launch File
To configure the parameters loaded when the camera starts in the percipio.launch file, do the following:
Execute the following command to open the
percipio.launchfile:
cd src/percipio_launch/launch/
gedit percipio.launch
Modify the configuration as needed.
Specify camera SN:
<arg name="device_id" default="207000106930" />Tip
The device_id is set to #1 by default, which means the first camera found will be opened by default.
Set the switch for exposure synchronization of left and right infrared images in the default:
<arg name="cmos-sync" default="true" />
Set the switch for alignment of depth and color images in the default:
<arg name="depth_registration" default="true" />Note
This enable switch will only take effect when the color image and the depth maps are both captured. This setting is invalid for cameras without the color component.
Modify Configurations in Percipio.cfg File
The parameters in the Percipio.cfg file support dynamic adjustment. After modifying the maximum and minimum values of the Percipio.cfg parameters, refer to the Run section to bring up the rqt_reconfigure_Param page and make adjustments.
Execute the following command in the root directory of the software package to open the
Percipio.cfgfile.cd src/percipio_camera/cfg/ gedit Percipio.cfg
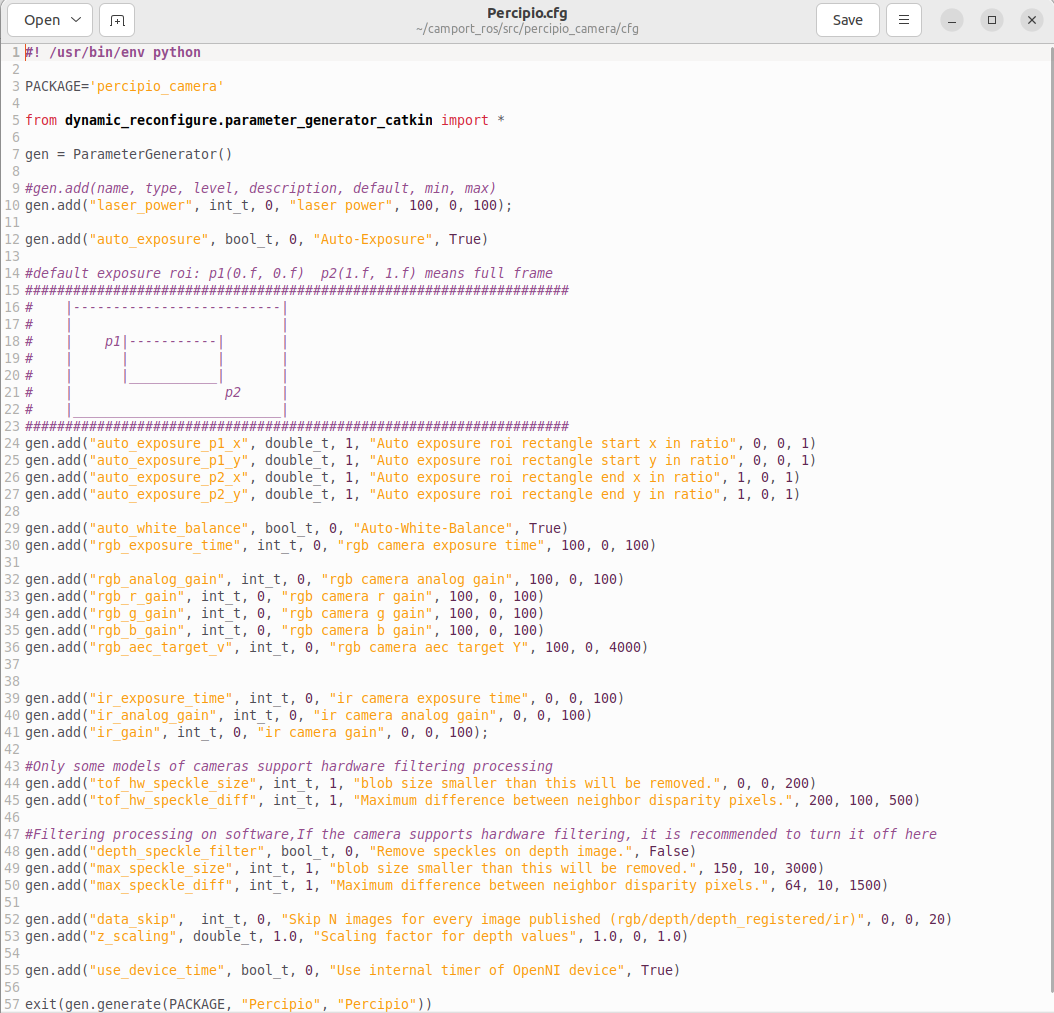
Set the minimum and maximum values for the parameters in gen.add( ).
Tip
gen.add (name, type, level, description, default, min, max) represents the feature name, type, level, description, default value, minimum value, and maximum value.
Boolean values must be written as True or False (with the first letter capitalized).
Note
If you don’t know the minimum and maximum values of camera features, you can view the supported components and features of the camera by one of the following steps:
Run the SDK sample program
DumpAllFeaturesto view the components and features supported by the camera in the listed information.Run the SDK sample program
DumpAllFeatures -dand check the supported components and features of the camera in the generatedfetch_config.xmlfile.
The setting range of the following parameters can be customized:
depth_speckle_filter: Switch for the Remove Outlier function. After enabling this function, adjust
max_speckle_sizeandmax_speckle_diffto reduces outliers and mismatched points in the point cloud. For more details, refer to the description for Remove Outlier.max_speckle_size: If the number of points in a region is less than the spk size setting, the points in that region are considered outliers and will be removed. It is recommended to set this value within the range of [10, 3000].
max_speckle_diff: If the depth difference between adjacent pixels in a region is less than the spk diff setting, the adjacent pixels in that region are considered part of the same outlier. It is recommended to set this value within the range of [10, 1500].
data_skip: Frame skipping interval. For example, if the Percipio Camera’s publishing node operates at 30 fps, but the ROS receiving node only needs 10 fps, you can set data_skip to 3. It is recommended to set this value within the range of [0,20].
z_scaling: The depth value unit of the pixels in the depth map. It is recommended to set this value within the range of [0,8].
use_device_time: The default setting is True, indicating using the camera’s internal timestamp. When it is set to False, it indicates using ROS timestamp.
Execute the following command to recompile. After compilation, the changes made to
Percipio.cfgwill take effect.catkin_make
Launch Camera Node
To launch the camera node, execute the following command in the root directory of the development package:
roslaunch percipio_launch percipio.launch
If the camera node starts successfully, the terminal will display information such as the camera IP address, SN, depth image format & resolution, and color image format & resolution.
Note
Do not close the terminal running this service during operation.
Subscribe to Topics
Open a new terminal and execute the following command to run RViz:
rosrun rviz rviz
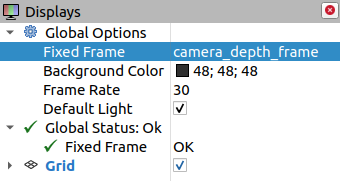
Add image display.
In the left side of the page, in the Global Options settings, set Fixed Frame to camera_depth_frame.
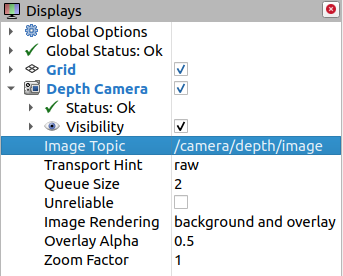
Add depth map display by the following steps:
Click on add, add Camera, name it Depth Camera.

In the newly added Depth Camera settings on the left side of the page, set Image Topic to /camera/depth/image.
Add color image display by the following steps:
Click on add, add Camera, and name it Color Camera.
Check the newly added Color Camera on the left side of the page and set the Image Topic to /camera/rgb/image in the settings.
Add IR image display by the following steps:
Click on add, add Image, name it IR Camera.
Check the newly added IR Camera on the left side of the page and set the Image Topic to /camera/ir/image in the settings.
Add point cloud display by the following steps:
(i). Add DepthCloud display
Note
DepthCloud is a point cloud generated internally by ROS by inputting a depth map and intrinsic parameters, which is then transformed via rgbd_launch within ROS.
Click on add, add DepthCloud, name it Depth Cloud.
Check the newly added Depth Cloud on the left side of the page and set the Depth Map Topic to /camera/depth/image.
(ii). Add PointCloud2 display
Note
PointCloud2 is a point cloud displayed by ROS when point cloud data is input into ROS.
Click on add, add PointCloud2, name it Point Cloud 2.
Check the newly added Point Cloud 2 on the left side of the page and set the Topic to /camera/PointCloud2.
Dynamically adjust the camera parameters according to the imaging situation, .
Execute the following command to bring up the rqt_reconfigure_Param page. Select driver and adjust the parameters on the page.
rosrun rqt_reconfigure rqt_reconfigure

Solution for Multi-Device Simultaneous Access
Edit
.launchfile.Refer to the
percipio.launchdocument to create multiple.launchfiles. Configure camera and device_id with different values in each.launchfile. For example, to run two devices simultaneously, create two.launchfiles, such aspercipio_camera1.launchandpercipio_camera2.launch.percipio_camera1.launchcontains the following content:<arg name="camera" default="camera1"> ...... <arg name="device_id" default="207000010443"> ......
percipio_camera2.launchcontains the following content:<arg name="camera" default="camera2"> ...... <arg name="device_id" default="207000010113"> ......
Execute the following command in the root directory of the development package to reconfigure the environment variables:
source ./devel/setup.bash
Open the device with serial number 207000010443 by running the command
roslaunch percipio_launch percipio_camera1.launch.Open the device with serial number 207000010113 by running the command
roslaunch percipio_launch percipio_camera2.launch.