VisionPro Platform
Download and Install VisionPro
Please download VisionPro from Cognex Official Website.
Note
Percipio has tested VisionPro 9.0 and confirmed that it can open the Percipio camera normally. It is recommended to use this tested version of VisionPro.
Set Up USB Camera
If you need to use a USB camera, complete the Set Up USB Camera steps first.
Download camport3_visionpro SDK
Choose any of the following methods to download camport3_visionpro SDK :
Access https://github.com/percipioxyz/camport3_visionpro.git using a browser and download the SDK.
Use the git command to obtain a local copy: Open the terminal, switch to the working directory where the SDK should be stored, and enter the
git clonecommand to clone the remote repository.git clone https://github.com/percipioxyz/camport3.git
The directory structure of Camport3_visionpro is shown in the following figure:
camport3_visionpro SDK Directory Structure
Configure Environment
Right-click on the VisionPro shortcut icon and select Open file location from the shortcut menu to access the installation directory of VisionPro.
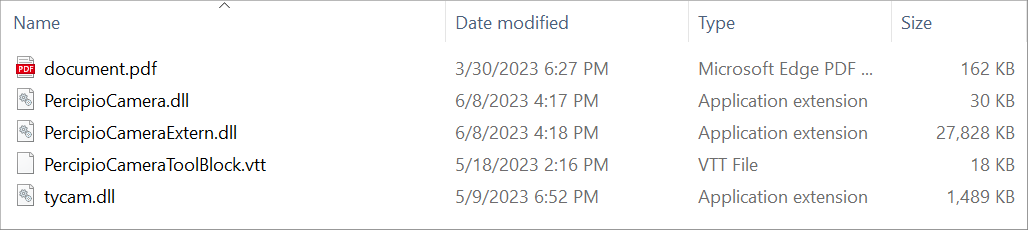
Copy
PercipioCamera.dll,PercipioCameraExtern.dll,tycam.dllandopencv_world460.dlltobinfolder in the VisionPro installation directory.Copy
PercipioCameraToolBlock.vtttobin/Templates/Toolsfolder in the VisionPro installation directory.
Run
This section mainly introduces how to run the Percipio camera in VisionPro. The steps are as follows:
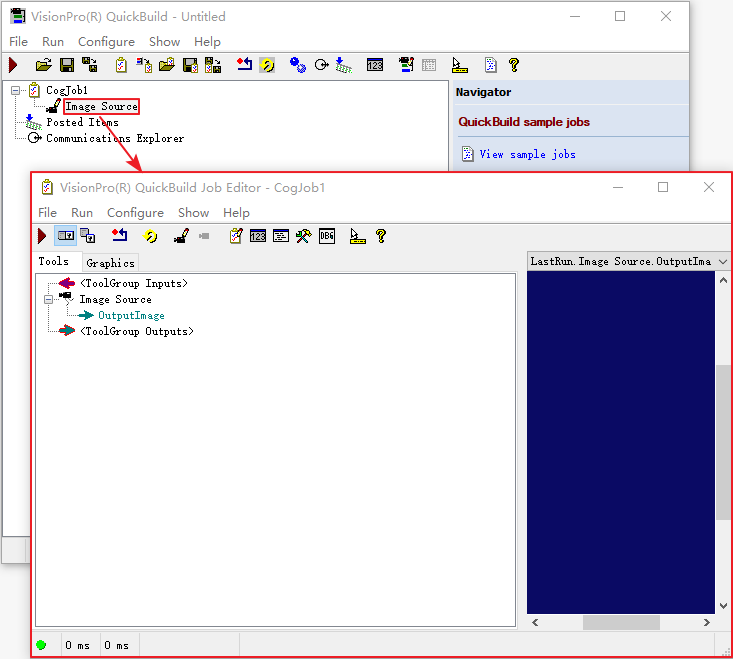
Double-click to run the VisionPro software.
Double-click on Image Source to enter VisionPro(R) QuickBuild Job Editor - CogJob1 page.
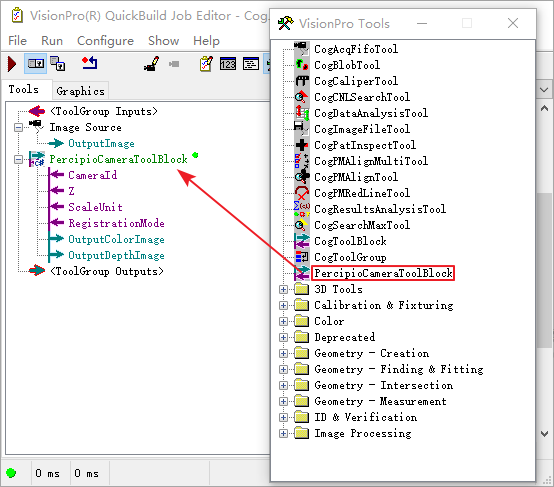
Click on the Show VisionPro Tools icon to bring up the VisionPro Tools page.
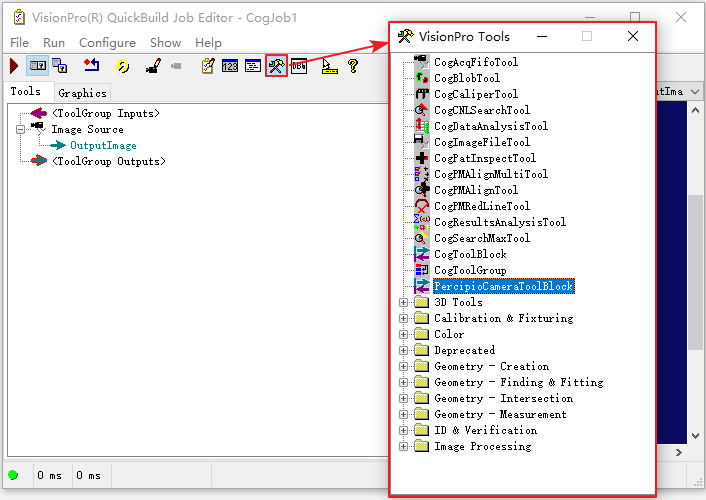
Double-click on PercipioCameraToolBlock and add it to the ToolGroup.
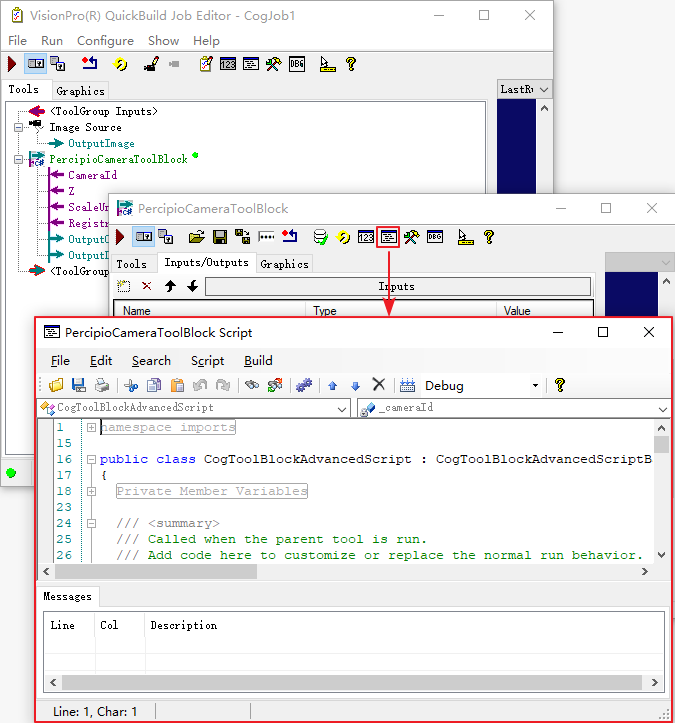
Double-click on PercipioCameraToolBlock, select the Input/Output tab in the PercipioCameraToolBlock page, and set the input parameters.
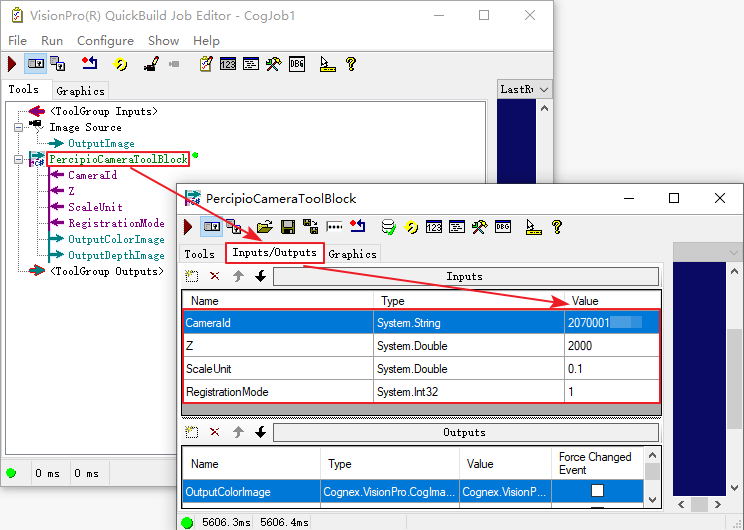
CameraId: Set camera serial number.
Z: Set the distance between the camera and the projection plane in the Z direction, in millimeters. Perform an orthogonal projection of the depth map onto this projection plane. With the camera field of view at this distance and the depth map resolution, the size of a single pixel (in millimeters) can be calculated for subsequent calculations.
ScaleUnit: Set the ScaleUnit feature of the camera to output depth values with different precisions.
RegistrationMode: Set the RGBD registration switch. 0: no registration; 1: rgb2depth; 2: depth2rgb.
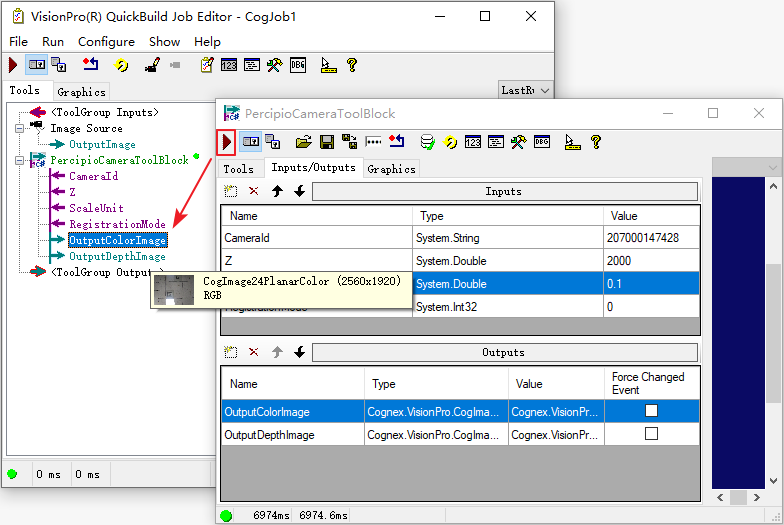
Click on the Run icon. You can view the images captured by the camera in the output terminal.
Afterwards, add other tools according to actual needs, and connect the output port of PercipioCameraToolBlock to the input port of other tools.
Optional: If you have secondary development needs for PercipioCameraToolBlock, you can click on the Create/Edit Script icon and edit the script.