Halcon Platform
Download and Install Halcon
Download the Halcon (Windows version) installation package from the Halcon Official Website and install Halcon according to the official documentation.
Important
The installation package Image Acquisition Interfaces must be installed. If there are no special requirements, it is recommended to check all installation packages and install them.
Set Up USB Camera
If you need to use a USB camera, complete the Set Up USB Camera steps first.
Download Halcon SDK
Choose any of the following methods to download the Camport3_Halcon_gentl SDK:
Access https://github.com/percipioxyz/camport3_halcon_gentl.git using a browser and download the Camport3_Halcon_gentl SDK.
Use the git command to obtain a local copy: Open the terminal, switch to the working directory where the SDK should be stored, and enter the
git clonecommand to clone the remote repository.git clone https://github.com/percipioxyz/camport3_halcon_gentl.git
Camport3_Halcon_gentl SDK directory structure is shown in the following figure:
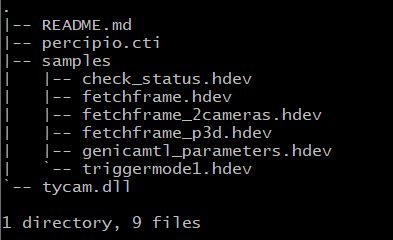
Camport3_Halcon_gentl SDK Directory Structure
samples Directory
It stores sample programs for user programming reference.
check_status.hdev: This sample program is used to display the status of the camera connection.fetchframe.hdev: This sample program is used to capture image data from one depth camera.fetchframe_2cameras.hdev: This sample program is used to configure two depth cameras to simultaneously capture images and output image data.fetchframe_RGBD.hdev: This sample program is used to capture depth maps that are registered to color.genicamtl_parameters.hdev: This sample program is used to list the parameters supported by Percipio cameras.triggermode1.hdev: This sample program is used to set the depth camera to work in mode 1. The camera captures images and outputs image data after it receives a software trigger command or a hardware trigger signal.
Others
The samples directory also includes:
percipio.cti: The implementation file of GenTL Producer.tycam.dll: The dynamic link library of Percipio SDK, which is a dependency for GenTL Producer.README.md: The README documentation.
Configure Environment Variables
Enter the environment variables page and create a new environment variable. The variable name is GENICAM_GENTL64_PATH, and the variable value is the storage path of percipio.cti, which is the Camport3_Halcon_gentl SDK folder path. After rebooting the computer, the configuration will take effect.
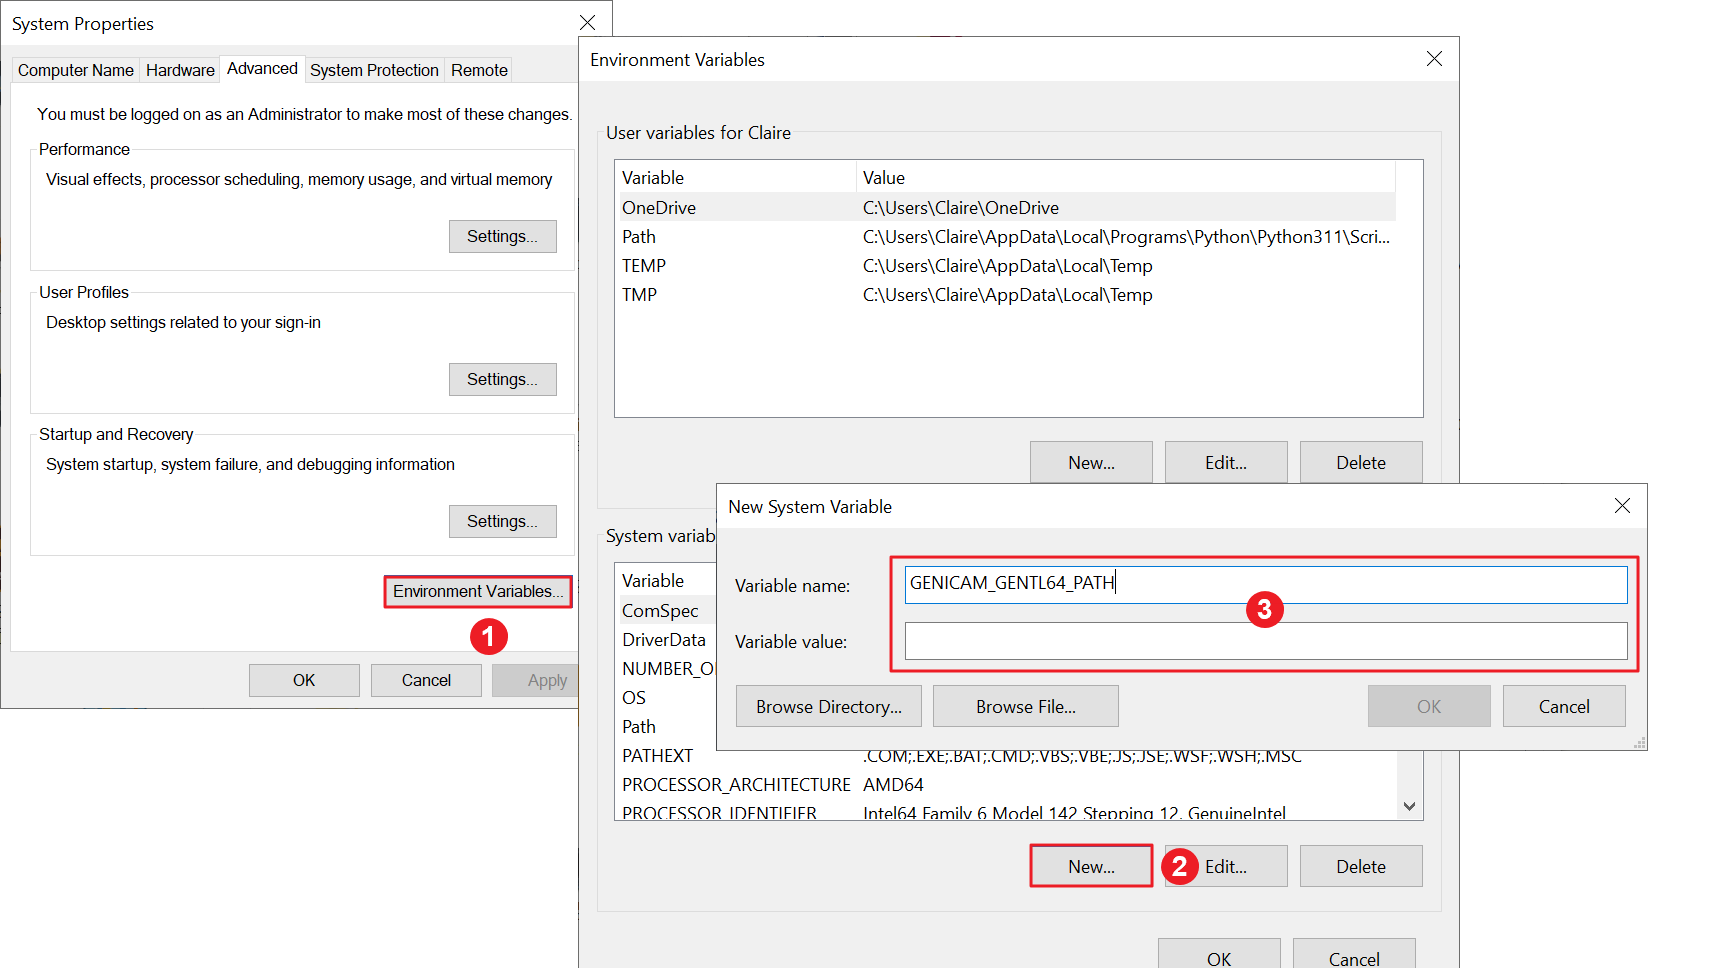
Configure Environment Variables
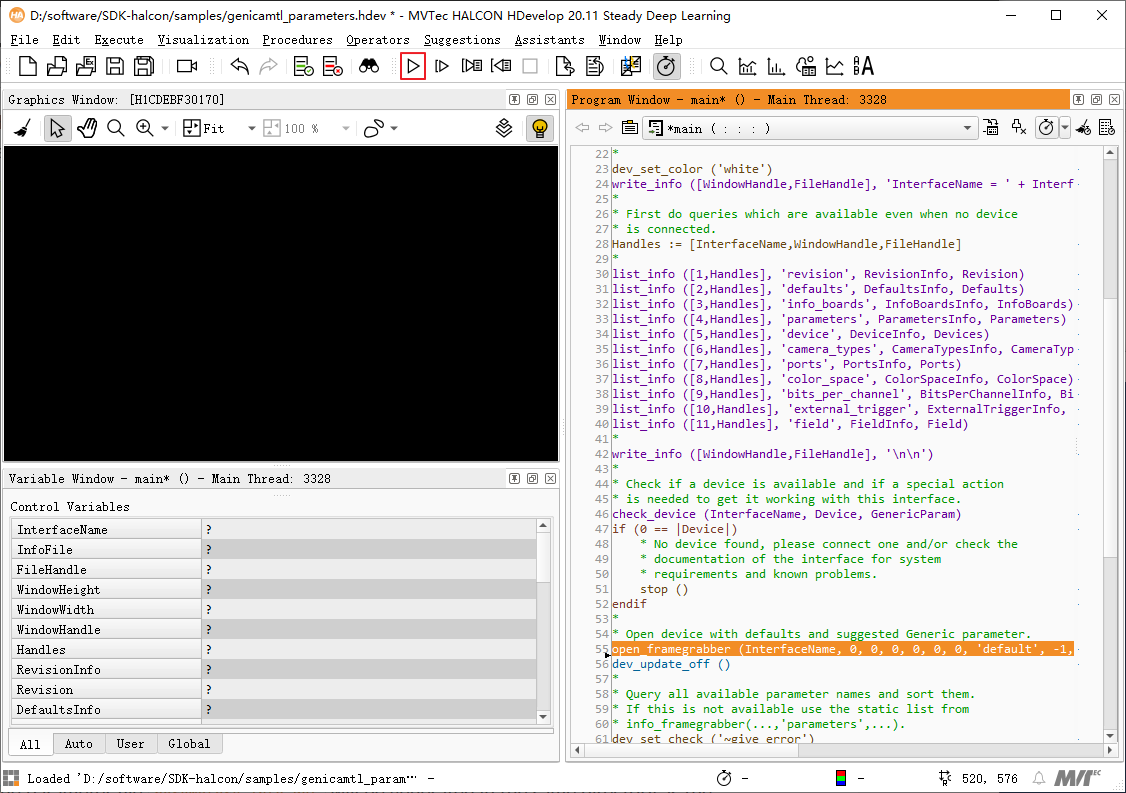
View Camera Features
Double-click on the
genicamtl_parameters.hdevfile in thesamplesfolder.Modify the serial number of the camera to be opened in the program window, and click on the run button.
Here, ‘PercipioTL_DEV_207000155512’ is provided as an example, please replace it with the serial number of your target camera before running.
Device := 'PercipioTL_DEV_207000155512'
open_framegrabber ('GenICamTL', 1, 1, 0, 0, 0, 0, 'default', -1, 'default', -1, 'false', 'default', 'Device', -1, -1, AcqHandle)
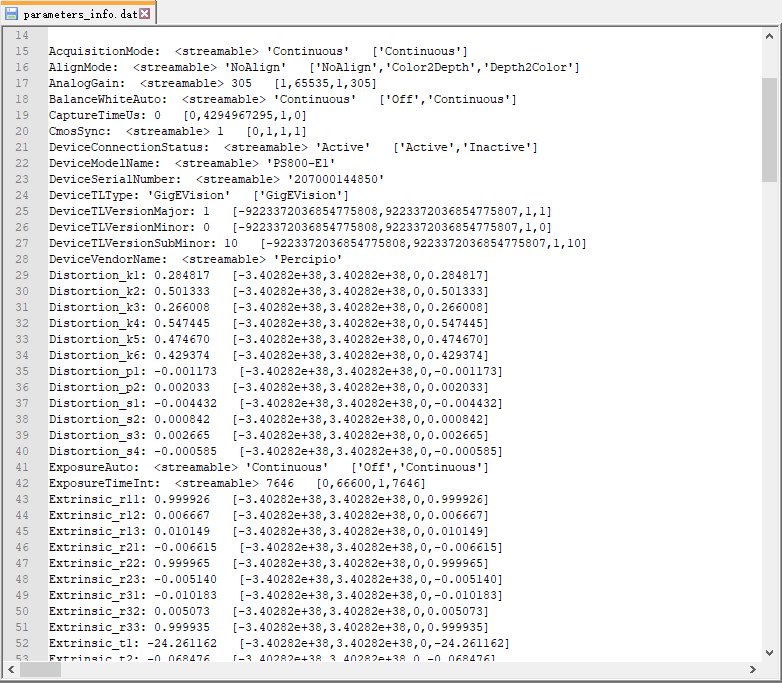
The parameter file
parameters_info.datwill be generated in the same directory as thegenicamtl_parameters.hdevfile.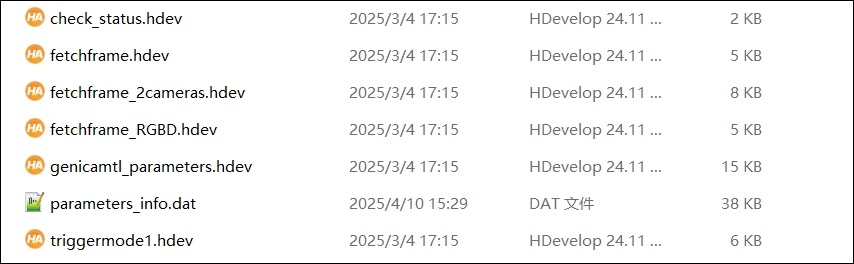
Open the
parameters_info.datfile, and view the list of supported features for the camera. For details on the parameter descriptions and parameter reading & writing methods, please refer to .
.
Tip
parameters_info.dat File Descriptions
Structure: Parameter Name + <Prefix> + Current Value + [Parameter Range]
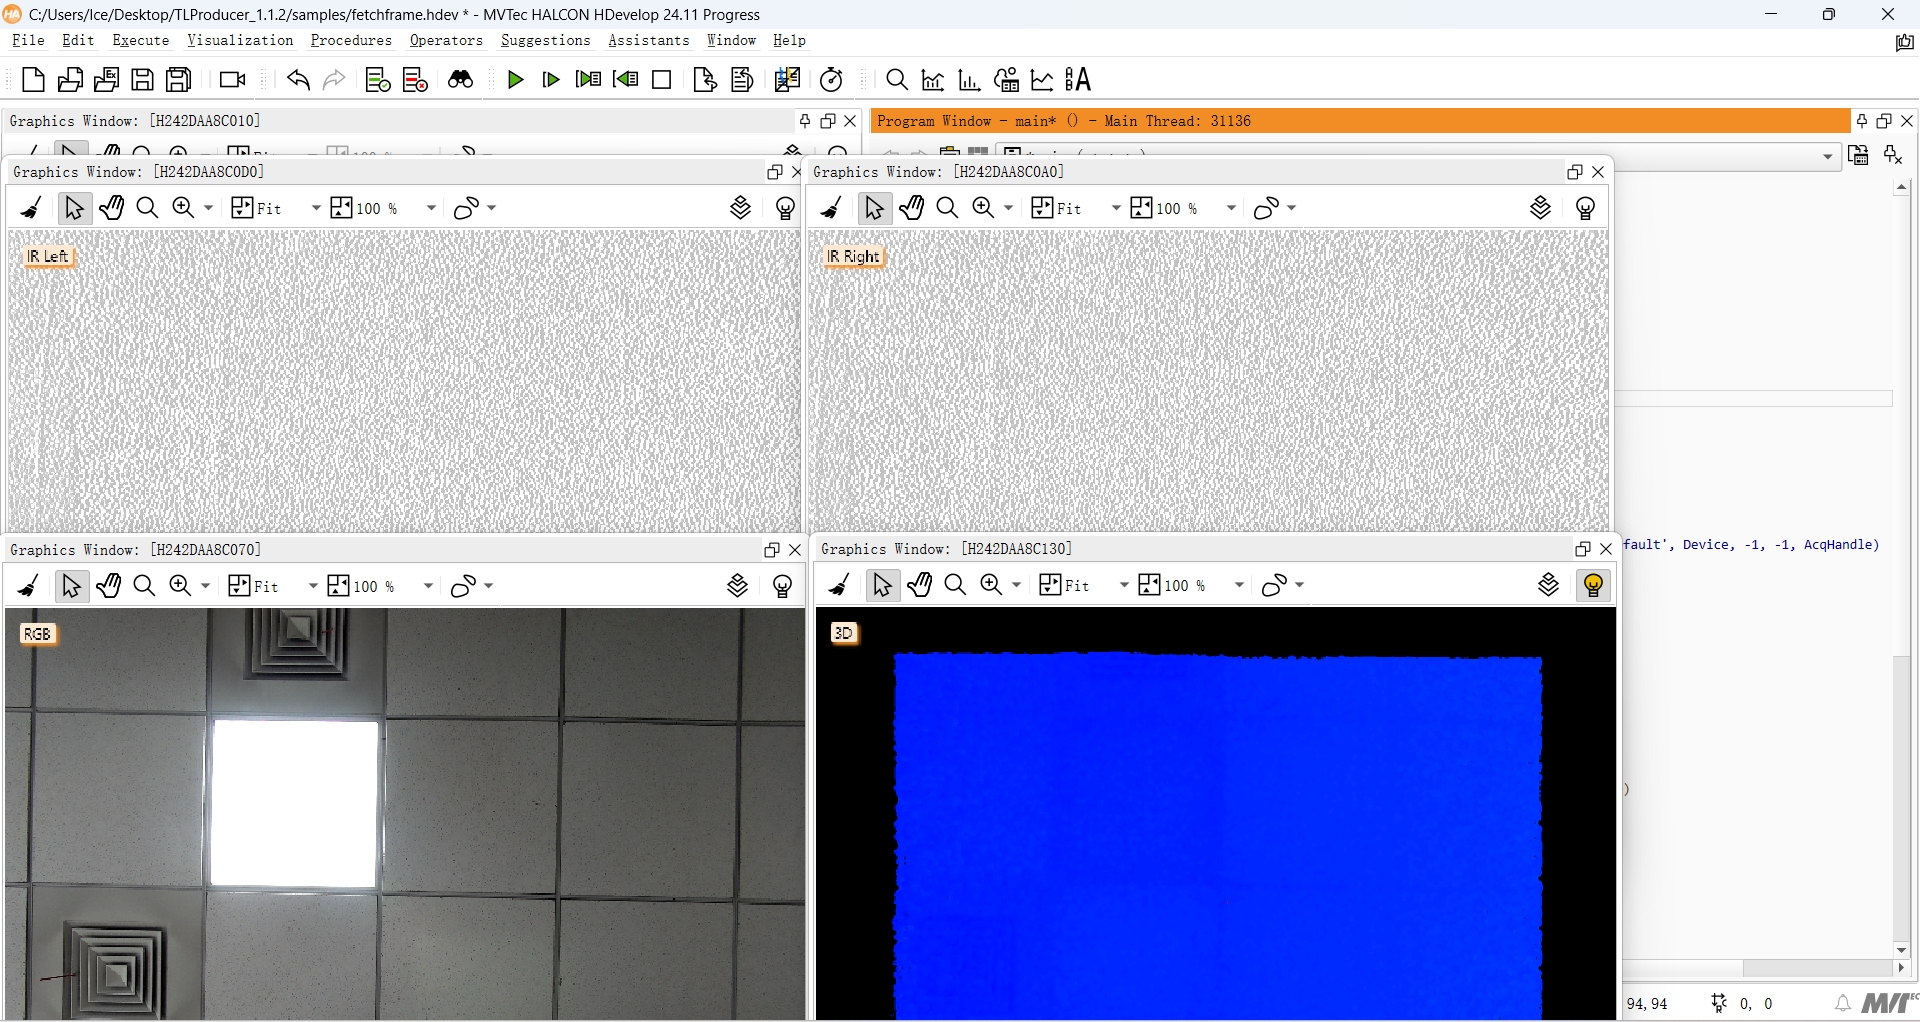
Run the Sample Program
Enter the serial number of the camera to be opened in the program window.
Here, ‘PercipioTL_DEV_207000155512’ is provided as an example, please replace it with the serial number of your target camera before running.
* Enter the camera serial number (replace it with the serial number of your target camera)
Device := 'PercipioTL_DEV_207000155512'

* Open the camera vai the GenICam protocol
open_framegrabber ('GenICamTL', 1, 1, 0, 0, 0, 0, 'default', -1, 'default', -1, 'false', 'default', Device, -1, -1, AcqHandle)
Click on the “Run” button to execute the
fetchframe.hdevsample program.View the running results.