C++ sample programs are located in VcameraSDK-X.X.X/cpp/example and include:
ConnectByIpAddress.cpp: Opens a network camera using its IP address.
DepthToTextureRegistration.cpp: Configures the camera in software trigger mode and aligns the output depth image with the color image.
DepthToPointCloud.cpp: Configures the camera in continuous acquisition mode and converts depth data into point clouds in real time.
DumpAllFeatures.cpp: Lists all features supported by the camera.
DumpDeviceInfo.cpp: Lists camera information.
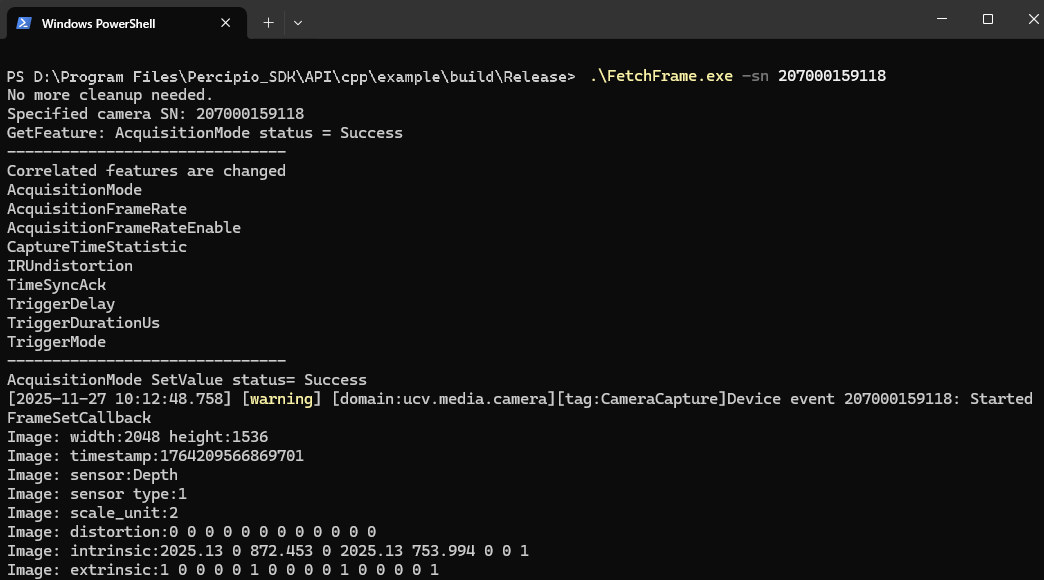
FetchFrame.cpp: Configures the camera in continuous acquisition mode to capture depth images.
FullExample1.cpp: Configures the camera in software trigger mode and converts depth data into point clouds in real time.
ListDevices.cpp: Lists all cameras connected to the computer.
ReadWriteFeatures.cpp: Demonstrates how to read and write camera features.
SetIpAddress.cpp: Sets a static IP address for the camera.
SetUndistortion.cpp: Configures the camera in software trigger mode. When the camera receives a software trigger command, it captures and outputs the undistorted left grayscale image and color image. All output images are automatically saved to the same directory as the executable.
SoftTrigger.cpp: Configures the camera in software trigger mode. After receiving a software trigger command, the camera captures and outputs a depth image.
UserSetSelector.cpp: Selects a user set, which is a saved group of camera feature settings. This sample only applies to Gige_2.1 cameras that support user sets.
LogConfig.cpp: Configures the Vcamera SDK software logging system.
SaveFeaturesToStorage.cpp: Saves parameter settings to the device Storage area. This sample only applies to Gige_2.0 cameras that do not support user sets.
LoadFeaturesFromStorage.cpp: Loads parameter settings from the Storage area and applies them to the camera. This sample only applies to Gige_2.0 cameras that do not support user sets.
SaveFeaturesToFile.cpp: Saves modified parameter settings to a specified JSON file.
LoadFeaturesFromFile.cpp: Loads camera parameter settings from a specified JSON file and applies them to the camera.
CMake 3.25 is recommended. This version has been fully validated for compatibility. Other versions have not been fully tested and compatibility is not guaranteed.
Download the Windows installer from the CMake website.
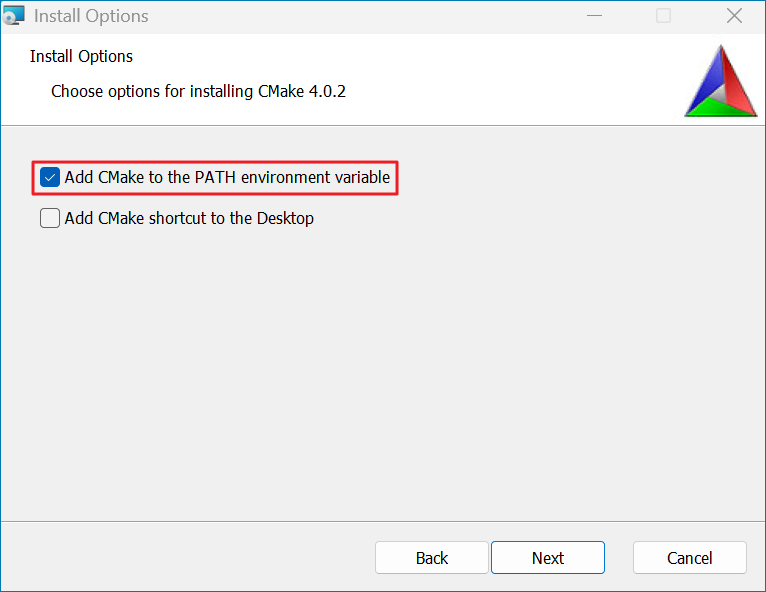
Double-click the downloaded .msi file and follow the prompts to complete the installation. During installation, select Add CMake to the PATH to add CMake to the system environment variables.
Open Command Prompt and run the following command to verify the installation. If a version number is shown, the installation succeeded.
cmake--version
Dependency 2 - Visual Studio
Note
Visual Studio 2022 is recommended. This version has been fully validated for compatibility. Other versions have not been fully tested and compatibility is not guaranteed.
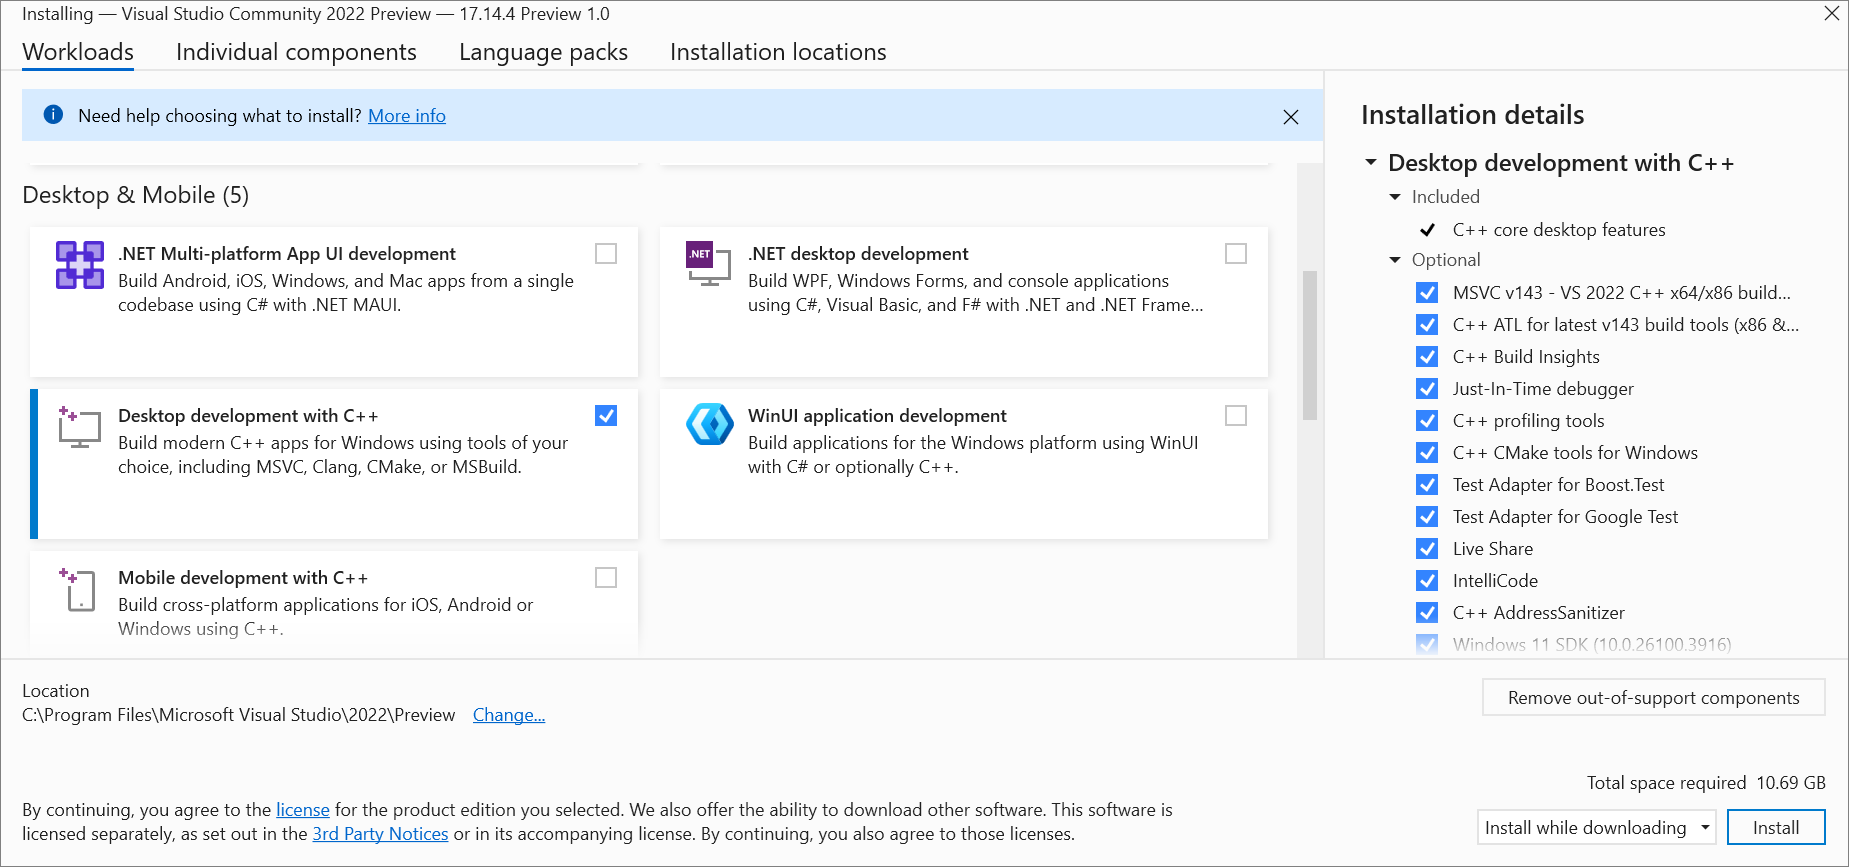
Download and install Visual Studio. Select the Desktop development with C++ workload.
OpenCV is an optional dependency. If it is not installed, sample features that depend on OpenCV, such as image saving, are skipped without affecting the overall build and execution of the samples.
OpenCV 4.11.0 is recommended. This version has been fully validated for compatibility. Other versions have not been fully tested and compatibility is not guaranteed.
Download the precompiled Windows package from the OpenCV website.
Double-click the downloaded .exe file and note the installation path.
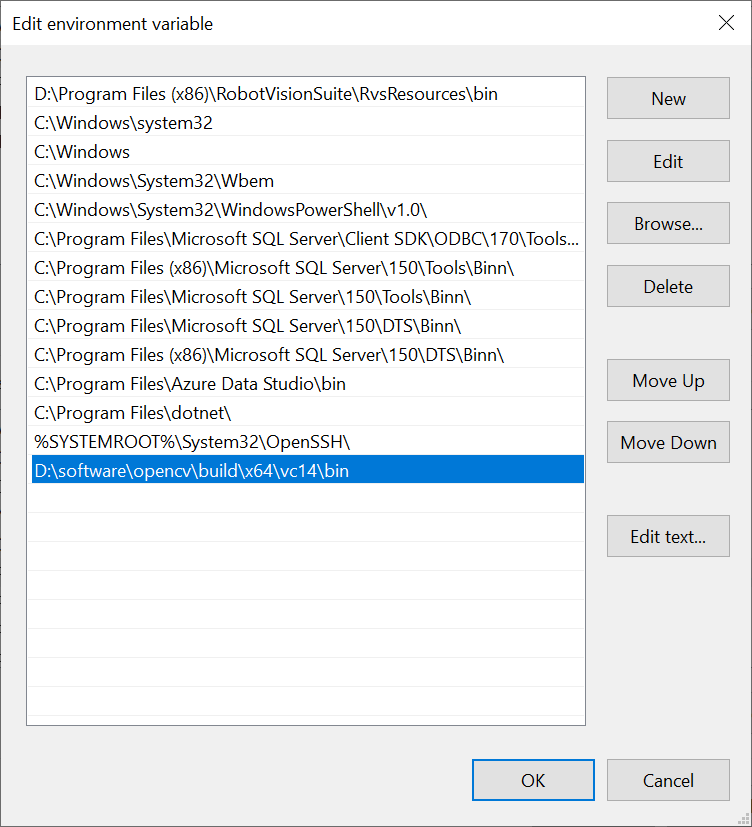
After extraction, configure the OpenCV library path in the system environment variables.
Specifically, open the Environment Variables dialog, select the “Path” entry, click Edit, and add the OpenCV library path in the Edit environment variable dialog.
Create a build folder under VcameraSDK-X.X.X/cpp/example.
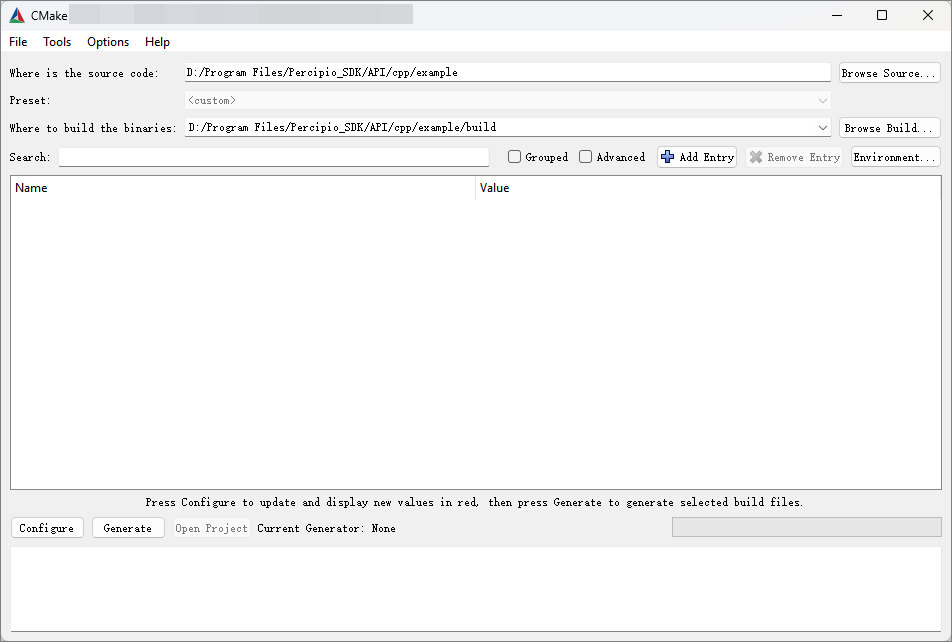
Launch cmake-gui.
Set the source code directory to “example” and the build output directory to “example/build”.
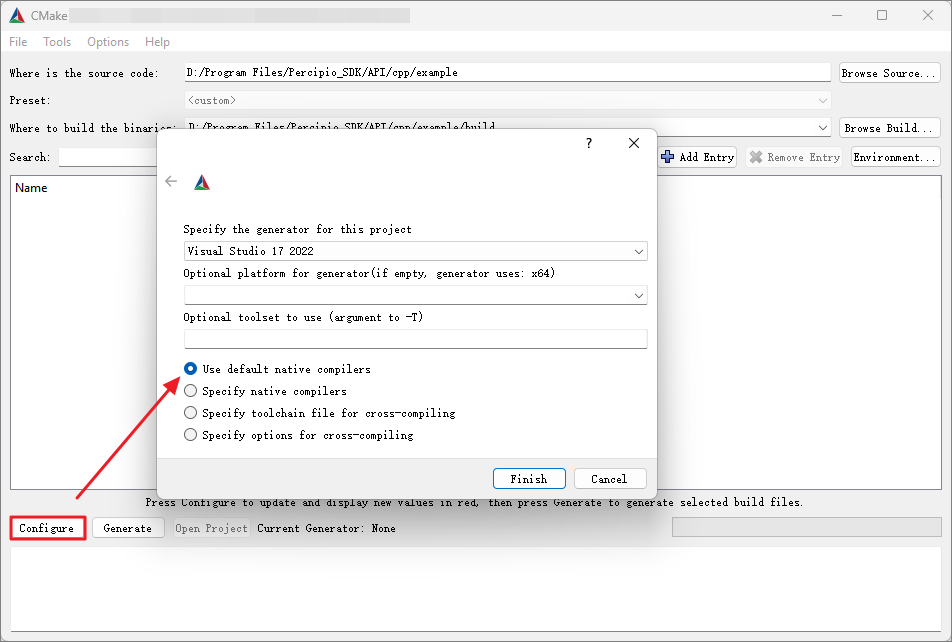
Click Configure, choose your Visual Studio version, and then click Finish.
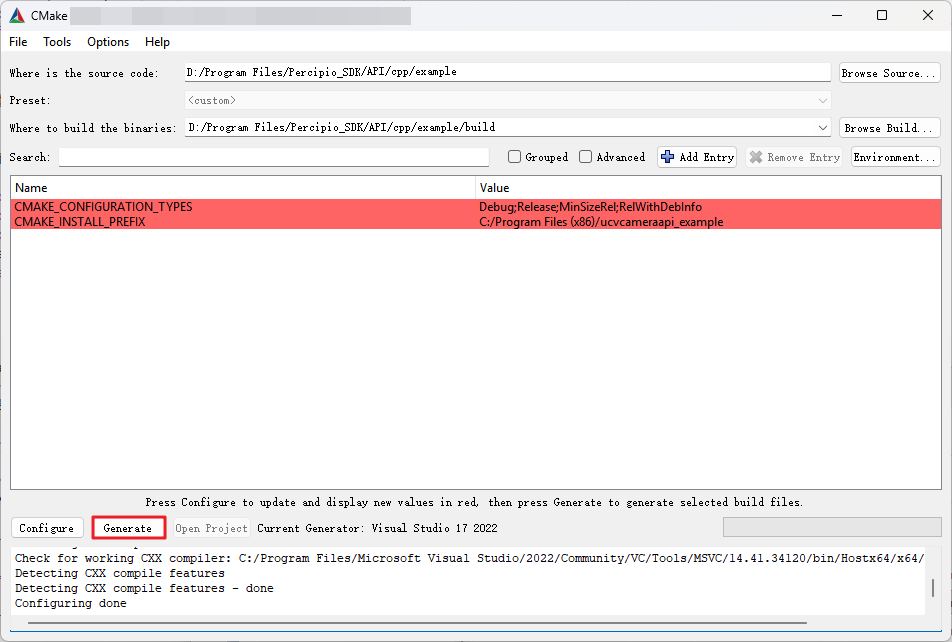
Click Generate.
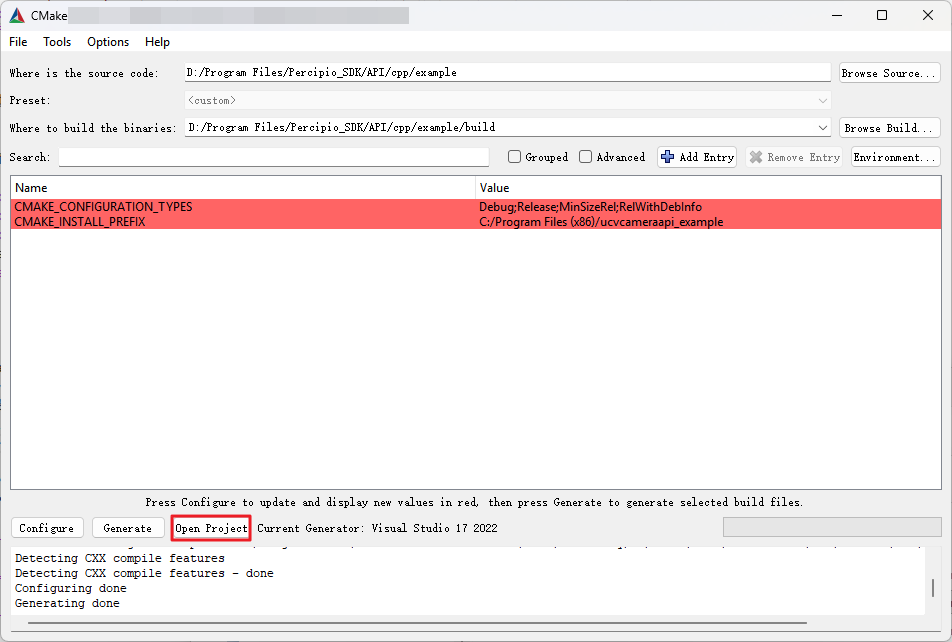
Click Open Project to open the project.
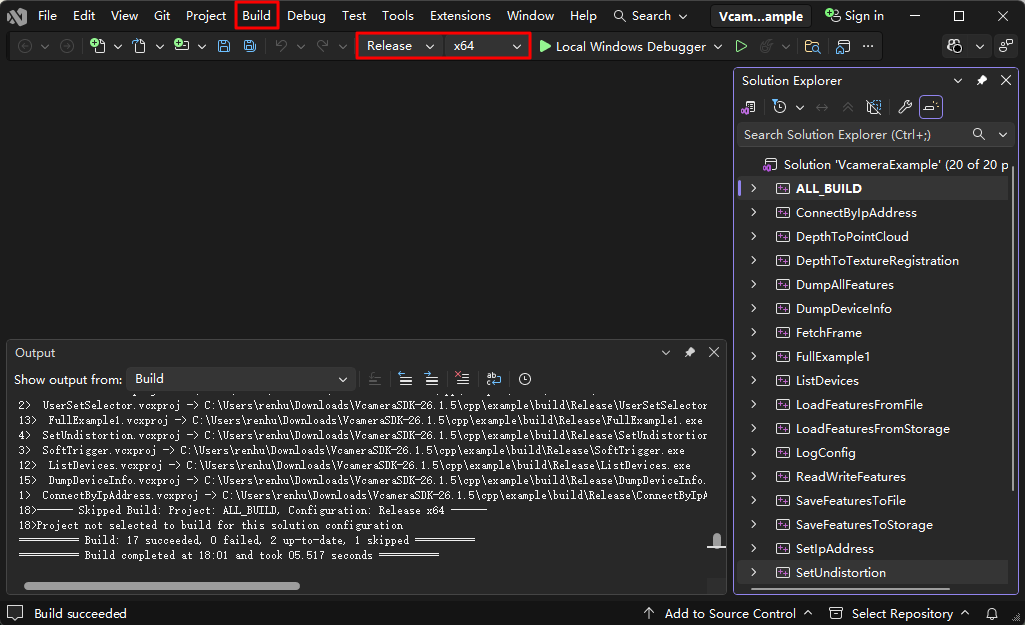
Select the build configuration, either “Release” or “Debug”, set the platform to “x64”, then click “Build” > “Build Solution”. The Release configuration is recommended.
Based on the selected build configuration, Release or Debug, copy all files from VcameraSDK-X.X.X/cpp/win/<build_configuration>/bin to
VcameraSDK-X.X.X/cpp/example/build/<build_configuration>/. Do not mix files from different configurations.
If the sample uses OpenCV, also copy the .dll files from the bin folder in the OpenCV installation directory
into the corresponding output directory, such as VcameraSDK-X.X.X/cpp/example/build/Release/ or VcameraSDK-X.X.X/cpp/example/build/Debug/.