: Camera is connectable. The button appears on the right side of this list row. If no other camera is connected, click to connect. If another camera is already connected, please disconnect it first.
: Camera is connected. The button appears on the right side of this list row. Click to disconnect the current camera.
: Camera error. Click this list row to view the specific error code in the “Status” column on the right side of the interface.
: Camera busy. Camera is in use by another process.
Camera Model
Camera Serial Number
: Click to connect the camera.
: Click to disconnect.
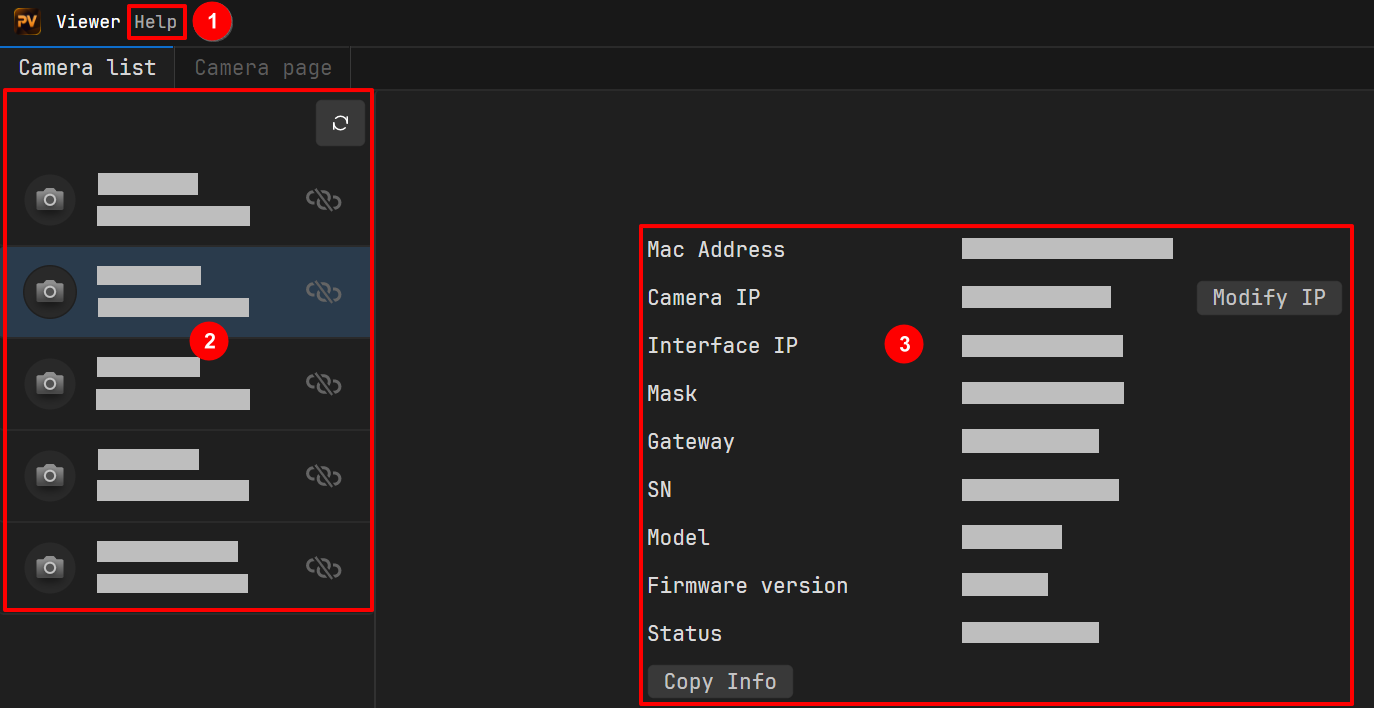
Click any row in the Camera List, and the camera information area on the right side of the interface will display detailed information for that camera.
Includes:
MAC Address: Camera MAC address
IP Address/Subnet Mask/Gateway: Camera IP information
Interface Address: Host (computer) network port IP address
Taking a camera that includes color, depth, left, and right components (e.g., PMD03-E1) as an example, when all data streams are enabled, the Image Acquisition Area is displayed as shown below.
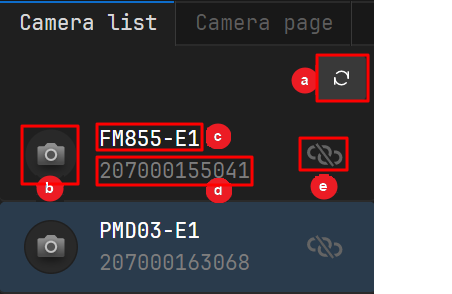
 : Click to refresh the camera list.
 : Camera is connectable. The
  button appears on the right side of this list row. If no other camera is connected, click to connect. If another camera is already connected, please disconnect it first.
 : Camera is connected. The
  button appears on the right side of this list row. Click to disconnect the current camera.
 : Camera error. Click this list row to view the specific error code in the “Status” column on the right side of the interface.
 : Camera busy. Camera is in use by another process.
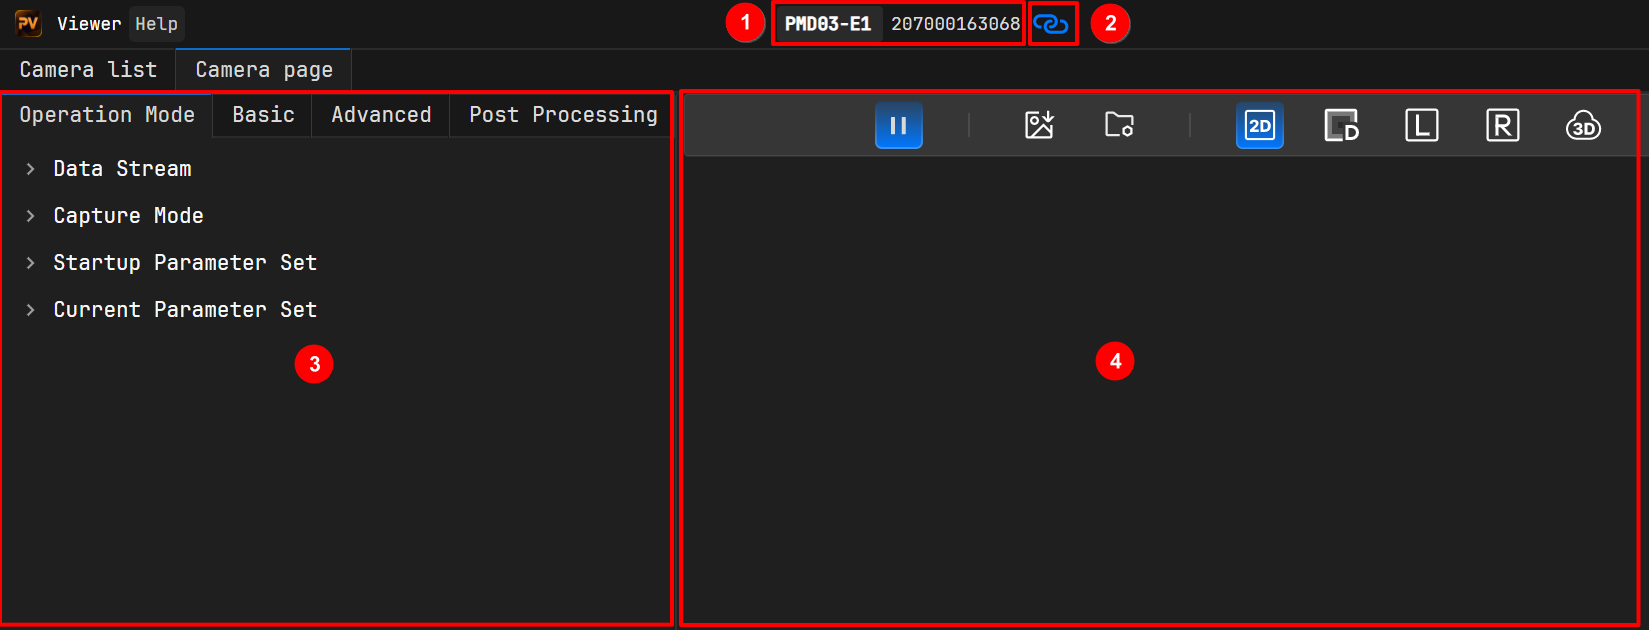
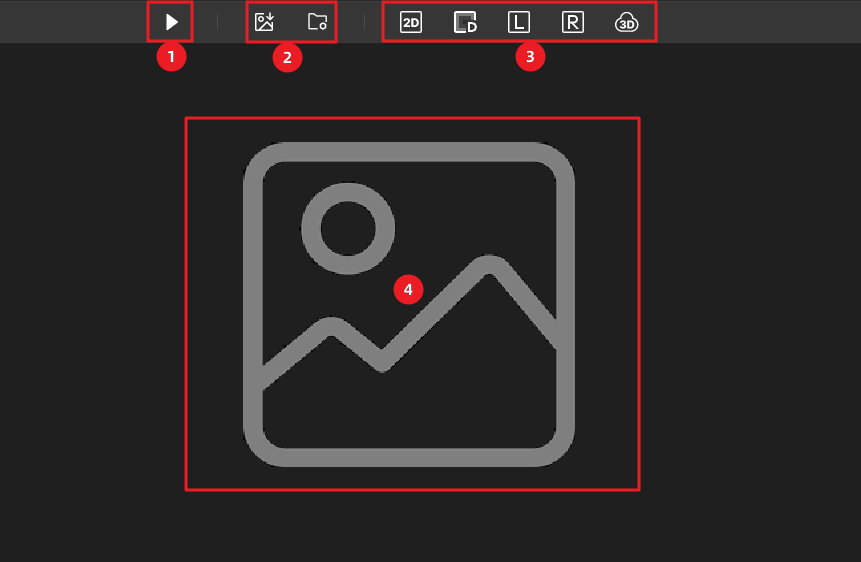
: Start image capture.
: Stop image capture.
: Click to start saving image data.
: Click to enter the Image Save Settings page and configure save-related settings.
: View color image
: View depth image
: View left grayscale image
: View right grayscale image
: View point cloud