Configure Standard Interface Communication
Attention
This section describes how to configure standard interface communication between RVS 2.0 and external devices (such as robots, PLCs, or host computers). For Adapter communication, refer to the Adapter Generator.
Configuration Steps
To configure communication on the vision system side and start communication, follow these steps:
Open the Robot Communication Config interface: Click the “Robot Communication Configuration” button in the main interface toolbar, or select the menu “Robot and Communication” > “Robot Communication Configuration”.
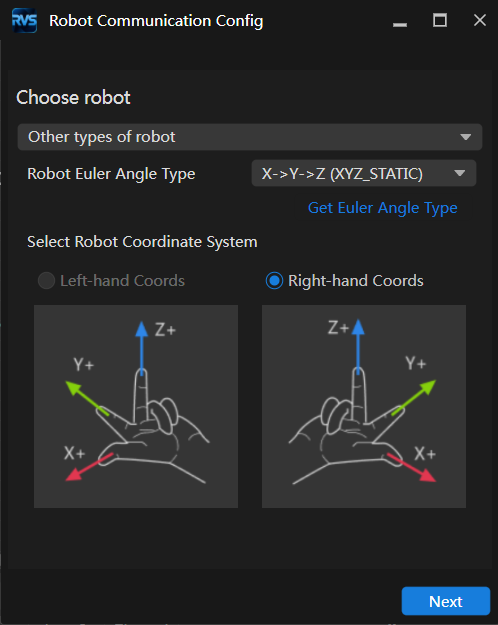
Complete the basic robot settings.
a. Select the robot brand.
Attention
The current software version does not yet support brand-specific robot configurations, so you do not need to select a robot model.
b. Select a robot Euler angle type: STATIC (fixed-axis rotation) or ROTATED (variable-axis rotation). If unsure, click “Get Euler Angle Type” and follow the interface prompts.

c. Select the robot coordinate system.
Attention
Currently, only robots using right-hand coordinate system are supported.
Click “Next”.
Configure communication protocol:
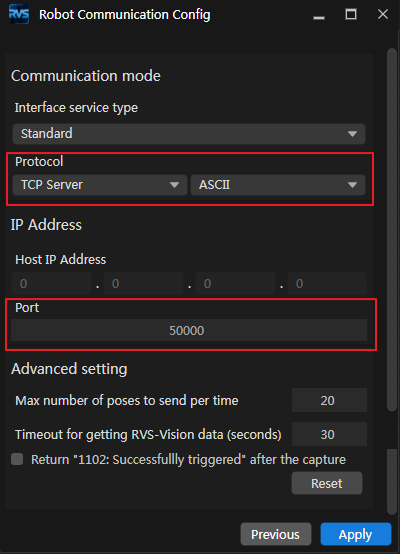
TCP Server: Select protocol, set encoding method (ASCII/HEX (big-endian)/HEX (little-endian)) and port number.
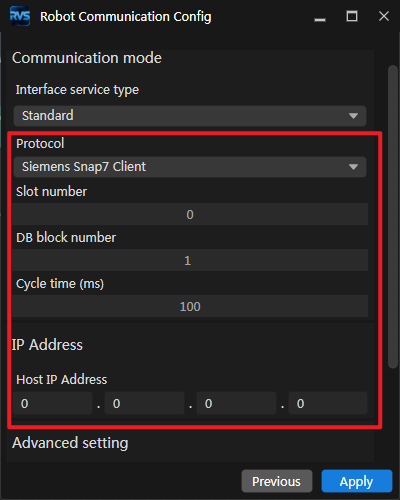
Siemens Snap7 Client: Select protocol, set slot number, DB block number, and enter PLC IP address.
Optional: Configure advanced settings.
Max number of poses to send per time: Upper limit on the number of vision points returned by the 102 command (default: 20, maximum: 30). Setting this value too high increases latency.
Timeout for getting RVS-Vision data (seconds): Maximum time that the 102 command waits for vision points (default: 10 seconds). If the timeout is exceeded, an error code is returned.
Return “1102: Successfully triggered” after the capture:
Unchecked: Return 1102 immediately after the 101 command is received, then capture and process the image.
Checked: Return 1102 only after image capture is complete.
Click “Apply”.
After successful connection, the “Robot Communication Configuration” button in the toolbar shows the enabled status.
